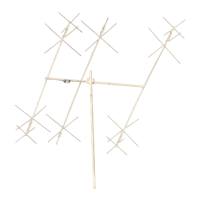
8
#6-ASSEMBLYOF6AND
10METERSSTUBS
SA R8SA R8StubSA 3/8"x52" 1
(1x132cm)
SB R8SB R8StubSB 1/4"x6" 2
(0.6x15cm)
SC R8SC R8StubSC 3/8"x48" 1
(1x121.9cm)
SD R8SD R8StubSD 3/8"x48" 1
(1x121.9cm)
SE R8SE R8StubSE 1/4"x12" 1
(.6x30.5cm)
105 055105 BlackPlasticCap 1/4" 2
(.6cm)
407 030407 SSWormClamp 7/32"-5/8" 4
(.6x1.6cm)
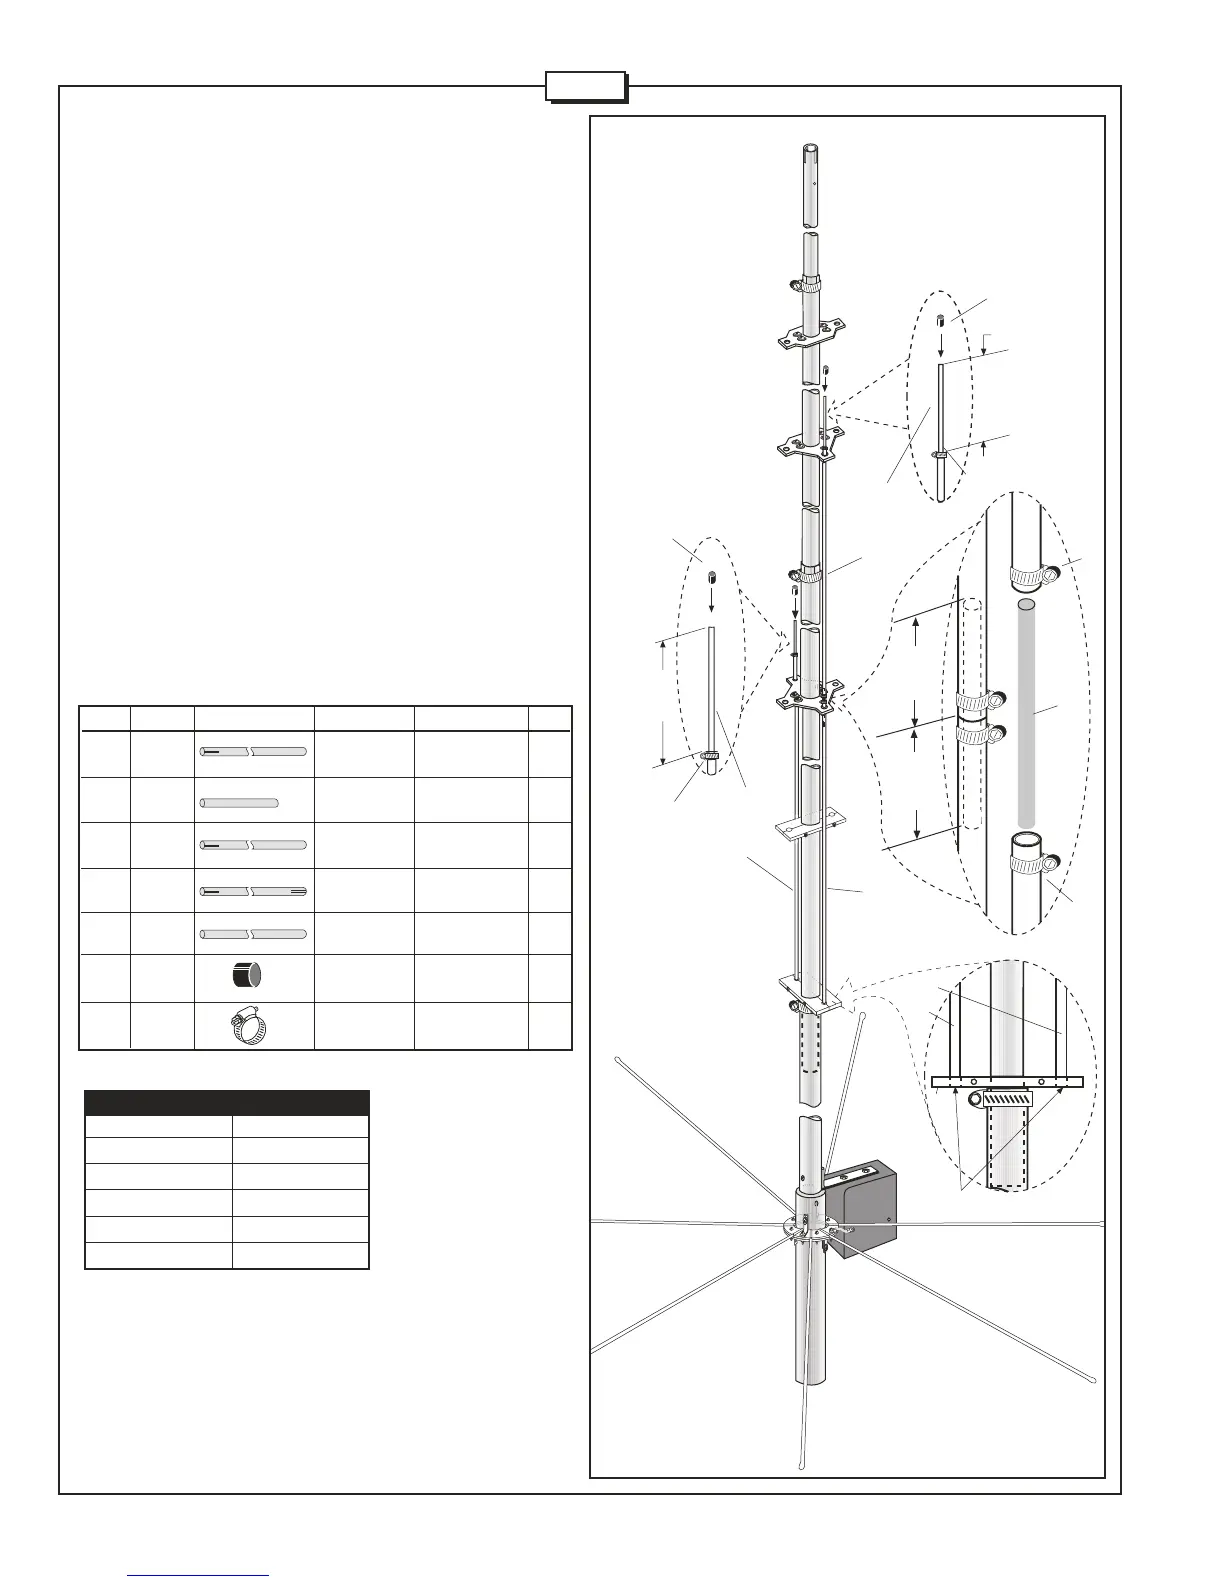
FIGUREI
Frequency(MHz) Length
50.250 4-1/2"(11.4cm)
50.800 3-1/2"(8.9cm)
51.500 2-1/2"(6.4cm)
52.500 1-1/2"(13.8cm)
53.500 1/2"(1.3cm)
6Meter TuneChart
KEY P/NDISPLAY DESCSIZEQTY
Takethe(SA)tubeandslideitthroughthe4-holeinsulatorandsecure
itinthebottomaluminumstubclampasshowninFig."I".Makesure
thattheslottedendof(SA)tubeprotrudesbeyondthe4-holeinsulator
andtheoppositeendof(SA)tubeismountedflushwiththebottom
ofthestubclamp(seecalloutatbottomofFigI).Insamefashion
slidethetube(SC)andsecureitonothersideofbottomaluminum
stubclamp. Alignthebottomstubclampwithplasticinsulatorsand
secureittight.Slidethe6"rod(SB)intotube(SA)andsecurewith
wormclamp(407).Use6Metertuningcharttoadjustthestub(SB)
forselectedportionoftheband.Placetheprotectiveplasticcapon
top of (SB) tuning rod to complete the 6 Meter stub.
Takeanother6"rod(SB)andslideit3"intotube(SC)andsecure
withwormclamp(407)asshownincalloutofFig."I".Slidethetube
(SD)through3-holeplasticinsulatorandassemblewithwormclamp
(407)overotherendofrod(SB).Insertrod(SE)intotube(SD)as
shown,andcompletethe10Meterstubbyplacingtheprotective
plasticcapontop.
3” (7.6cm)
INSERT
3” (7.6cm)
INSERT
10” (25.4cm)
EXPOSED
SEE6METER
TUNECHART
105
SE
407
407
407
105
SB
SB
407
SD
SC
SA
SC
SA
99
Stubssitflushwithbottomof
stubclamp,ontopofBA.
NOTE:
BB
BA
R9