6. Verify the model, voltage and color.
A. Verify that you have the correct model by looking at the console and reading the
model name.
B. Verify that you have the correct voltage by looking at the lower board and reading the
voltage sticker.
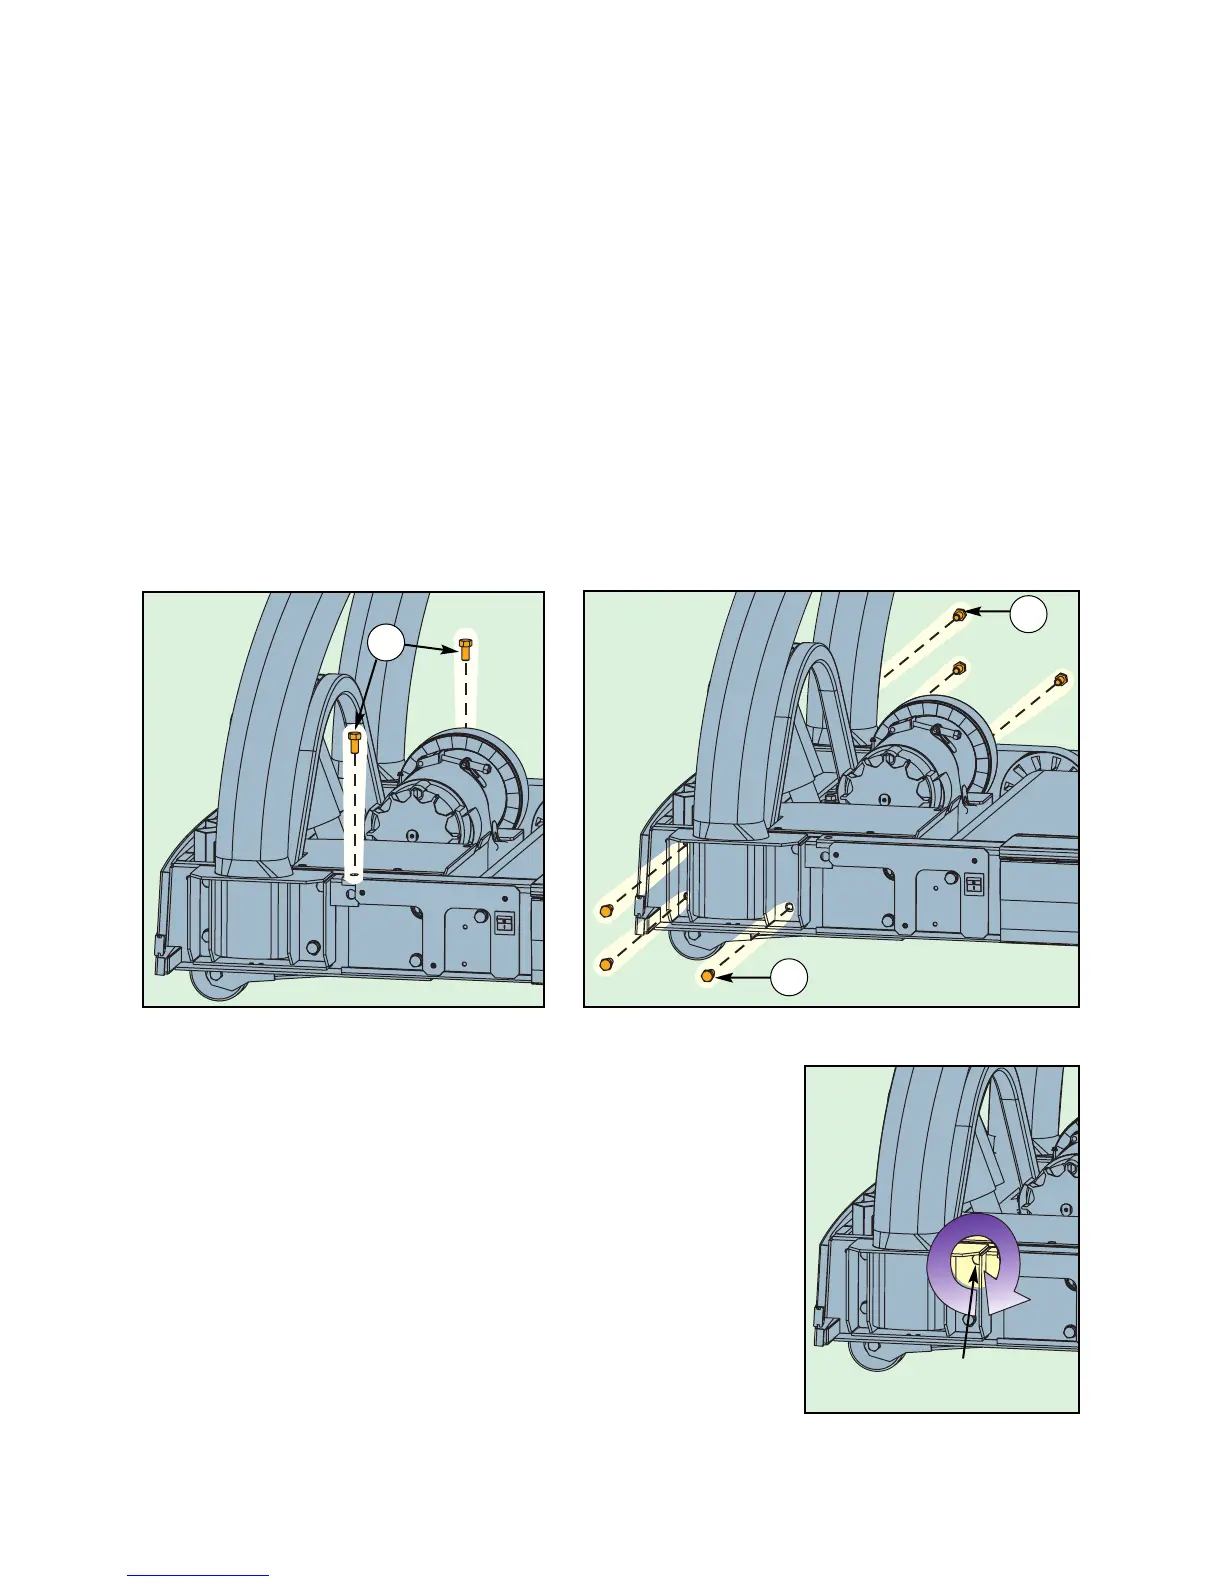
7. Secure the uprights.
A. Using a 9/16” socket wrench, loosely attach the uprights with two of the 3-8-16 x 5-8
hex head whiz-lock screws. NOTE: Do not securely tighten the screws until step 7C.
See Figure 4.
B. Using a 9/16” socket wrench with a 4” extension, attach the uprights with six of the 3-8-
16 x 5-8 hex head whiz-lock screws. NOTE: Do not securely tighten the screws until
step 7C. See Figure 5.
C. Tighten all 9/16” screws used during steps 7A and 7B
including the two pivot screws (one on each side). See
Figure 6.
8. Secure the handrail.
A. Using the hex key provided, secure the handrail with two
5-16-18 x 7-8 screws. See Figure 7. NOTE: You may
need to lift the console slightly to line up the holes.
Cybex Pro Treadmill Owner’s & Service Manual
Page 5-6
Figure 4
Figure 6
Figure 5
Pivot Screws
(1 on Each Side)
2
2
2