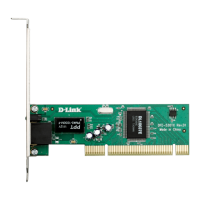
9 D-Link DFE-530TX+ Quick Install Guide
Configure your Adapter
IfyouarenotusingaDHCPcapablegateway/router,oryouneedto
assignastaticIPaddress,pleasefollowthestepsbelow.
Step 1:
Windows
®
2000: Click on Start > Settings > Control Panel >
Network Connections
WindowsXP:ClickonStart>Control Panel > Network Connections
Windows
Vista
®
: Click on Start > Control Panel > Network and
Internet > Network and Sharing Center > Manage network
connections
Windows
®
7
:ClickonStart > Control Panel > Network and Internet
> Network and Sharing Center > Change Adapter Settings
Step 2:
Right-clickontheLocal Area Connection,whichrepresentsyour
D-Linknetworkadapter,andselectProperties.
Step 3:
HighlightInternet Protocol (TCP/IP)andclickProperties.
Step 4:
ClickUse the following IP addressandenteranIPaddressthat
isonthesamesubnetasyournetworkortheLANIPaddresson
yourrouter.
Example:Iftherouter’sLANIPaddressis192.168.0.1,makeyour
IP address 192.168.0.X where X is a number between 2 and 99.
Makesurethatthenumberyouchooseisnotinuseonthenetwork.
SetDefaultGatewaythesameastheLANIPaddressofyourrouter
(192.168.0.1).
SetPrimaryDNSthesameastheLANIPaddressofyourrouter
(192.168.0.1).TheSecondaryDNSisnotneededoryoumayenter
aDNSserverfromyourISP.