3 | Components
Service manual
160
EBLA09~16DA + EDLA09~16DA
Daikin Altherma 3 M
ESIE20-06A – 2021.03
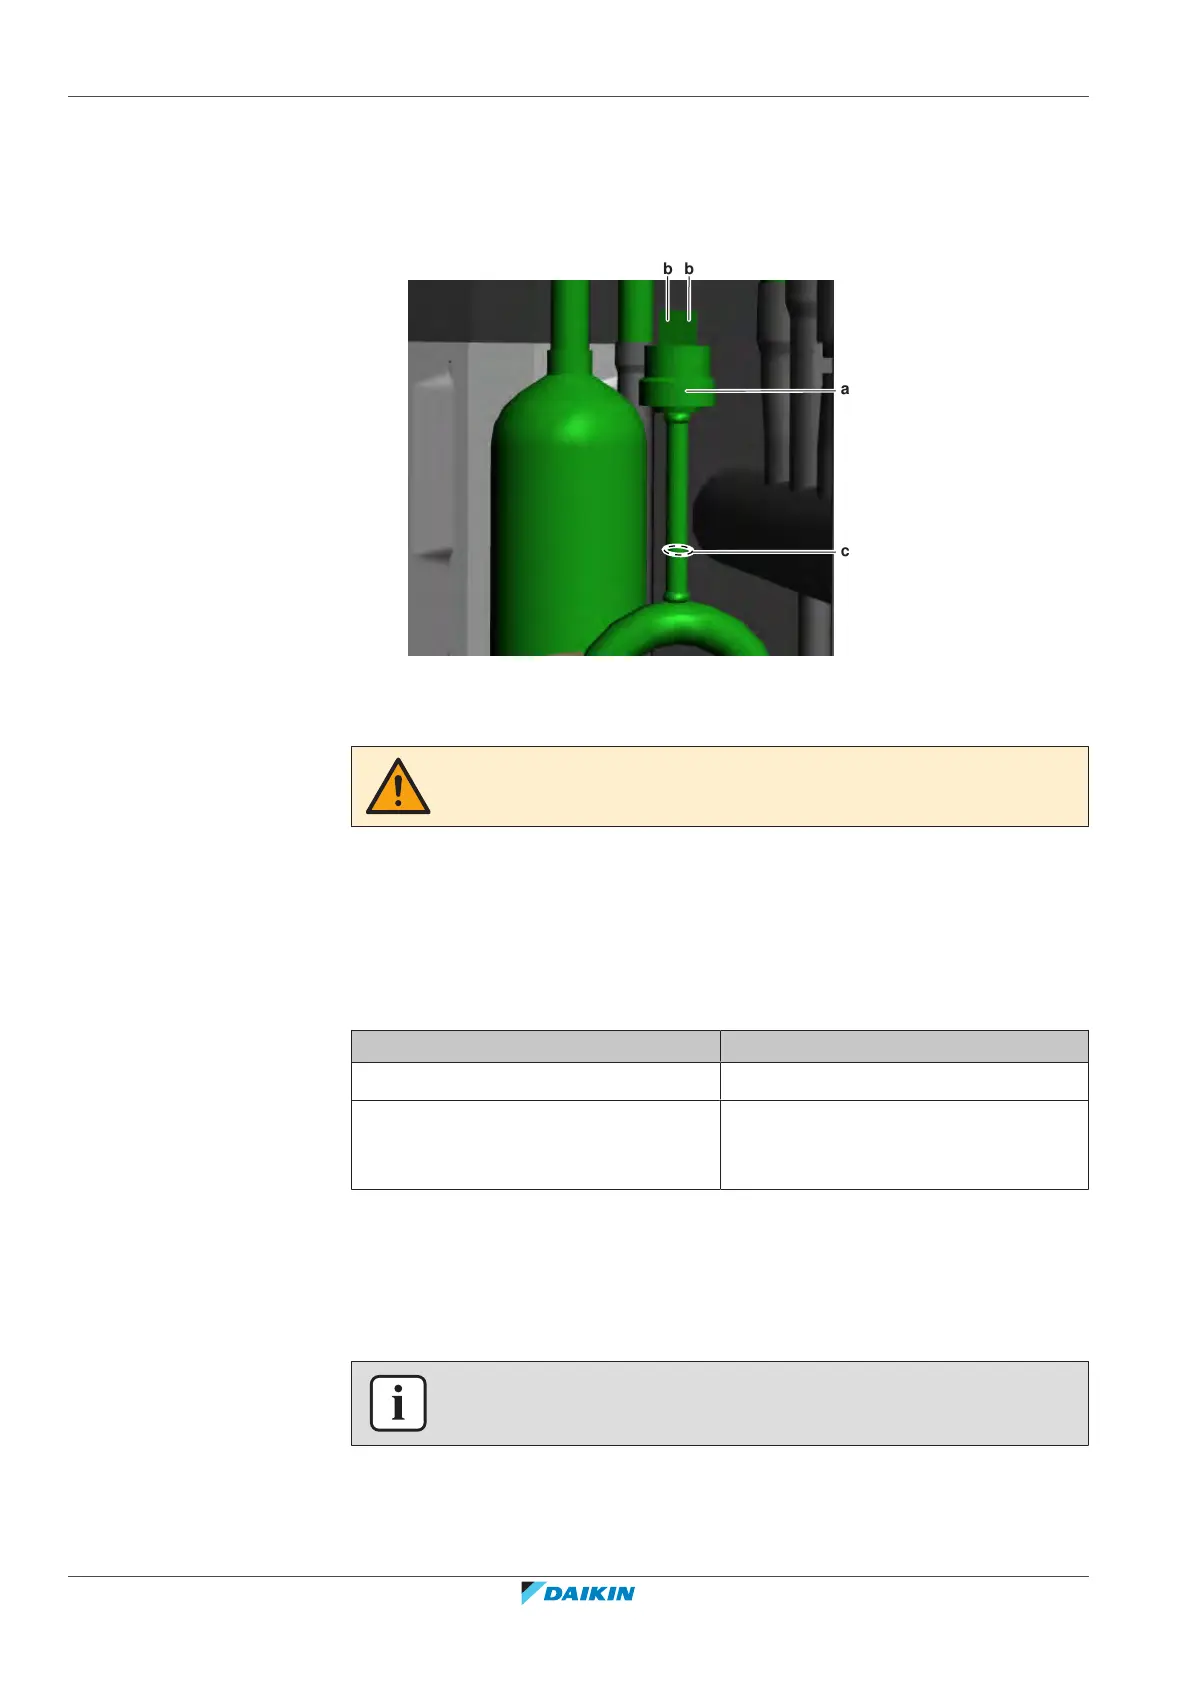
3 Supply nitrogen to the refrigerant circuit. The nitrogen pressure MUST NOT
exceed 0.02MPa.
4 Wrap a wet rag around the high pressure switch and any other components
near the high pressure switch and solder the high pressure switch pipe to the
refrigerant pipe.
a High pressure switch
b Faston connector
c High pressure switch pipe
CAUTION
Overheating the pressure switch will damage or destroy it.
5 After soldering is done, stop the nitrogen supply after the component has
cooled‑down.
6 Connect the Faston connectors to the high pressure switch.
7 Perform a pressure test, see "4.2.1Checking procedures"[4286].
8 Add refrigerant to the refrigerant circuit, see "4.2.2 Repair
procedures"[4291].
Is the problem solved? Action
Yes No further actions required.
No Return to the troubleshooting of the
specific error and continue with the
next procedure.
3.12 Hydro PCB
3.12.1 Checking procedures
INFORMATION
It is recommended to perform the checks in the listed order.
To perform a power check of the hydro PCB
Prerequisite: Stop the unit operation via the user interface.
Prerequisite: Turn OFF the respective circuit breaker.
 Loading...


