3 | Components
Service manual
249
EBLA09~16DA + EDLA09~16DA
Daikin Altherma 3 M
ESIE20-06A – 2021.03
1 Locate the thermistor and remove the insulation if needed. Check that the
thermistor is correctly installed and that there is thermal contact between the
thermistor and the piping or ambient (for air thermistor).
Is the thermistor correctly installed
(thermal contact between the
thermistor and the piping)?
Action
Yes Perform an electrical check of the
specific thermistor, see "Checking
procedures"[4248].
No Correctly install the thermistor, see
"Repair procedures"[4251].
To perform an electrical check of the specific thermistor
1 First perform a mechanical check of the thermistor, see "Checking
procedures"[4248].
2 Locate the thermistor.
INFORMATION
Remove the thermistor from its holder if not reachable with a contact thermometer.
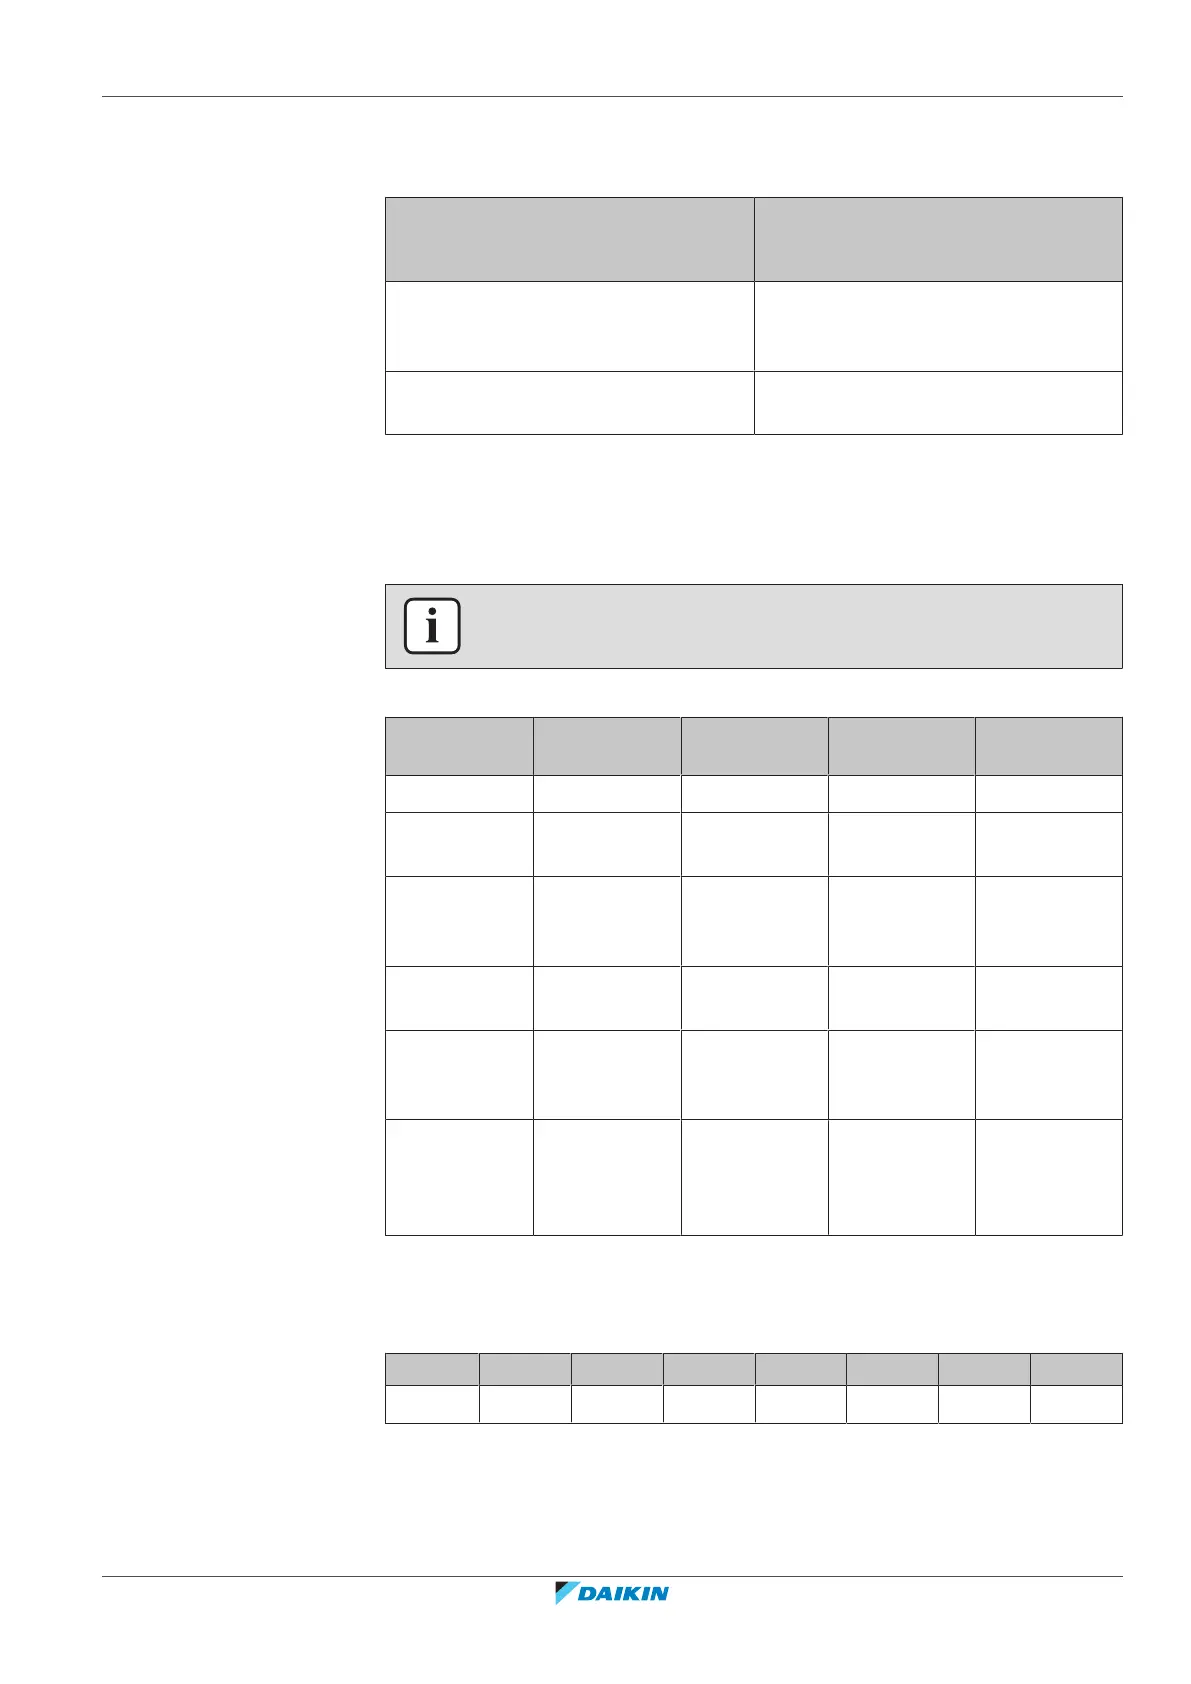
3 Measure the temperature using a contact thermometer.
Name Symbol Location (PCB) Connector
(pins)
Reference
(table)
Air thermistor R1T Main X11A: 1‑3 A
Discharge pipe
thermistor
R2T Main X12A: 1‑2 B
Refrigerant
liquid
thermistor
R3T Hydro X7A: 1‑2 A
Suction
thermistor
R3T Main X12A: 3‑4 A
Heat
exchanger
thermistor
R4T Main X12A: 5‑6 A
Heat
exchanger
(middle)
thermistor
R5T Main X12A: 7‑8 A
4 Determine the thermistor resistance that matches the measured
temperature.
Thermistor – Table A
T °C kΩ T °C kΩ T °C kΩ T °C kΩ
–20 197.81 10 39.96 40 10.63 70 3.44
 Loading...


