FTX-N/U, FVXS-N, FDMQ-R Series EDUS091558E
385
1P398933-1C
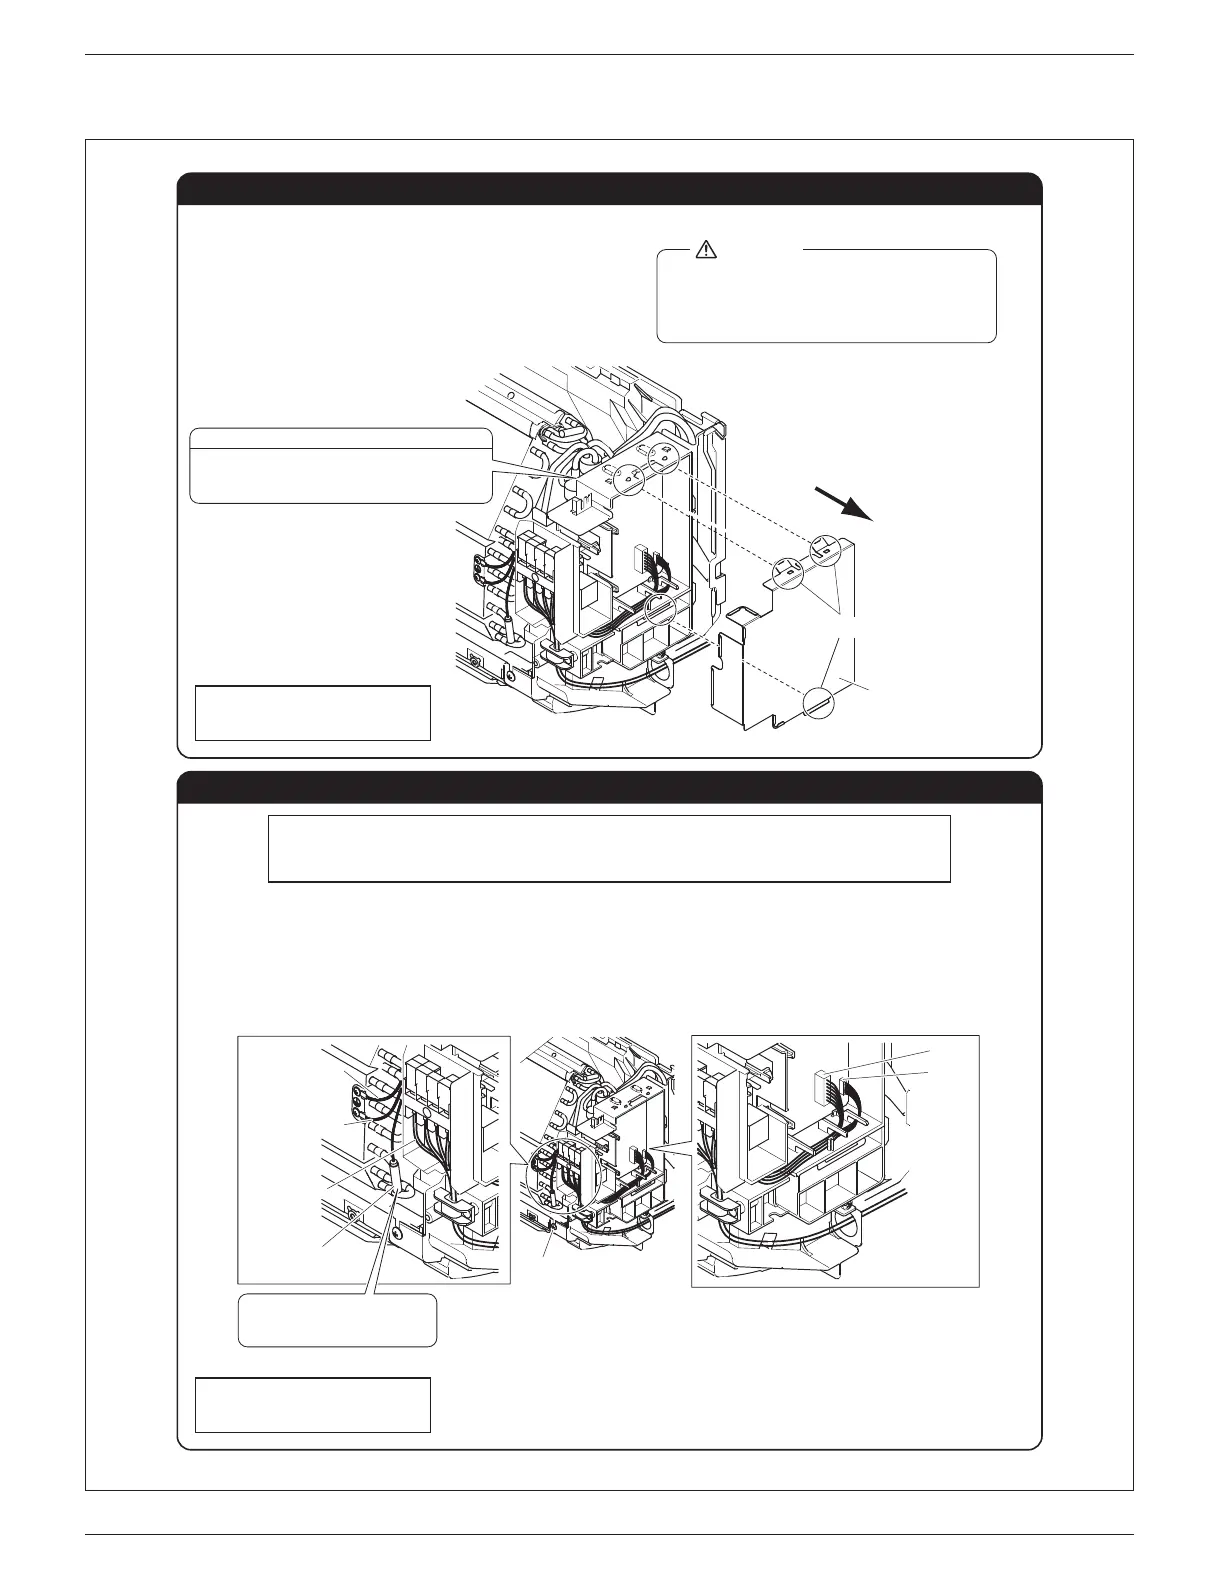
1. Remove the front panel and the front grille and service lid of
indoor unit.
(Refer to the front page for the removal of each part in detail.)
2. Remove the electrical wiring box cover.
If there is workspace on the right-hand side of the indoor unit, the installation work can be
conducted without removing the electrical wiring box.
Connect HA without removing the electrical wiring box, if possible.
Removal of Electrical Wiring Box Cover
Removal of Electrical Wiring Box
1. Disconnect the inter-unit wire.
2. Disconnect the fan motor connector (S200) and swing motor connector (S6).
3. Disconnect the thermistor and ground/earth wire from the heat exchanger (2 screws).
(Some models may not have ground/earth wire.)
4. Remove the mounting screw of the electrical wiring box (1 screw).
Mounting screw of
electrical wiring box
*The position of the ground/earth wire
may differ depending on the model
Make sure that the mounting
bracket of the thermistor will not
fall off.
Thermistor
Inter-unit wire
Ground/Earth wire*
(Green/Yellow)
Ground/Earth wire*
(Green)
S200
S6
WARNING
r $GUWTGVQVWTP1((VJGRQYGTCVVJGVKOGQH
installation work.
Touching any electric parts with the power
turned ON may cause electric shock.
Electrical wiring box cover
Disengage the hooks.
Electrical wiring box
If there is workspace on the right-hand side of the
indoor unit, the installation work can be conducted
without removing the electrical wiring box.
After connecting the HA PCB (this set),
return all removed parts to their original
positions.
After connecting the HA PCB (this set),
return all removed parts to their original
positions.



 To Next Page