NOTICE
This product may generate DC current exceeding 6 mA,
into the external grounded PE wire. Where a residual
current-operated protective (RCD) or monitoring (RCM)
device is used for protection in case of direct or indirect
contact, only an RCD or RCM of Type B is allowed on the
supply side of this product. When applying an RCD it
must have a 300 mA sensitivity to avoid tripping. IT
systems are not supported.
NOTICE
For fuse and RCD information, refer to 5 Technical Data.
2.7 RS-485 or Ethernet Connections
Before connecting RS-485 or Ethernet cables, refer to
requirements in 5.9 RS-485 and Ethernet Connections.
Procedure:
1. Do not remove the RJ-45 connector.
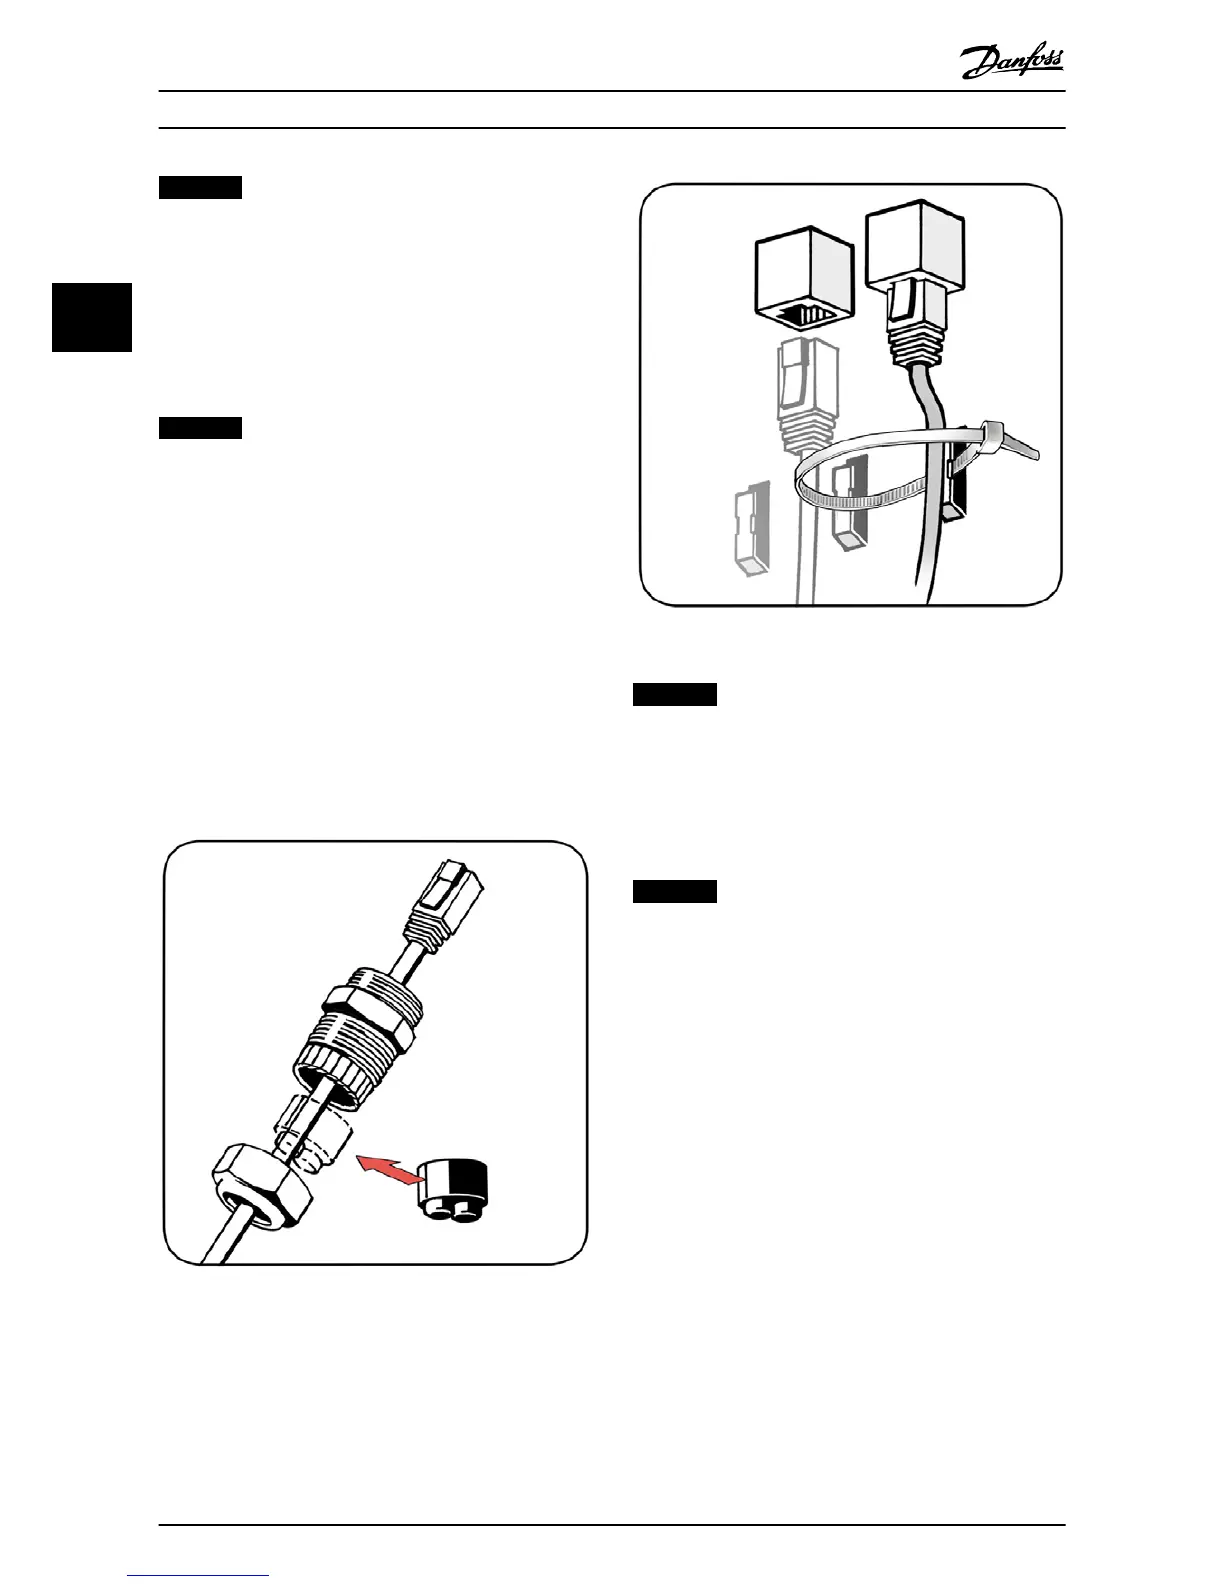
2. Guide the cables through the base of the inverter
via cable glands. See Illustration 2.18.
3. Plug into the RS-485 or Ethernet connector.
4. Fasten cables with cable ties to ensure a durable
connection over time. See Illustration 2.19.
Illustration 2.18 Guide Through Cable Glands
Illustration 2.19 Fasten with Cable Ties
NOTICE
Tighten all screws and glands thoroughly.
2.8 Options
To install options, refer to the respective option installation
guide.
NOTICE
Tighten all screws and glands thoroughly.
2.9 Closure
1. Close the cover of the inverter installation area.
Fasten the 2 front screws.
2. Turn on AC power.
Installation
12 L00410568-02_02 / Rev. date: 2013-12-10
2