MATRIX 300™ QUICK GUIDE
2. Place the Grade A Barcode Test Chart in front of the reader at the correct reading distance for your application. See “STEP 2 - Mount
and Position the Reader” and the Reading Diagrams in the Appendix of this Quick Reference Guide or in the Reference Manual.
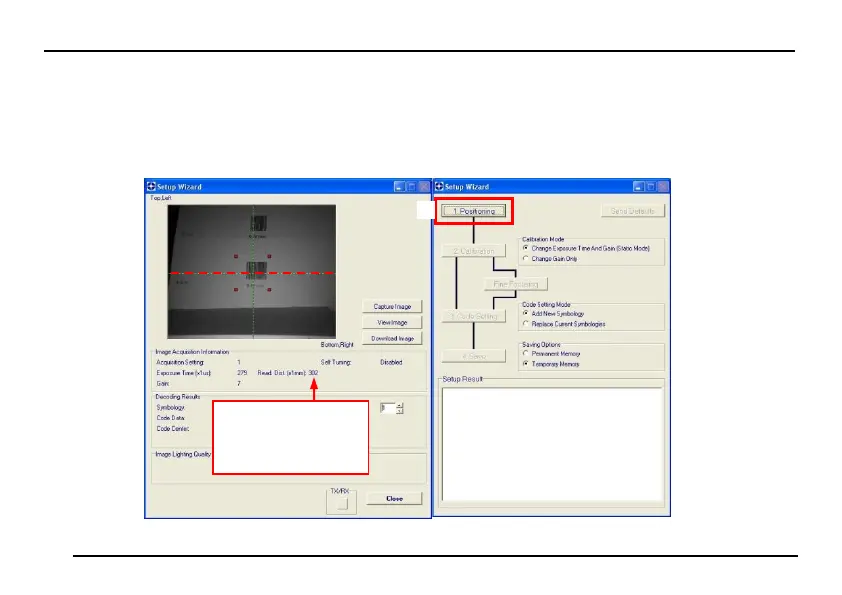
3. Press the "Positioning" button. The reader continuously acquires images and gives visual feedback in the view image window. The
Setup Wizard now shows four delimiters (red points) in the acquired images which indicate the region in which the calibration algorithm
is active. Choose one of the larger codes and move either the reader or code to center it. The code must be aligned across the X-axis
reference line at the center of the FOV. See figure below. Press the Positioning button again to stop positioning.
The Read. Dist. value is not
significant until the
Autofocus procedure ends
successfully.
 Loading...