24
2.6.3.Connecting using DavLink 6 via the USB port
In order to connect to the Cortex through the local USB port, via telephone or over a narrowband radio or serial link, DavLink
6 is required. For the USB connection, Davicom’s USB driver is also required. It is included on the installation CD or it can
also be found on our website at www.davicom.com.
Once you have installed the USB driver, please connect your computer to the Cortex’s front-panel USB port and then start
DavLink.
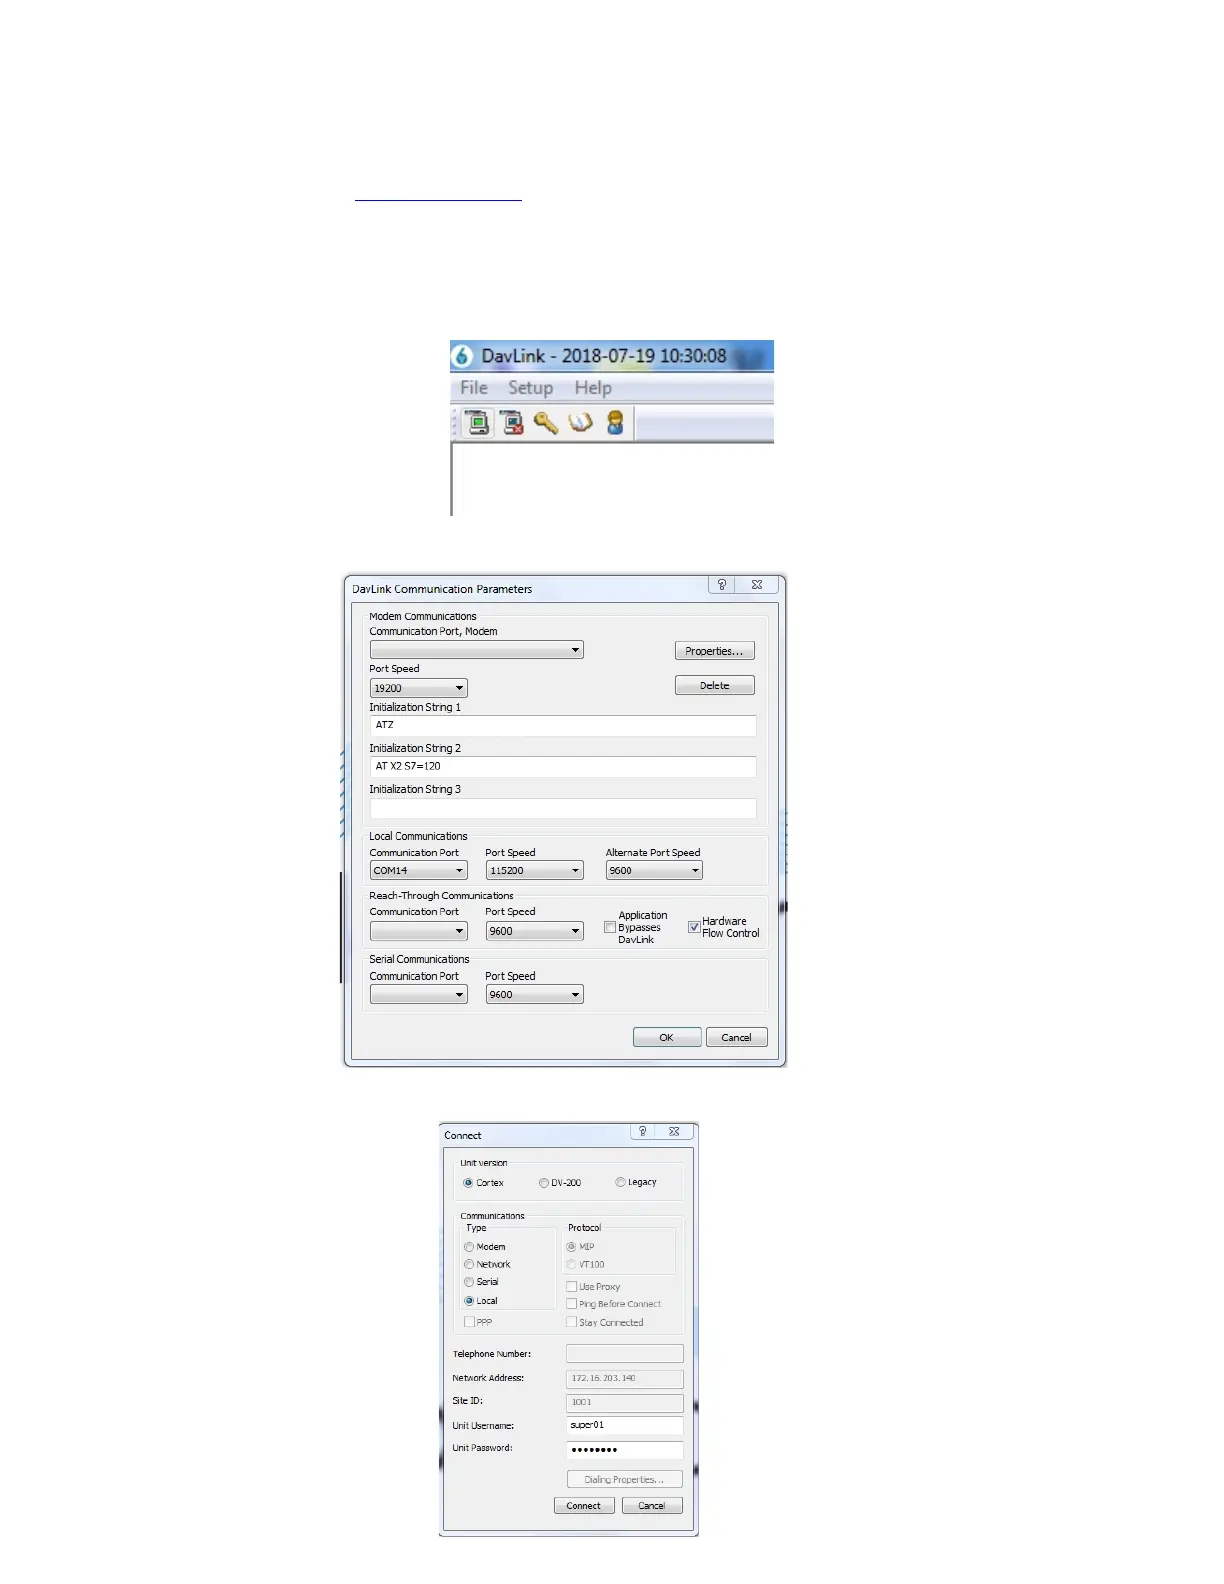
Once started, DavLink will display its main screen. Go to the upper left of this screen to see:
Select Setup-Communications and you will see the following screen, go to the Local Communications section and select
the Communication Port that corresponds to the USB port where you have connected the Cortex (COM14 in this example).
Click OK and then click on the small green computer Icon at the top left of the DavLink main screen. The following window
will open: