25
Select Cortex, Local and then enter the Username and Password (super01 and ssssssss) into the fields.
You should then be connected to the Cortex GUI.
When you are finished, you can logout from the Cortex with the Icon at the top left.
Special note for DavLink:
Contrary to operation through a web browser, in DavLink, workspaces can only be used locally. This means that DavLink
does not download the workspace from the Cortex unit when it connects, but instead loads it internally from the
computer’s memory. DavLink has been configured this way to allow operation over narrow-band data channels like slow
satellite links, narrowband radio channels or RS-232 multi-drop lines.
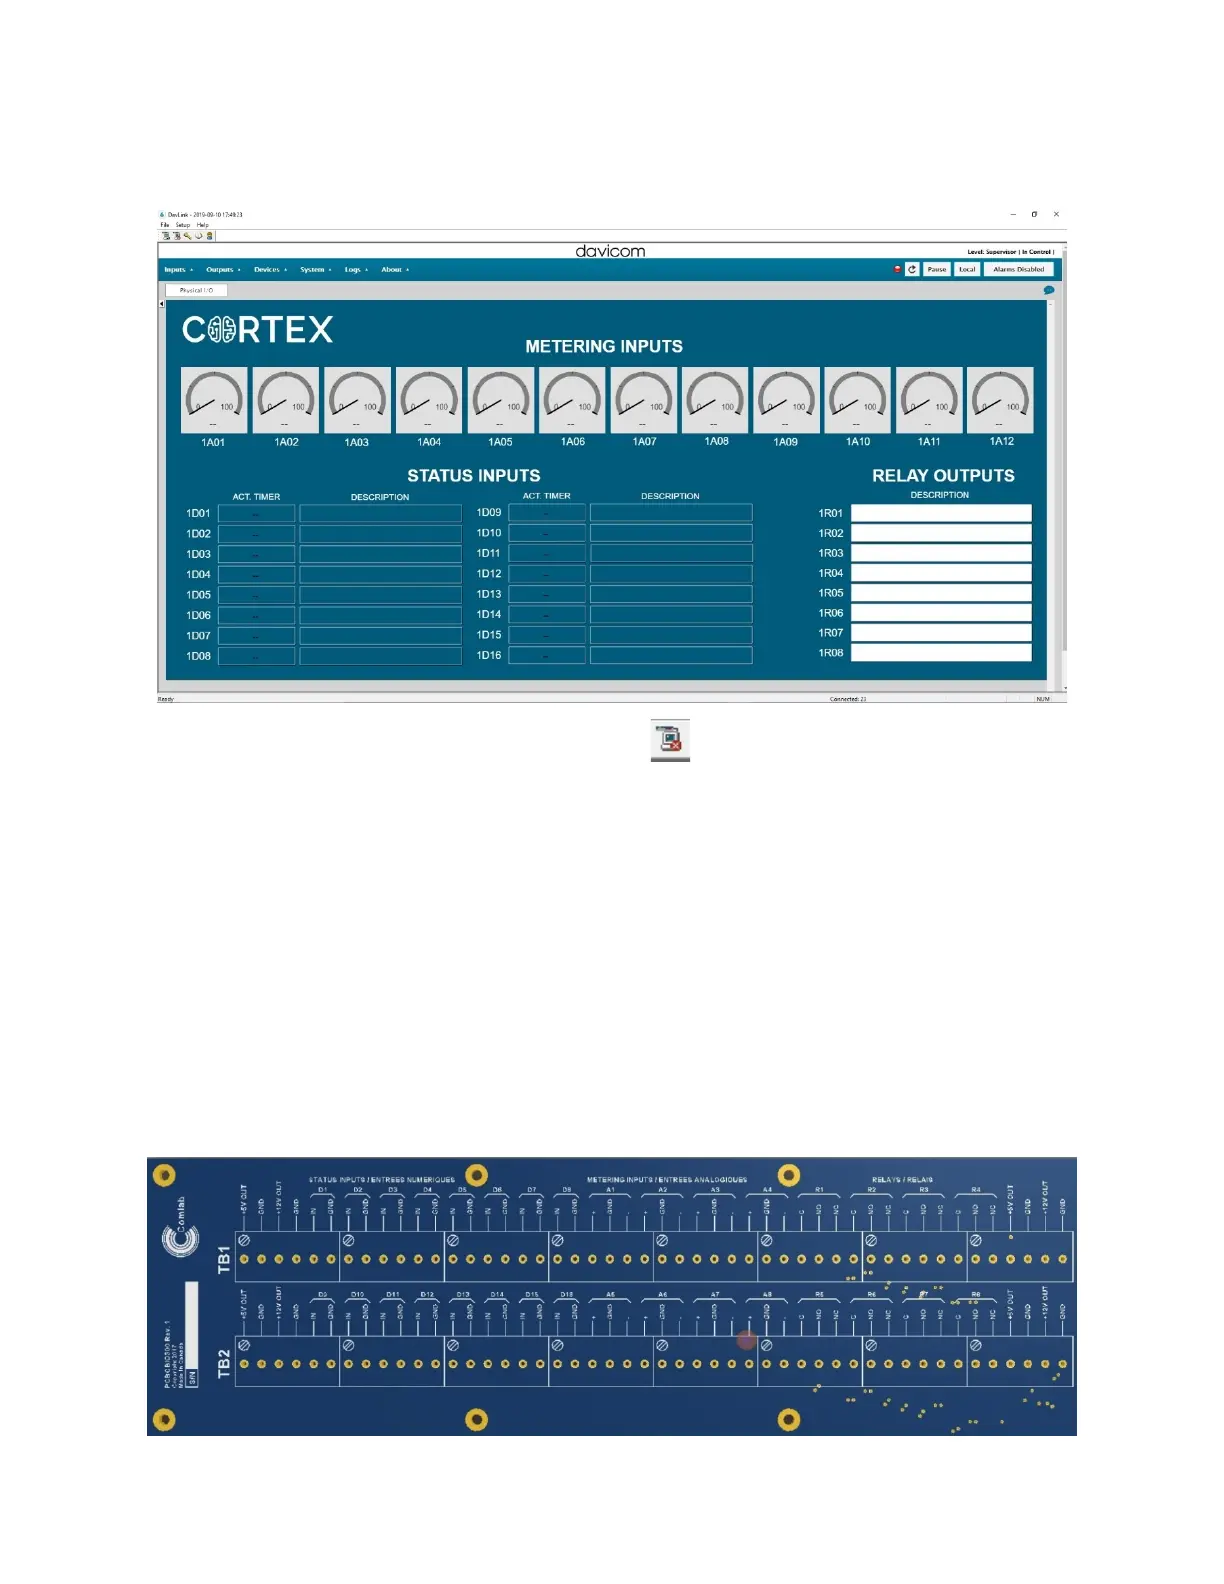
2.7.1 Connecting Physical I/O to the Cortex-360
The most convenient way to connect physical I/O to the Cortex-360 is through Davicom’s MIOP300 screw-terminal I/O
panel.
This rack-mount panel provides complete connection options for the auxiliary DC outputs (+12V and +5V), the differential
metering inputs, the internal or external-ground status inputs as well as the Form-C relay outputs.
The panel’s layout is shown below.