EasyManuals Logo

DayTronic 4000 Series User Manual

DayTronic 4000 Series
72 pages
To Next Page IconTo Next Page
To Previous Page IconTo Previous Page
Page #14 background imageLoading...
Page #14 background image
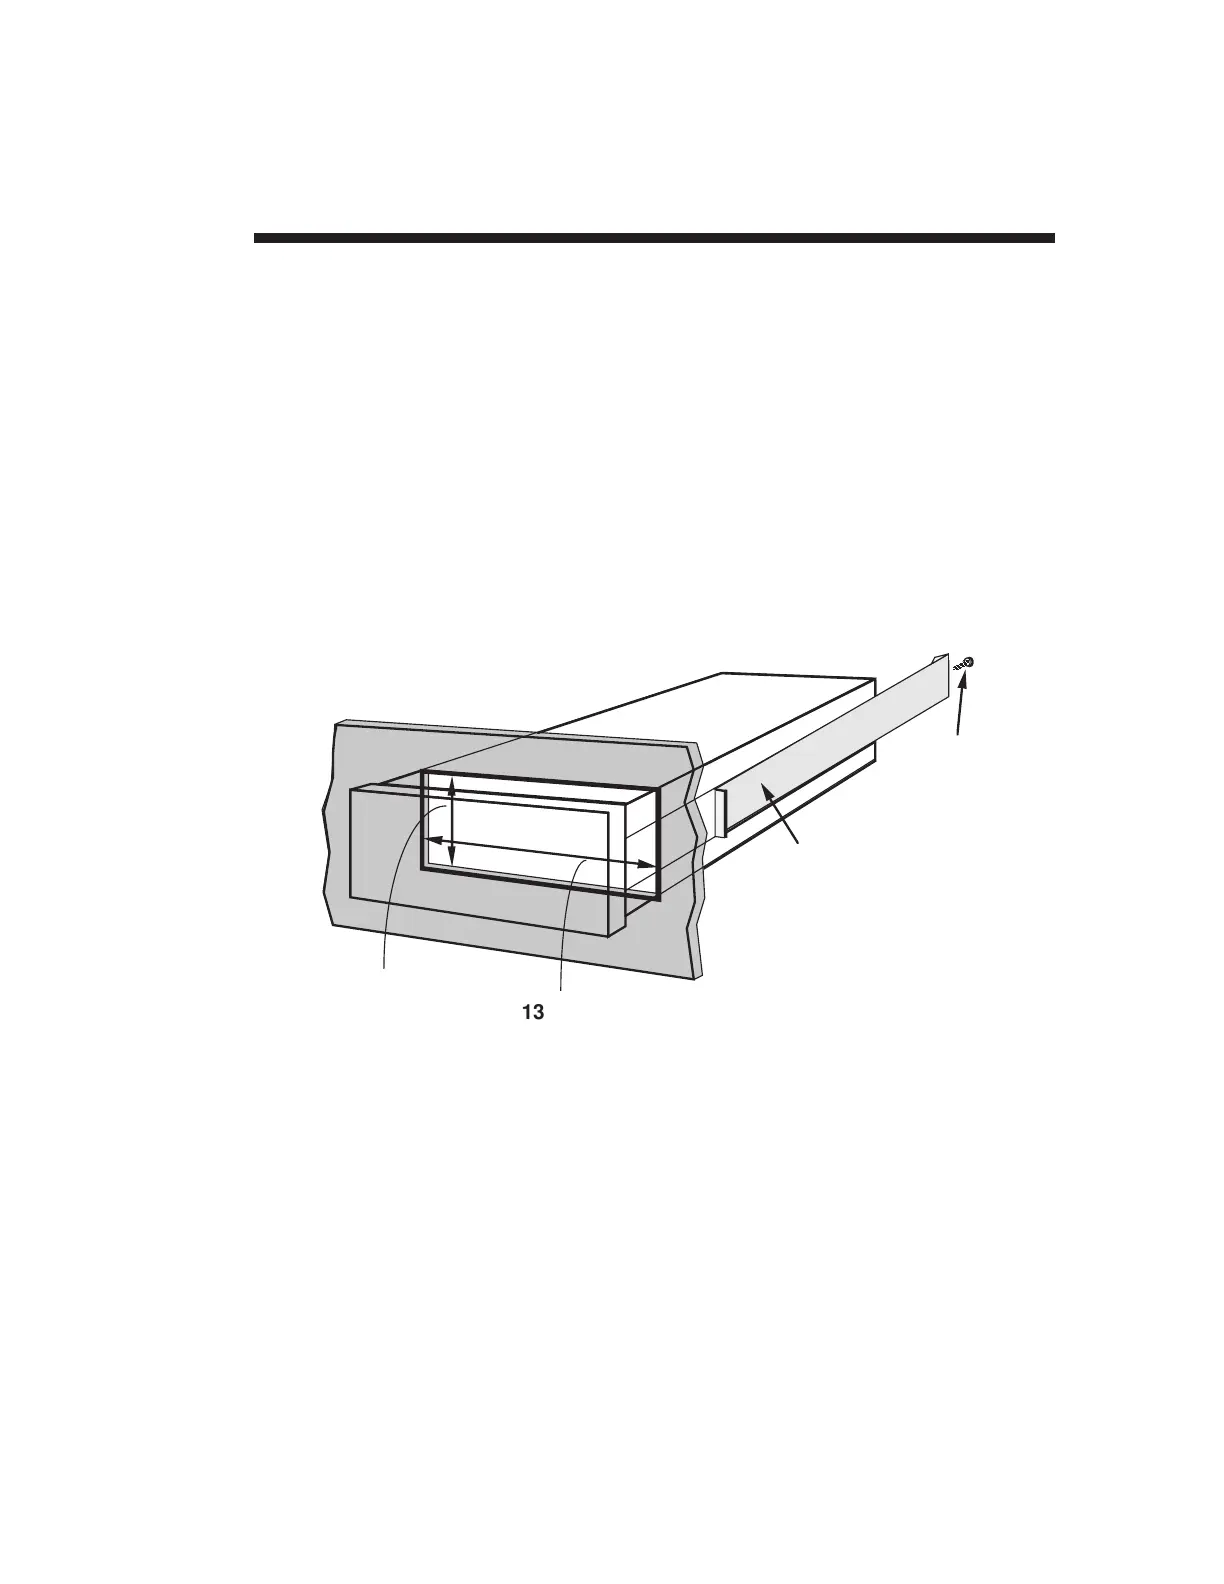
You can easily mount a Model 4077 in your own precut panel. Cutout
dimensions for a
panel-mounted
unit are standard DIN (see Fig. 3);
panel thickness should not exceed 6 mm (0.24 in).
When mounting a 4077,
DO NOT REMOVE THE FRONT BEZEL.
Simply unscrew the two rear-panel CLAMP SCREWS and slide the
CLAMP SLIDES rearwards out of their grooves. Insert the 4077 unit
through the panel cutout,
from the front of the panel
(if the unit has
rubber feet, these will have to be removed). Then reinstall the CLAMP
SLIDES, and tighten the CLAMP SCREWS until the instrument is
securely mounted.
1.9
1.c Panel Mounting
A
A
138 ± 1.0 mm
(5.43 ± 0.04 in)
68 ± 0.7 mm
(2.68 ± 0.03 in)
CLAMP SLIDE
CLAMP
SCREW
Fig. 3
4077 Panel Mounting

Questions and Answers:

Question and Answer IconNeed help?

Do you have a question about the DayTronic 4000 Series and is the answer not in the manual?

DayTronic 4000 Series Specifications

General IconGeneral
BrandDayTronic
Model4000 Series
CategoryMeasuring Instruments
LanguageEnglish

Related product manuals