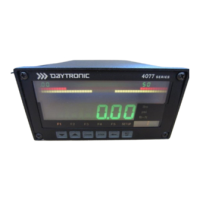
Study this manual section carefully to familiarize yourself with the
general operation of your 4077's front-panel buttons when they are in
"SETUP" mode. Specific setup parameters—such as "HIGH END-
POINT (HEP)", "FILTER (FIL)," "LCD," etc.—are explained in detail in
Section 2.
The 4077 provides
instant visual feedback
for its front-panel buttons.
Thus, pressing any button will light the green ON LINE indicator. This
indicator is located in the lower right-hand corner of the 4077 front
panel (see Fig. 1). It will remain lit as long as the button is pressed.
The 4077's six front-panel buttons greatly simplify the basic setup
procedure. With them you can quickly review in sequence the existing
numeric "configuration parameters"
of any selected channel. At the
same time you can easily reset any displayed parameter to any
allowable value. The LEFT ARROW button lets you select a displayed
digit
or
decimal-point location.
The UP ARROW and DOWN ARROW
buttons let you change as desired the numeric value of the parameter,
its polarity, and/or (if it is a calibration value) its decimal-point location.
The new number goes into effect as soon as you exit "SETUP," and is
automatically stored in battery-backed memory.
1. Entering "Setup" Mode
To enter "SETUP" mode,
PRESS THE BUTTON
WARNING!
DO NOT USE A SHARP OR POINTED OBJECT TO
DEPRESS THE FRONT-PANEL BUTTONS.
SERIOUS INSTRUMENT DAMAGE COULD RESULT.
ALSO, DO NOT SPLASH LIQUID ON THE FRONT
OF THE UNIT. THIS CAN CAUSE THE BUTTON
SWITCHES TO SHORT OUT.
1.f Using the Front-Panel Setup Buttons
1.13

 Loading...