Create a serial console connection
To create a serial console connection, perform the following steps:
1. Use a micro USB to USB type-A cable to establish a connection between the VEP1405 series micro USB console port and the personal
computer.
NOTE: Ensure that you have the driver for the CP210X USB - UART Bridge VCP from Silicon Labs installed. For more
information or to download the necessary driver, see https://www.silabs.com/products/development-tools/
software/usb-to-uart-bridge-vcp-drivers.
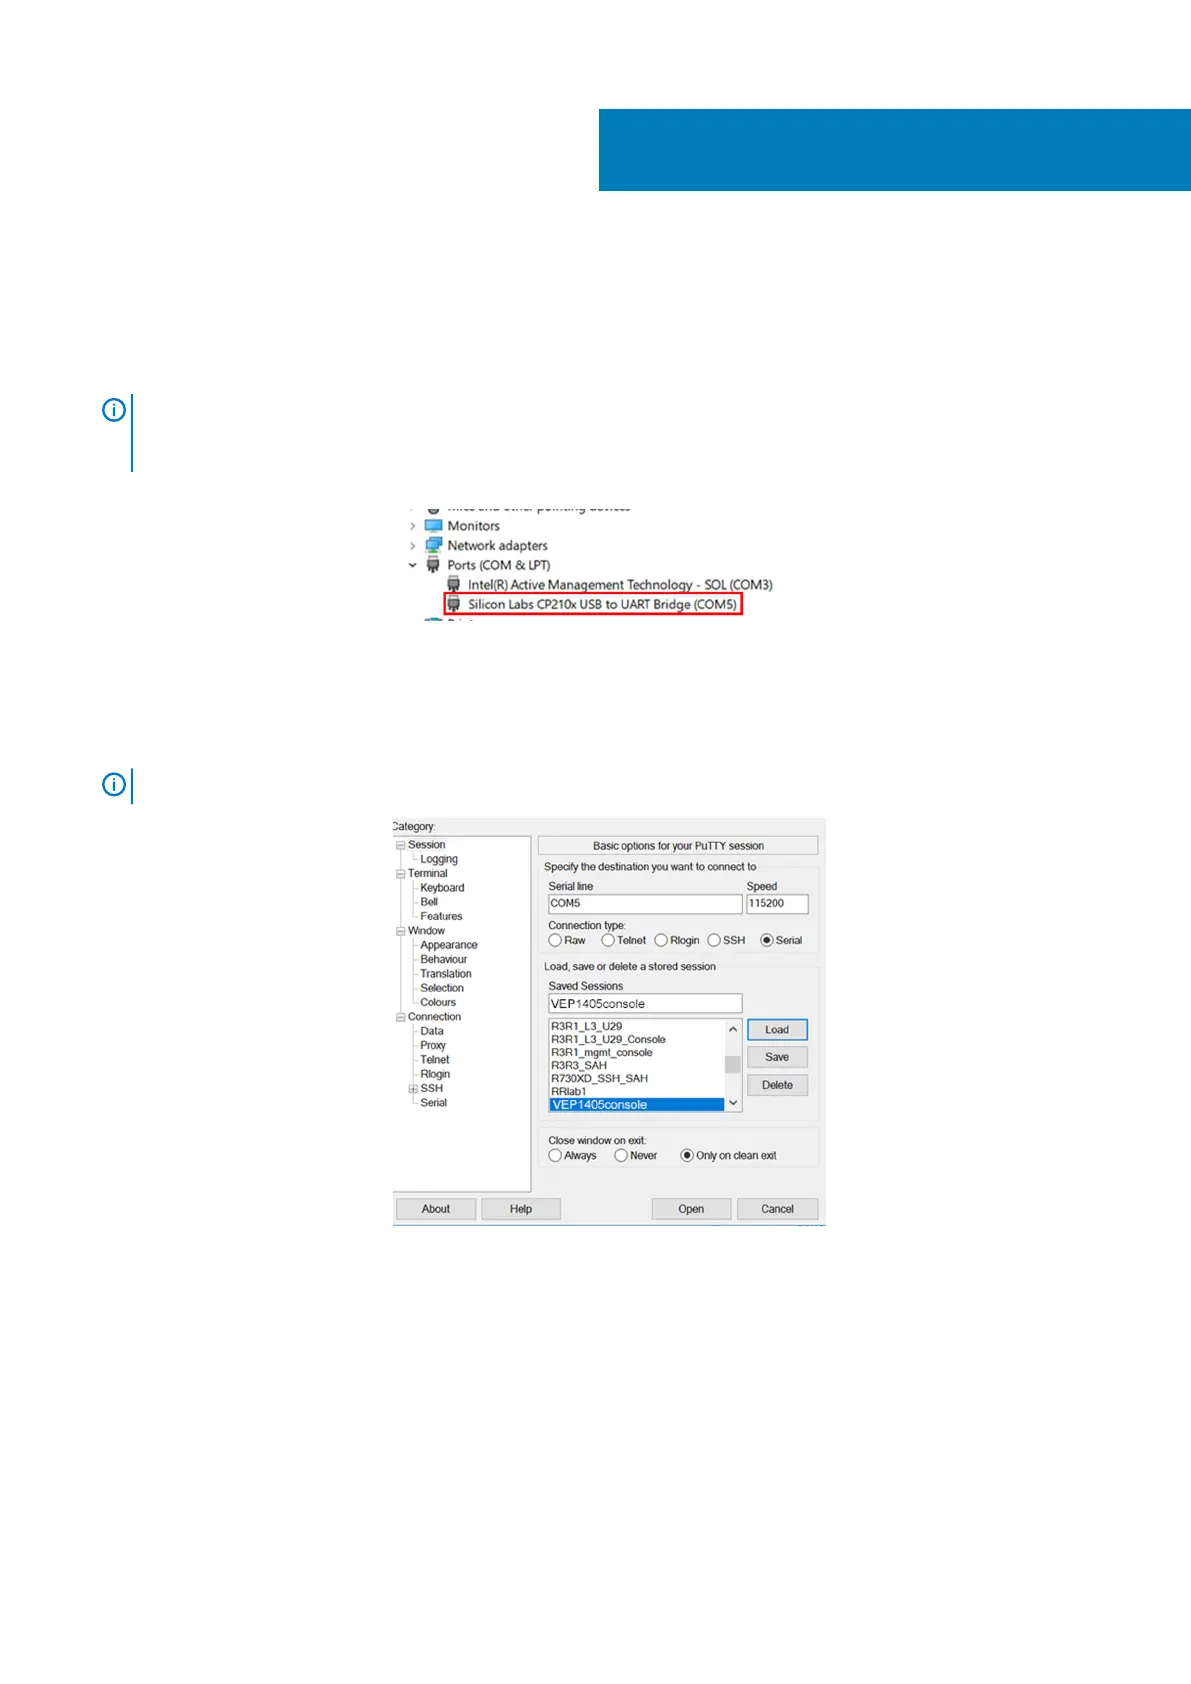
2. Check the CP2102 drive communications port using the Microsoft Windows operating system Device Manager.
Figure 4. Microsoft Windows Device Manager
3. Using a terminal emulator such as PuTTY, locate and configure the serial port that the USB connection represents.
4. In the Serial field, enter the wanted connection name.
5. Enter 115200 as the baud rate, in the Speed field.
6. Select Serial for the Connection type.
NOTE:
To save the selected options for future use, enter a name in the Saved Sessions field then click Save.
Figure 5. PuTTY configuration screen
7. Click Open.
8. Plug the VEP1405 system power cable into a power source.
The unit immediately starts to power up. Watch for the VEP1405 console window. The POST Lower DRAM Memory test screen
displays with a green cursor.
2
8 Create a serial console connection
 Loading...