l
The interconnect IP address is automatically configured with the IPv6 prefix
d:d:d:d:d:/80
l
If there is an IP conflict, set the registry key
config.net.interconnect_ip6prefix.
Procedure
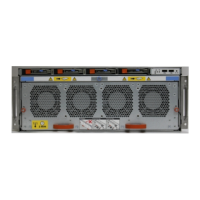
1. Refer to the diagram for the port connections.
Figure 48 DD9500/DD9800 HA interconnect
2. Cable port 0 of the interconnect I/O module in node 0, slot 11 to port 0 of the
interconnect I/O module in node 1, slot 11.
3. Cable port 1 of the interconnect I/O module in node 0, slot 11 to port 1 of the
interconnect I/O module in node 1, slot 11.
4. Cable port 2 of the interconnect I/O module in node 0, slot 11 to port 2 of the
interconnect I/O module in node 1, slot 11.
5. Cable port 3 of the interconnect I/O module in node 0, slot 11 to port 3 of the
interconnect I/O module in node 1, slot 11.
Connect data cables on both nodes
The data cabling for both nodes of the HA pair must be identical.
1. Enable data transfer Ethernet connectivity. Repeat for each connection.
a. If using 1 Gb copper Ethernet, attach a Cat 5e or Cat 6 copper Ethernet cable
to an RJ-45 Ethernet network port (start with ethMa and go up).
Connect Cables and Power on
82 Data Domain DD9500 and DD9800 Systems 6.1 Hardware Overview and Installation Guide