Removing and Installing Parts 91
Adding a Second Hard Drive
CAUTION: Before you begin any of the procedures in this section, follow the safety instructions in the
Product Information Guide.
CAUTION: To guard against electrical shock, always unplug your computer from the electrical outlet before
removing the cover.
NOTICE: To avoid damage to the drive, do not set it on a hard surface. Instead, set the drive on a surface, such as
a foam pad, that will sufficiently cushion it.
1
Check the documentation for the drive to verify that it is configured for your computer.
2
Follow the procedures in "Before You Begin" on page 61.
3
Press in on the blue release tabs on each side of the hard drive bracket and slide it up and out of the
computer.
4
Snap the bracket to the hard drive (see "Installing a Hard Drive" on page 88).
5
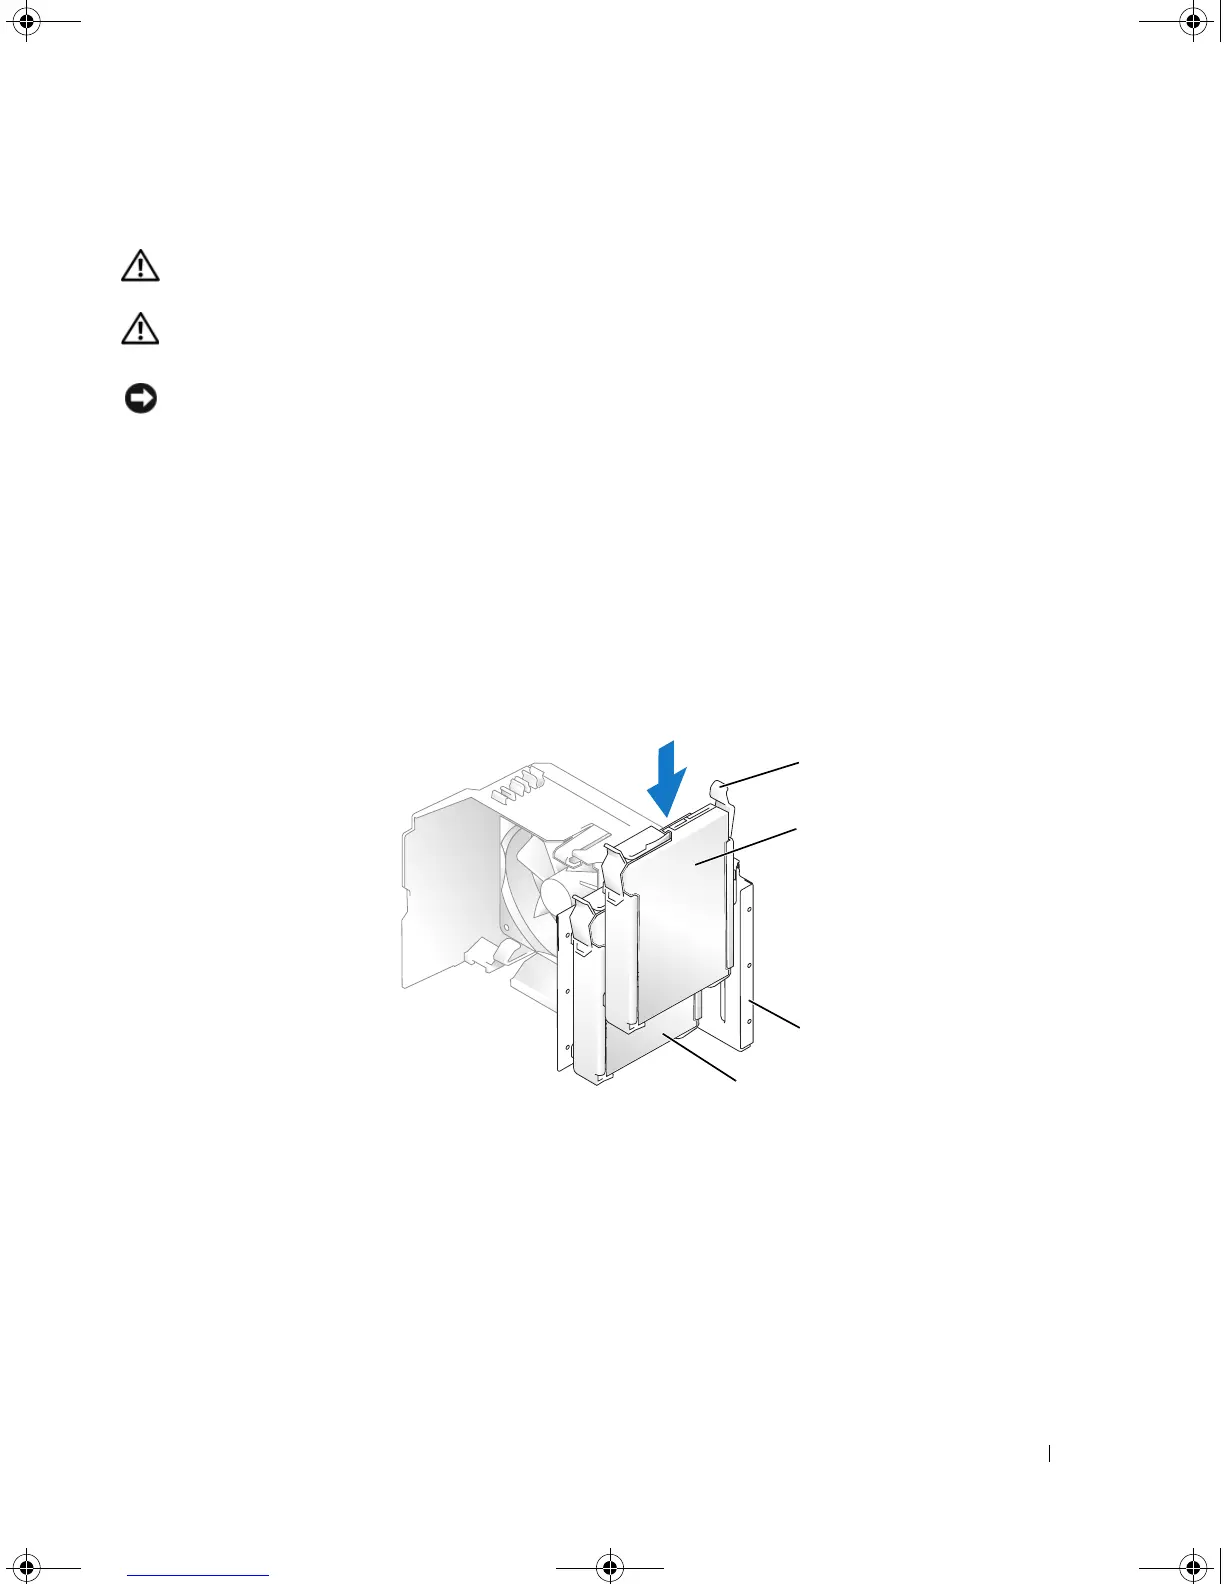
Align the hard drive bracket with the guides in the hard drive bay.
6
Gently slide the new drive (second hard drive) into place until you feel a click or feel the drive securely
installed. Take care not to let the drive free-fall into the drive bay.
7
Connect the power and data cables to the drive (see "Connecting Drive Cables" on page 86).
8
Connect the other end of the data cable to the SATA connector on the system board labeled
SATA0
or
SATA1
(see "System Board Components" on page 65).
9
Check all cables to be certain that they are properly connected and firmly seated.
1 release tabs (2) 2 second hard drive in lower bay 3 hard drive bay
4 primary hard drive in upper bay
1
2
3
4
book.book Page 91 Monday, July 23, 2007 3:47 PM