Do you have a question about the Dell Inspiron One 2330 and is the answer not in the manual?
Steps to safely power down the computer before performing maintenance procedures.
Guidelines for safe handling and operation of the computer to ensure personal safety.
List of necessary tools for performing hardware maintenance tasks.
Diagram and labeling of the computer's internal components.
Detailed illustration of the system board with labeled connectors and jumpers.
Step-by-step procedure for detaching the computer stand from the chassis.
Step-by-step procedure for reattaching the computer stand to the chassis.
Instructions for removing the computer's rear access panel.
Instructions for reattaching the computer's rear access panel.
Procedure for safely removing the B-CAS card from its slot.
Procedure for safely installing the B-CAS card into its slot.
Steps to detach the converter board from the computer's internal structure.
Steps to install the converter board into the computer's internal structure.
Procedure to remove the power button and its associated board.
Procedure to install the power button and its associated board.
Steps to safely remove RAM modules from the memory slots.
Steps to safely install RAM modules into the memory slots.
Procedure to detach the optical disc drive from the computer.
Procedure to install the optical disc drive into the computer.
Steps to detach the VESA mounting bracket from the computer.
Steps to attach the VESA mounting bracket to the computer.
Procedure to safely detach the hard disk drive from the computer.
Procedure to safely install the hard disk drive into the computer.
Steps to remove the protective cover for the system board.
Steps to reinstall the protective cover for the system board.
Procedure to detach the TV tuner card from the system.
Procedure to install the TV tuner card into the system.
Steps to detach the wireless communication module.
Steps to install the wireless communication module.
Instructions to detach the computer's internal speakers.
Instructions to install the computer's internal speakers.
Steps to detach the CPU heat sink assembly from the system board.
Steps to install the CPU heat sink assembly onto the system board.
Steps to detach the fan from the processor heat sink assembly.
Steps to attach the fan to the processor heat sink assembly.
Procedure to safely remove the CPU from its socket.
Procedure to safely install a new CPU into its socket.
Steps to detach the bracket securing the power supply fan.
Steps to install the power supply fan bracket.
Instructions for removing the cover for the input/output ports.
Instructions for reinstalling the cover for the input/output ports.
Steps to remove the protective shield for the I/O board.
Steps to reinstall the protective shield for the I/O board.
Procedure to detach the main power supply unit from the computer.
Procedure to install the main power supply unit into the computer.
Steps to detach the fan cooling the power supply components.
Steps to install the fan cooling the power supply components.
Procedure to detach the TV input port from the chassis.
Procedure to install the TV input port into the chassis.
Steps to detach the infrared sensor port from the chassis.
Steps to install the infrared sensor port into the chassis.
Procedure to detach the main input/output board from the chassis.
Procedure to install the main input/output board into the chassis.
Procedure to safely remove the CMOS battery.
Procedure to safely install the CMOS battery.
Steps to detach the motherboard from the computer chassis.
Steps to install the motherboard into the computer chassis.
Guide to inputting the Service Tag after system board replacement.
Steps to detach the wireless antenna modules from the chassis.
Steps to install the wireless antenna modules onto the chassis.
Procedure to detach the screen assembly from the computer.
Procedure to install the screen assembly onto the computer.
Steps to detach the infrared receiving component from the chassis.
Steps to install the infrared receiving component onto the chassis.
Procedure to detach the webcam assembly from the chassis.
Procedure to install the webcam assembly onto the chassis.
Guide on how to access and understand the BIOS setup interface.
Detailed settings for system info, advanced features, power, security, and boot.
Procedures for modifying the computer's boot order.
Steps to clear forgotten passwords and reset BIOS settings.
Guide to finding and downloading the correct BIOS update from Dell's website.
| Tcase | - °C |
|---|---|
| Bus type | DMI |
| Stepping | P0 |
| FSB Parity | No |
| Processor code | SR163 |
| Processor cache | 3 MB |
| Processor cores | 2 |
| Processor model | G2030 |
| System bus rate | 5 GT/s |
| 64-bit computing | Yes |
| Processor family | Intel Pentium G |
| Processor series | Intel Pentium G2000 Series for Desktop |
| Processor socket | LGA 1155 (Socket H2) |
| Processor codename | Ivy Bridge |
| Number of QPI links | - |
| Processor frequency | 3 GHz |
| Processor cache type | Smart Cache |
| Configurable TDP-down | - W |
| Processor lithography | 22 nm |
| Processor manufacturer | Intel |
| Processor front side bus | - MHz |
| PCI Express slots version | 2.0 |
| Processor operating modes | 64-bit |
| PCI Express configurations | 1x16, 2x8, 1x8+2x4 |
| Thermal Design Power (TDP) | 55 W |
| Memory types supported by processor | DDR3-SDRAM |
| Memory voltage supported by processor | - V |
| Memory channels supported by processor | Dual |
| Memory clock speeds supported by processor | 1333 MHz |
| Memory bandwidth supported by processor (max) | 25.6 GB/s |
| Maximum internal memory supported by processor | 32 GB |
| Discrete graphics card model | AMD Radeon HD 7650A |
| On-board graphics card model | Intel® HD Graphics |
| Discrete graphics card memory | 1 GB |
| Discrete graphics memory type | GDDR3 |
| Maximum on-board graphics card memory | - GB |
| On-board graphics card base frequency | 650 MHz |
| On-board graphics card dynamic frequency (max) | 1050 MHz |
| Number of displays supported (on-board graphics) | 3 |
| Processor ARK ID | 74749 |
| Processor package size | 37.5 x 37.5 mm |
| CPU configuration (max) | 1 |
| Graphics & IMC lithography | - nm |
| Supported instruction sets | SSE4.1, SSE4.2 |
| Thermal solution specification | PCG 2011C |
| Intel Secure Key Technology version | 0.00 |
| Operating altitude | -15.2 - 3048 m |
| Storage temperature (T-T) | -40 - 65 °C |
| Operating temperature (T-T) | 0 - 35 °C |
| Storage relative humidity (H-H) | 10 - 95 % |
| Operating relative humidity (H-H) | 10 - 90 % |
| Cables included | AC |
| Wi-Fi standards | 802.11b, 802.11g, Wi-Fi 4 (802.11n) |
| Bluetooth version | 4.0 |
| Ethernet LAN data rates | 10, 100, 1000 Mbit/s |
| USB 2.0 ports quantity | USB 2.0 ports have a data transmission speed of 480 Mbps, and are backwards compatible with USB 1.1 ports. You can connect all kinds of peripheral devices to them. |
| Thunderbolt ports quantity | 0 |
| USB 3.2 Gen 1 (3.1 Gen 1) Type-A ports quantity | 4 |
| Internal memory | 4 GB |
| Memory slots type | DIMM |
| Memory clock speed | 1600 MHz |
| Maximum internal memory | 8 GB |
| Pixel pitch | 0.2652 x 0.2652 mm |
| Screen shape | Flat |
| Display diagonal | 23 \ |
| Native aspect ratio | 16:9 |
| HDD speed | 7200 RPM |
| HDD capacity | 500 GB |
| HDD interface | SATA |
| Storage media | HDD |
| Optical drive type | DVD Super Multi |
| Compatible memory cards | MMC, MS PRO, Memory Stick (MS), SD, SDHC, SDXC, xD |
| Audio system | Waves MaxxAudio 3 |
| AC adapter power | 200 W |
| Total megapixels | 1.3 MP |
| Product color | Black, Silver |
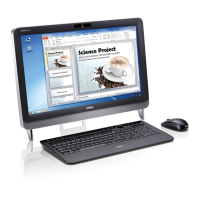
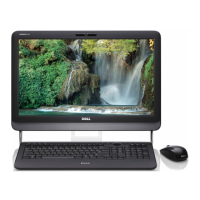
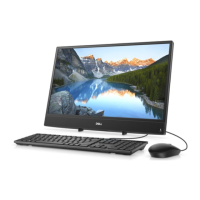
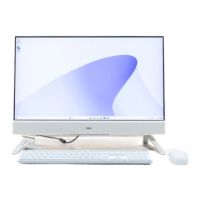
| Product type | All-in-One PC |
| Operating system installed | Linux |
| Depth (with stand) | 220 mm |
|---|---|
| Width (with stand) | 574 mm |
| Height (with stand) | 442.4 mm |
| Weight (with stand) | 9340 g |
| Depth (without stand) | 72.4 mm |
| Weight (without stand) | 7340 g |