Installation 17
3
Slide the plunger bracket forward against the vertical post and secure the
plunger bracket to the post flange with two user-supplied screws.
See Figure 4, item 3.
4
Repeat this procedure for the second rail.
Two-post Center-mount Configuration
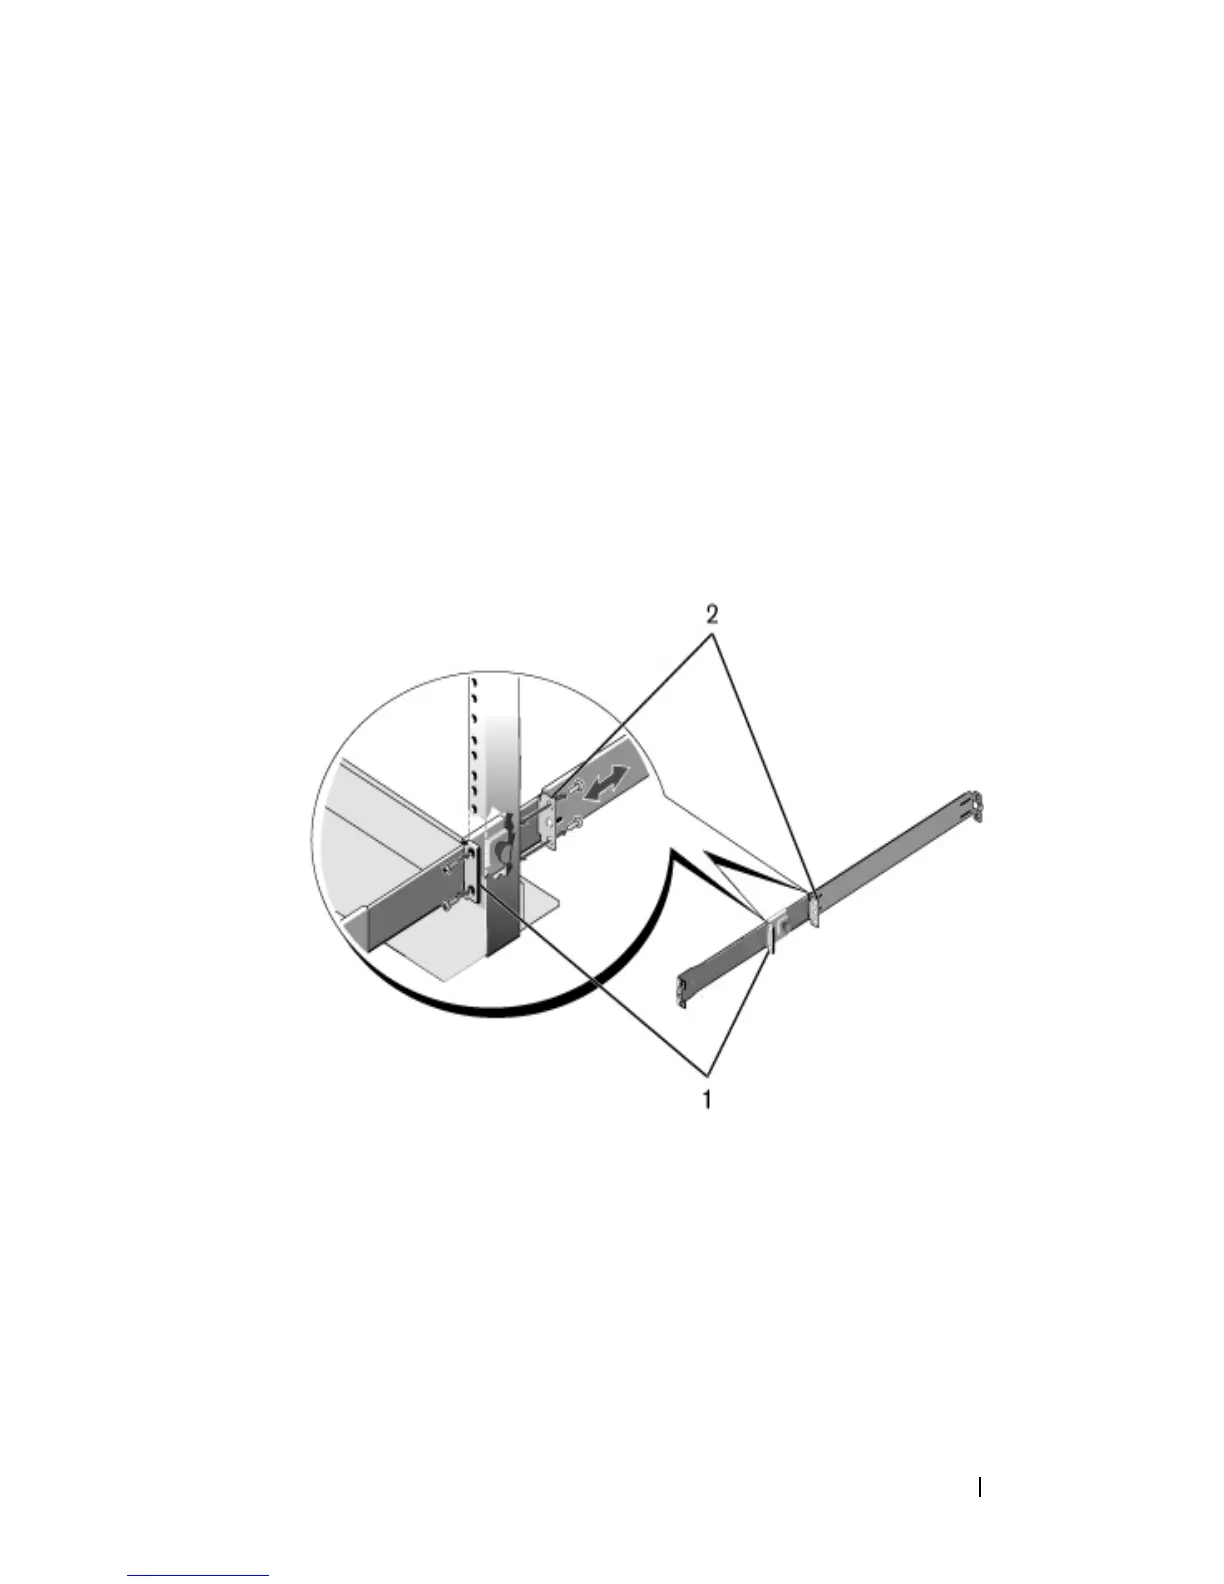
1
Slide the plunger bracket rearward until it clicks into place and secure the
bracket to the front post flange with two user-supplied screws.
See Figure 5, item 1.
Figure 5. Two-post Center-mount Configuration
2
Slide the back bracket towards the post and secure it to the post flange
with two user-supplied screws. See
Figure 5, item 2.
3
Repeat this procedure for the second rail.
Four-post Threaded Configuration
1
For this configuration, the flange ear castings must be removed from each
end of the ReadyRails assemblies. Use a Torx driver to remove the two
screws from each flange ear and remove each casting. See
Figure 6,
item 1 on page 18. Retain the castings for future rack requirements.
 Loading...