4. If you are installing a new card, remove the filler bracket to create a card- slot opening. Then continue with step 6.
5. If you are replacing a card that is already installed in the computer, remove the card. If necessary, disconnect any cables connected to the card. Then
continue with step6.
6. Prepare the card for installation.
7. Place the card in the connector and press down firmly. Ensure that the card is fully seated in the slot.
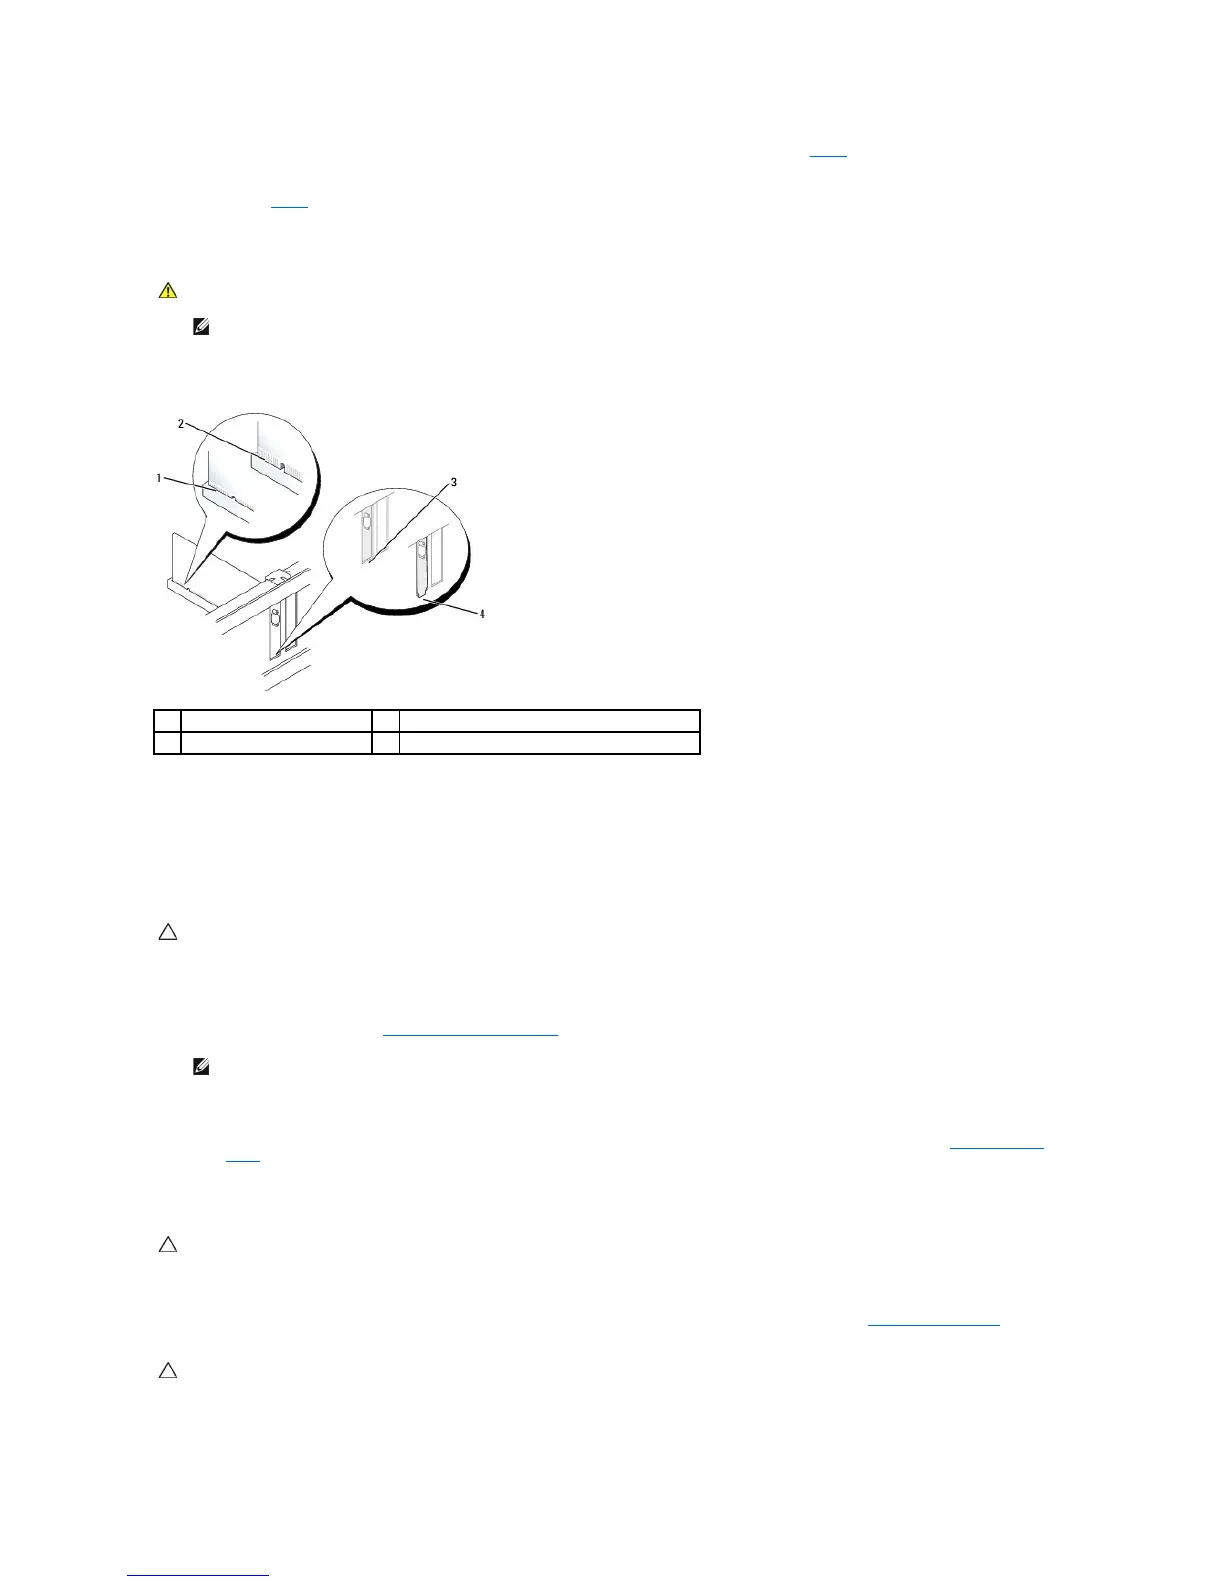
8. Before closing the card retention latch, ensure that:
l The tops of all cards and filler brackets are flush with the alignment guide
l The notch in the top of the card or filler bracket fits around the alignment guide
9. Secure the card(s) by closing the card retention latch and snapping it into place.
10. Connect any cables that should be attached to the card.
11. Replace the computer cover (see Replacing the Computer Cover).
12. If you installed a sound card:
a. Enter system setup, select System Configuration® Miscellaneous Devices, and change the Audio setting to Disabled (see Entering System
Setup).
b. Connect external audio devices to the sound card's connectors. Do not connect external audio devices to the microphone, speaker/headphone,
or line-in connectors on the back panel of the computer.
13. If you installed a network adapter card and want to turn off the integrated network adapter:
a. Enter system setup, select System Configuration® Integrated NIC, and change the setting to Disabled (see Entering System Setup).
b. Connect the network cable to the network adapter card's connectors. Do not connect the network cable to the integrated network connector on
the back panel of the computer.