Steps
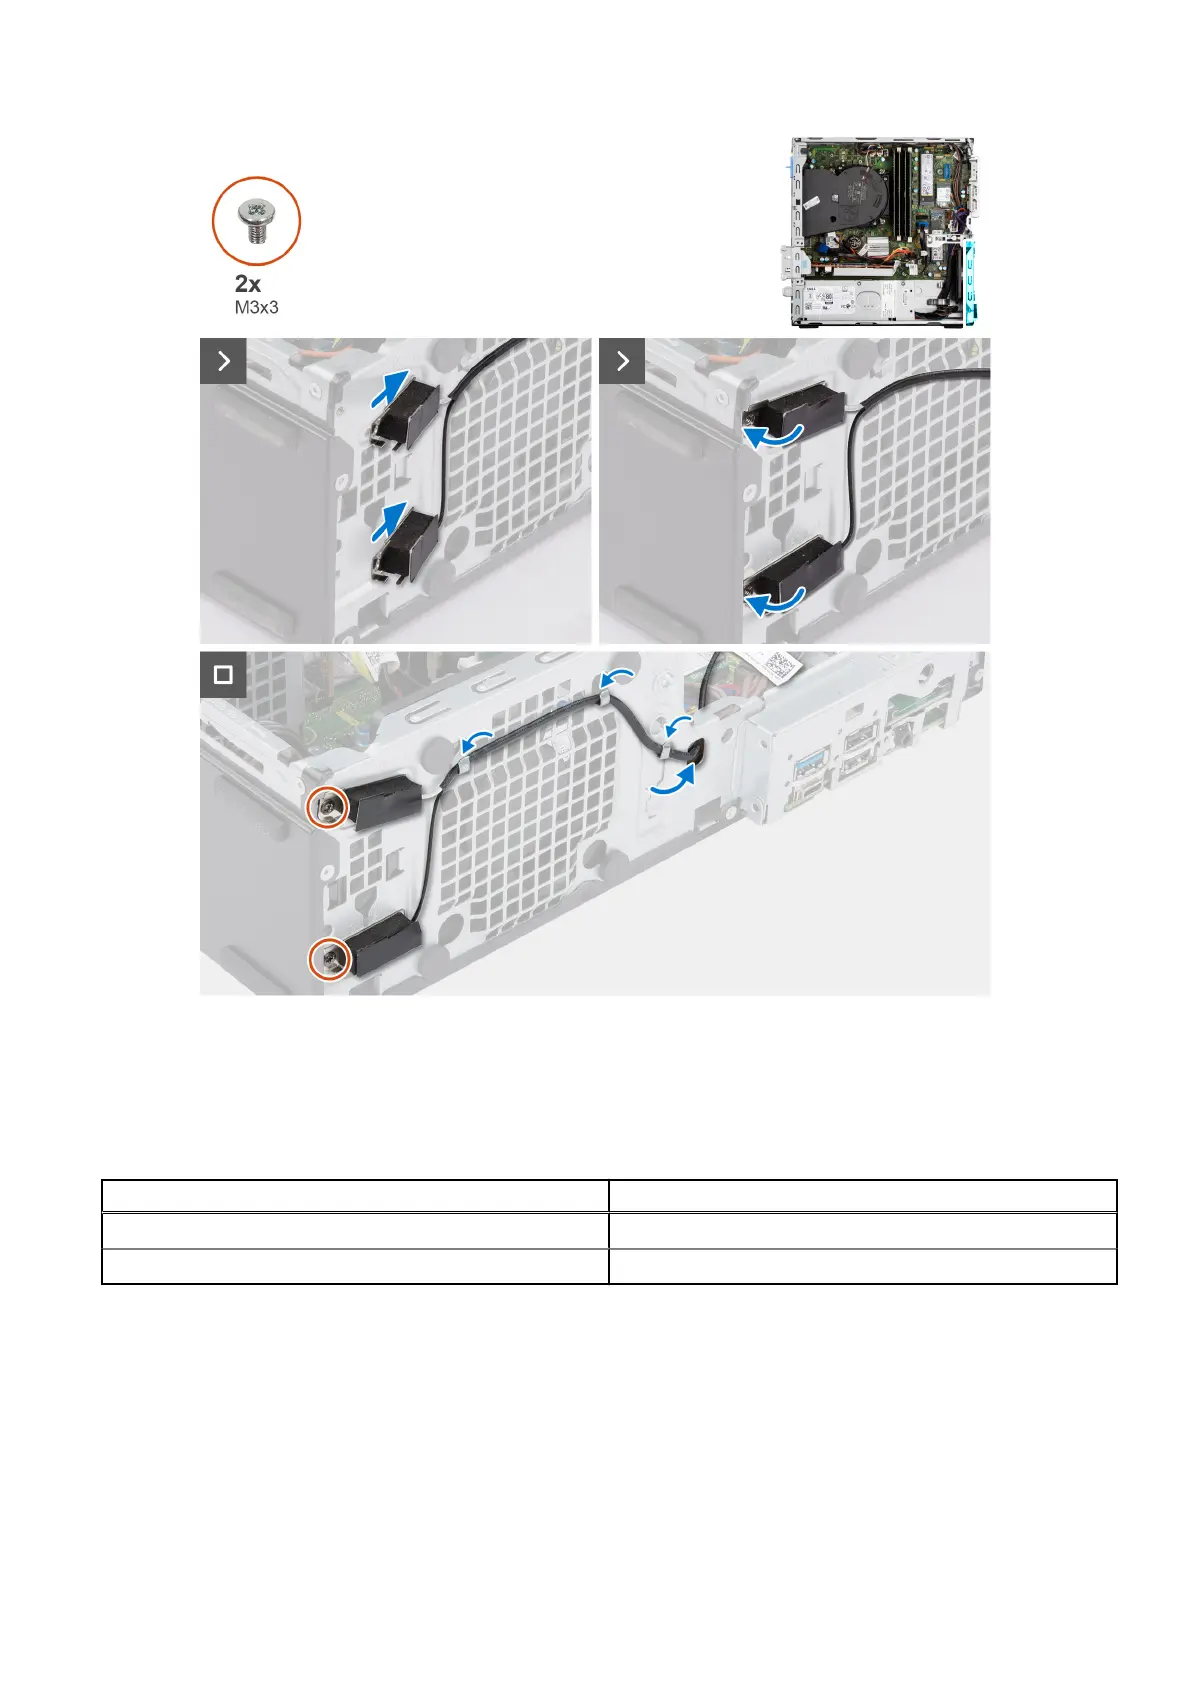
1. Remove the protection mylars from the internal antennas.
2. Insert the antennas into the slots on the chassis.
The antennas should be installed on the appropriate slots on the chassis. The following table provides guidance on the
correct installation method.
CHASSIS LABEL
ANTENNA-CABLE COLOR
ANT-W White
ANT-B Black
3. Replace the two screws (M3x3) that secures the internal antennas to the chassis.
4. Route the internal-antenna cable through the routing guides on the chassis.
Next steps
1. Install the wireless card if applicable.
2. Install the disk-drive cage.
3. Install the 3.5-inch hard drive if applicable.
4. Install the 2.5-inch hard drive if applicable.
Removing and installing Field Replaceable Units (FRUs)
89