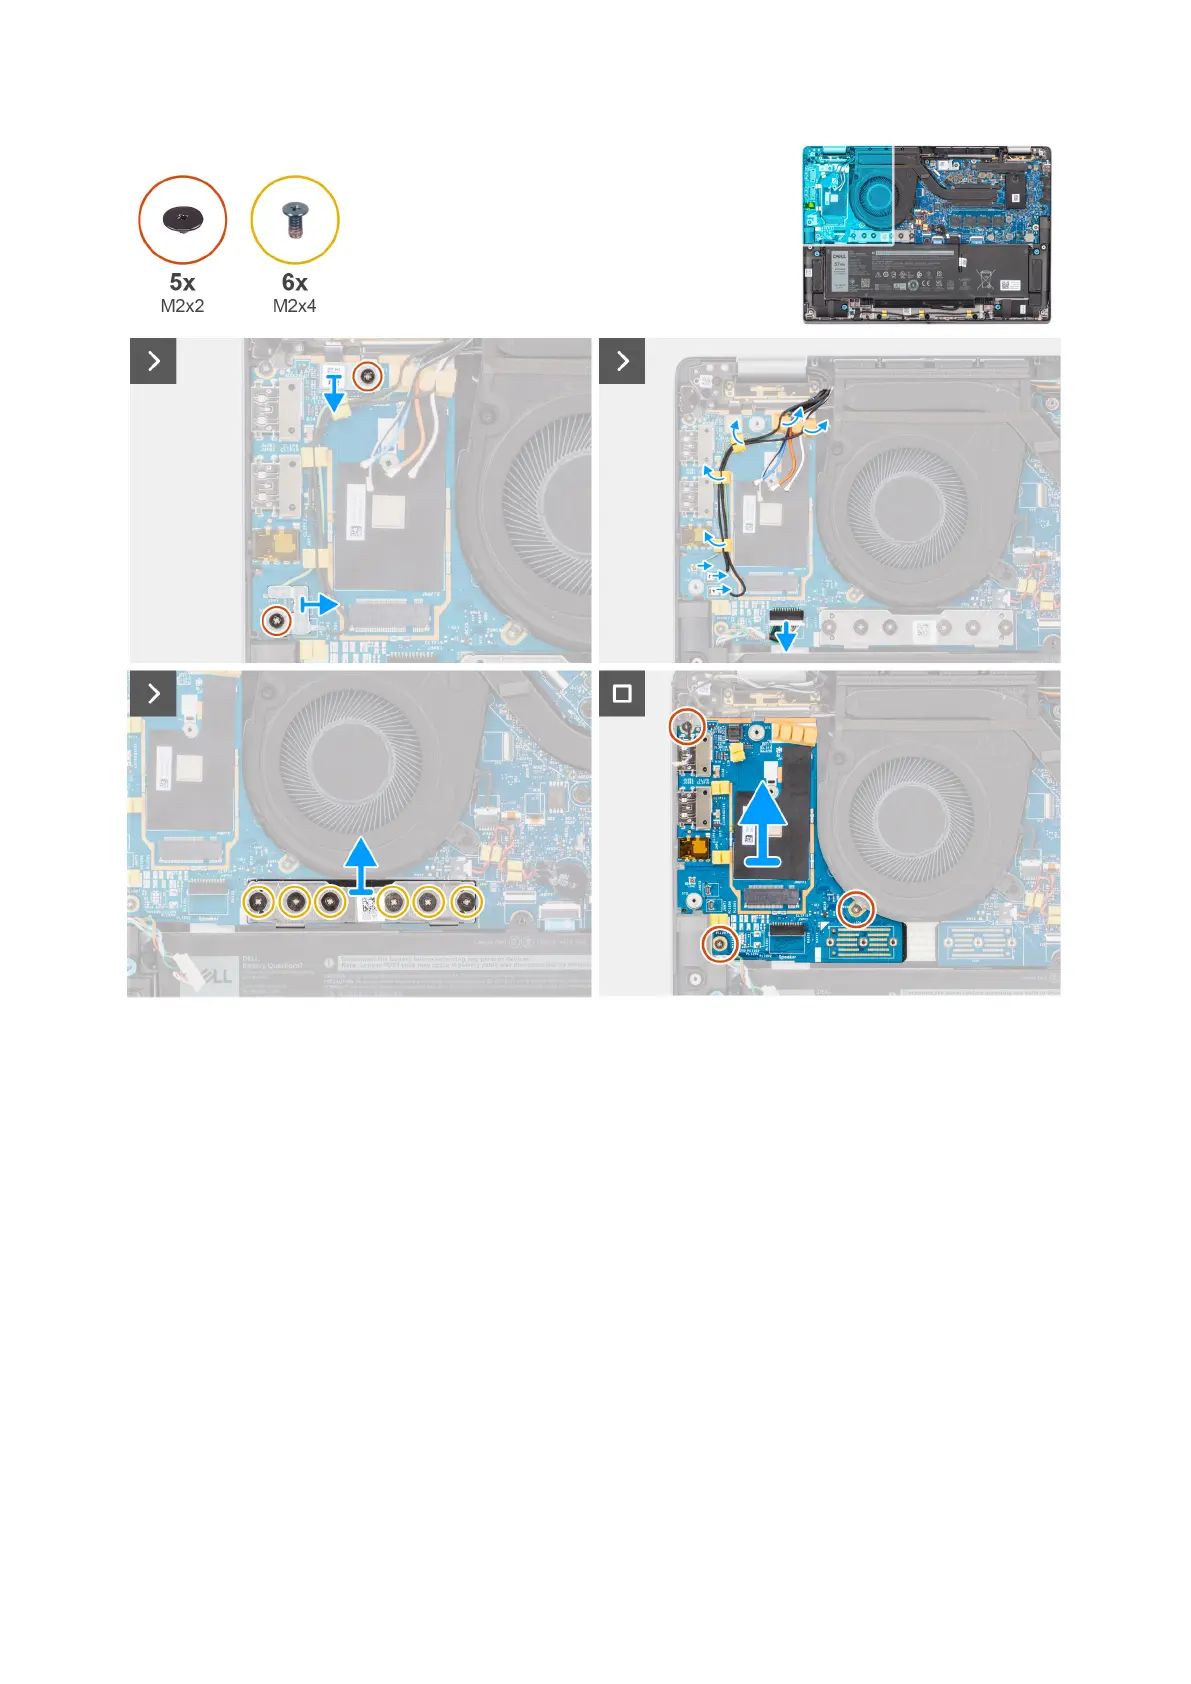
Figure 71. Removing the I/O daughterboard
Steps
1. Remove the single screw (M2x2) screw that secures the 4G WWAN card extension bracket to the palm-rest and keyboard
assembly for the models that are shipped with a 4G WWAN card.
2. Remove the 4G WWAN card bracket from the computer for the models shipped with a 4G WWAN card.
3. Remove the single screw (M2x2) that secures the Darwin antenna cable bracket to the palm-rest and keyboard assembly.
4. Remove the Darwin antenna cable bracket from the computer.
5. Unroute the two Darwin antenna cables, and green P-sensor cable from the routing guide on the I/O daughterboard.
6. Disconnect the antenna cables from the connectors.
7. Remove the single screw (M2x2) that secures the fingerprint reader bracket to the palm-rest and keyboard assembly.
8. Remove the fingerprint reader bracket from the computer for the models shipped with a fingerprint reader.
9. Remove the fingerprint reader bracket from the computer.
10. Disconnect the fingerprint reader FPC from the I/O daughterboard.
11. Disconnect the speaker cable from the I/O daughterboard.
12. Remove the six screws (M2x4) that secures the I/O daughterboard bridge connector board to the palm-rest and keyboard
assembly.
100
Removing and installing Field Replaceable Units (FRUs)