About this task
NOTE: This procedure applies only to computers shipped with a 4G WWAN card installed.
NOTE: When reinstalling the WWAN card shielding cover, ensure that the shielding cover is inserted into the clips on the
I/O daughterboard.
NOTE: WWAN card is configured at point of sales for 2-in-1 computers, WWAN card upgrade (CUS Kit) is not available for
2-in-1 computers.
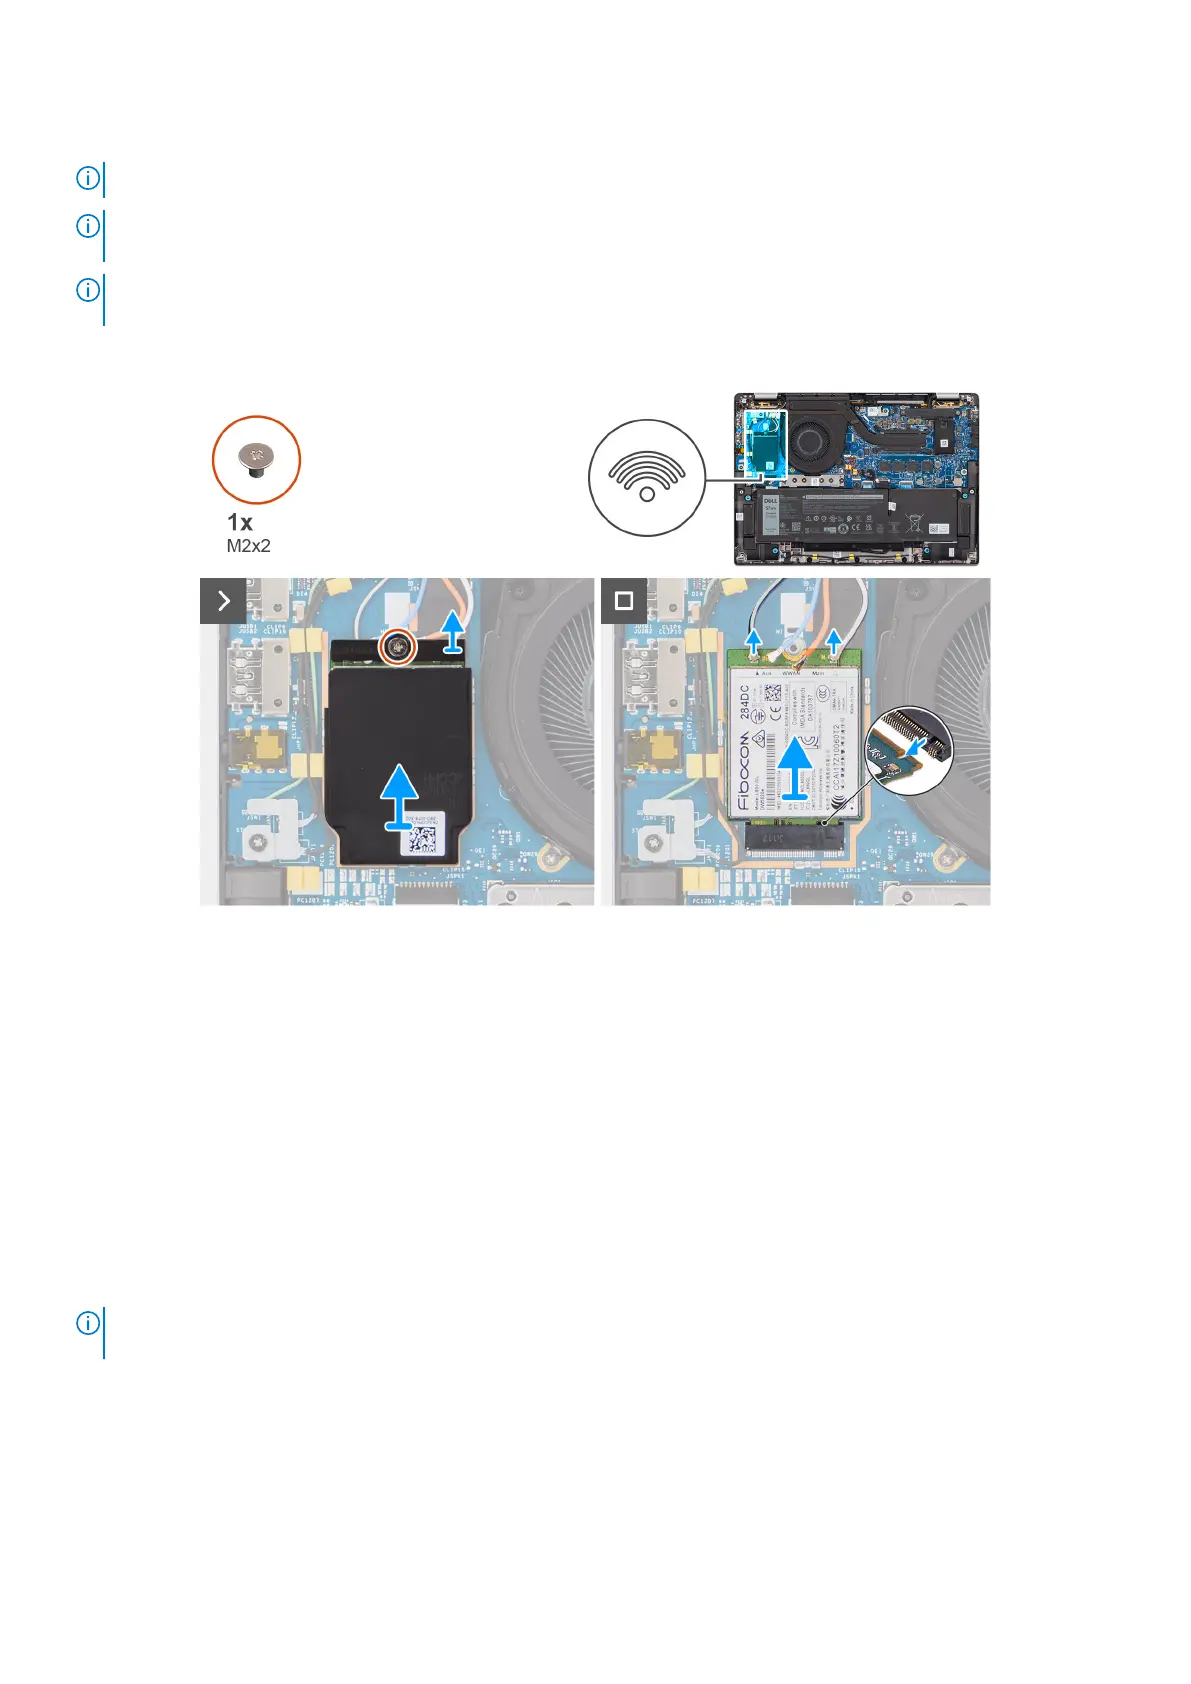
The following images indicate the location of the 4G WWAN card and provide a visual representation of the removal procedure.
Figure 24. Removing the 4G WWAN card
Steps
1. Remove the single screw (M2x2) that secures the 4G WWAN-card bracket to the I/O daughterboard.
2. Pry the WWAN shielding cover from the top-left side of the shielding cover and remove it from the computer.
3. Lift the 4G WWAN-card bracket off the I/O daughterboard.
4. Disconnect the antenna cables from the connectors on the 4G WWAN card.
5. Slide and remove the 4G WWAN card from the M.2-card slot on the I/O daughterboard.
Installing the 4G WWAN card
Prerequisites
If you are replacing a component, remove the existing component before performing the installation procedure.
NOTE:
When reinstalling the WWAN card shielding cover, ensure that the shielding cover is inserted into the clips on the
I/O daughterboard.
About this task
The following images indicate the location of the 4G WWAN card and provide a visual representation of the installation
procedure.
Removing and installing Customer Replaceable Units (CRUs)
55