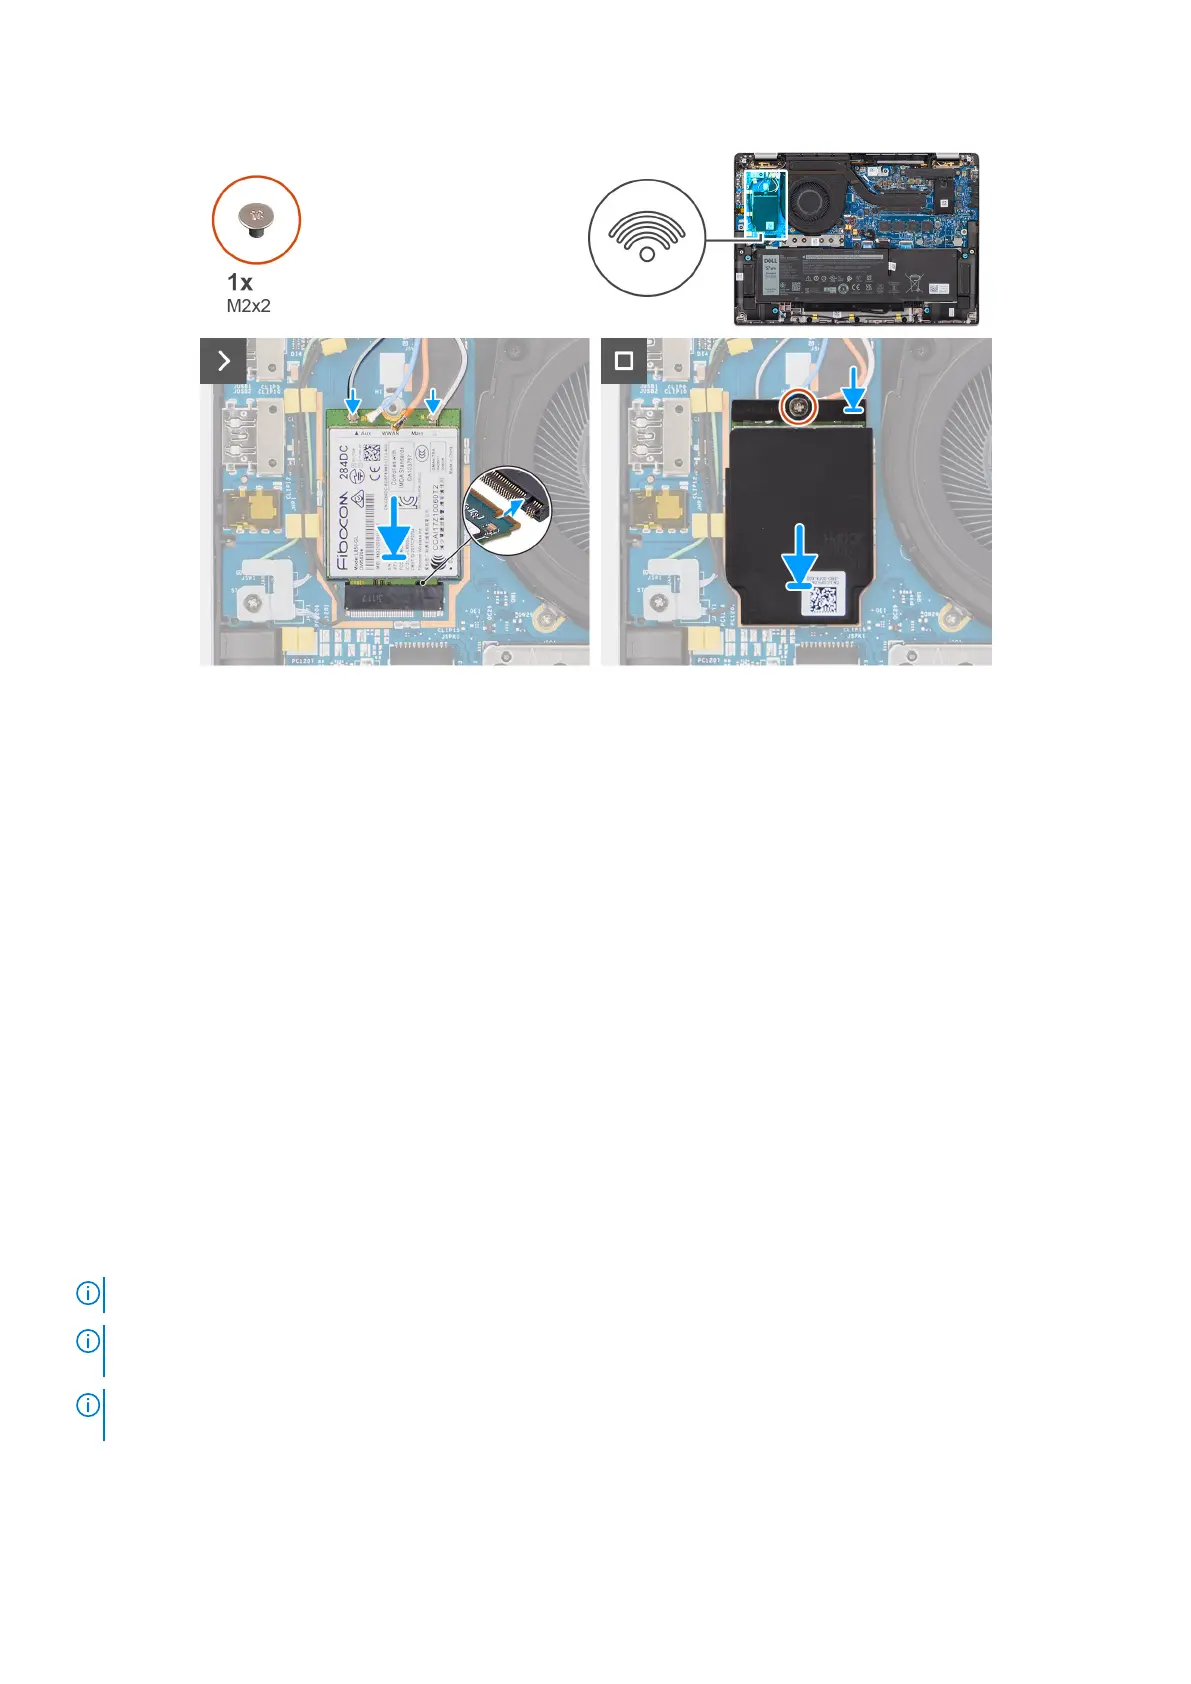
Figure 25. Installing the 4G WWAN card
Steps
1. Align the notch on the 4G WWAN card with the tab on the M.2-card slot on the I/O daughterboard.
2. Slide the 4G WWAN card firmly into the M.2-card slot on the I/O daughterboard.
3. Connect the antenna cables to the connectors on the 4G WWAN card.
4. Place the 4G WWAN-card bracket on the 4G WWAN card.
5. Align the screw hole on the 4G WWAN-card bracket with the screw hole on the I/O daughterboard.
6. Replace the single screw (M2x2) that secures the 4G WWAN-card bracket to the I/O daughterboard.
Next steps
1. Install the base cover.
2. Follow the procedure in After working inside your computer.
Removing the 5G WWAN card
Prerequisites
1. Follow the procedure in Before working inside your computer.
2. Remove the base cover.
About this task
NOTE: This procedure applies only to computers shipped with a 5G WWAN card installed.
NOTE: When reinstalling the WWAN card shielding cover, ensure that the shielding cover is inserted into the clips on the
I/O daughterboard.
NOTE: WWAN card is configured at point of sales for 2-in-1 computers, WWAN card upgrade (CUS Kit) is not available for
2-in-1 computers.
The following images indicate the location of the 5G WWAN card and provide a visual representation of the removal procedure.
56
Removing and installing Customer Replaceable Units (CRUs)