Prerequisites
1. Follow the procedure in Before working inside your computer.
2. Remove the base cover.
About this task
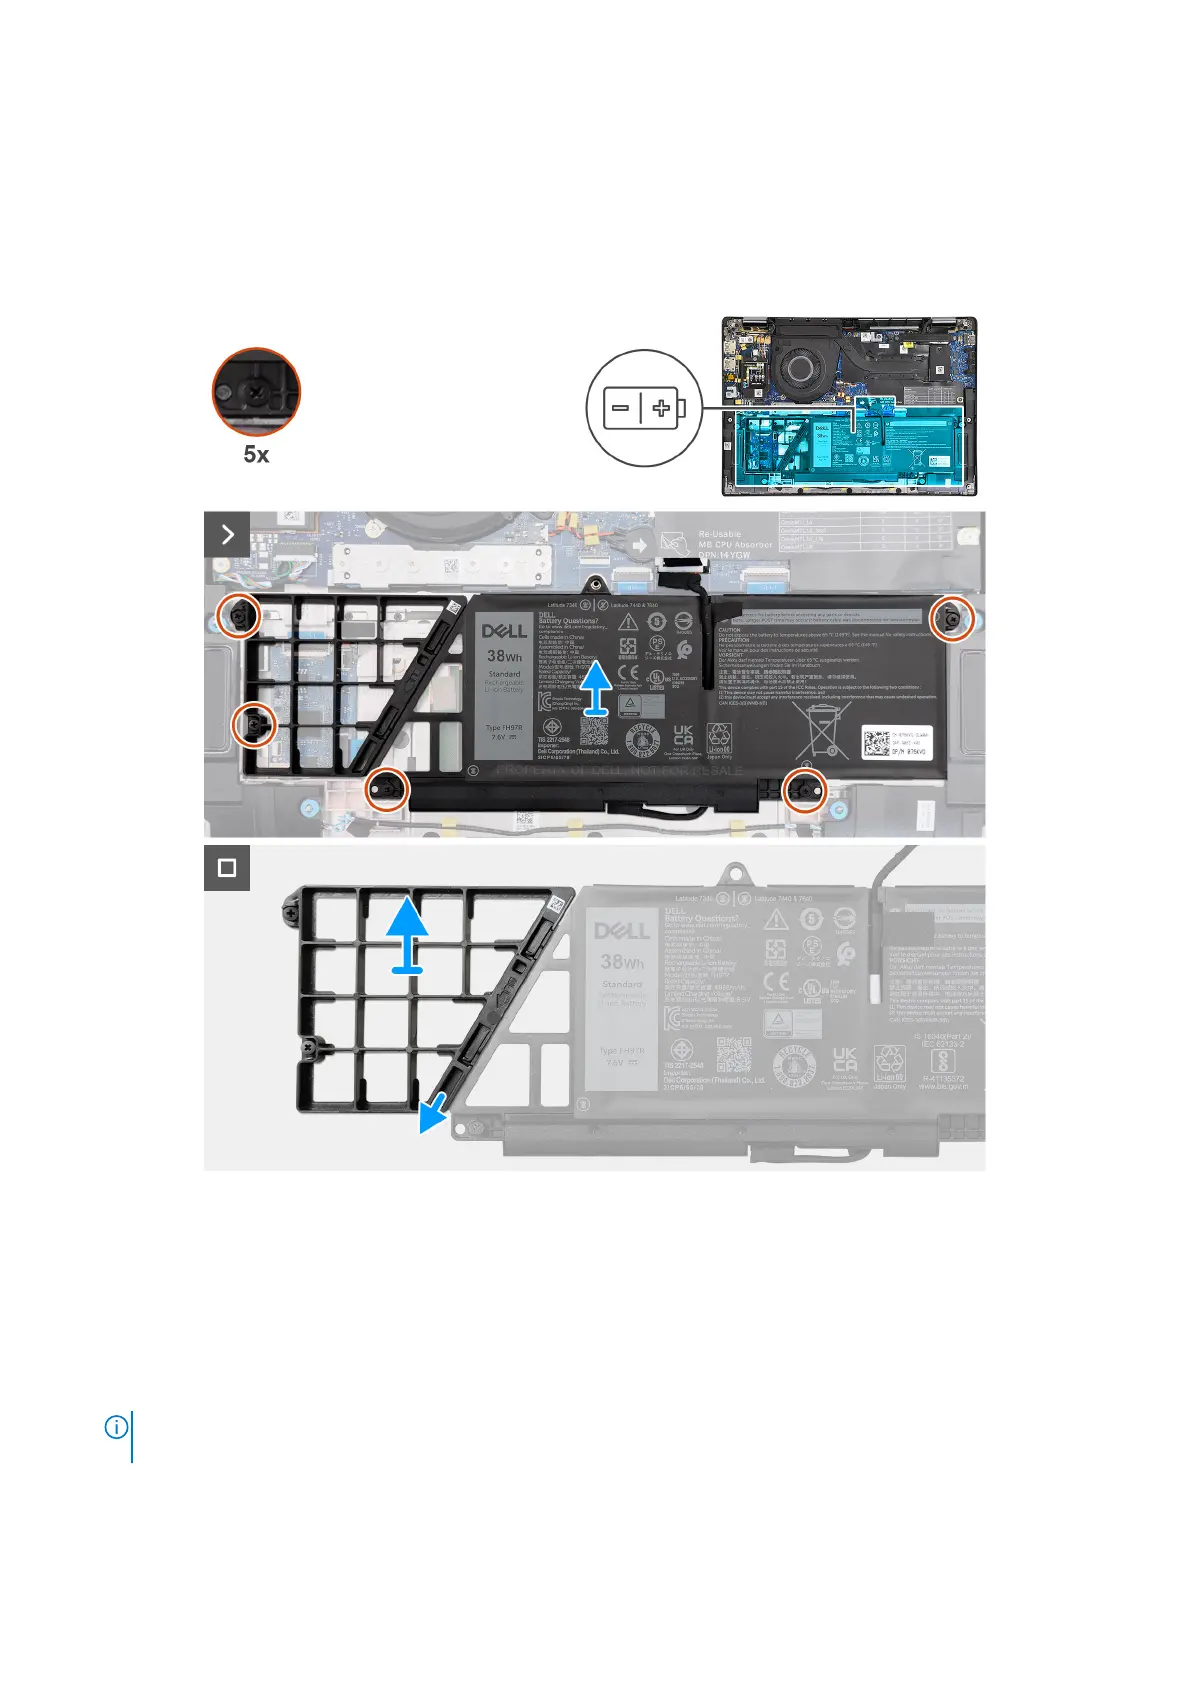
The following image indicates the location of the 2-cell battery and provides a visual representation of the removal procedure.
Figure 37. Removing the 2-cell battery
Steps
1. Use the pull tab to disconnect the battery cable from the connector on the system board.
2. Loosen the five captive screws that secure the 2-cell battery to the palm-rest and keyboard assembly.
3. Lift the 2-cell battery along with the battery cable off the palm-rest and keyboard assembly.
4. Disconnect the battery cable from the connector on the 2-cell battery.
5. Carefully push the battery filler downwards to remove it from the 2-cell battery.
NOTE:
For models shipped with a 2-cell battery, push downward to remove the dummy cell from the battery, and then
reverse the process to install the dummy cell on the replacement battery.
Removing and installing Field Replaceable Units (FRUs) 67