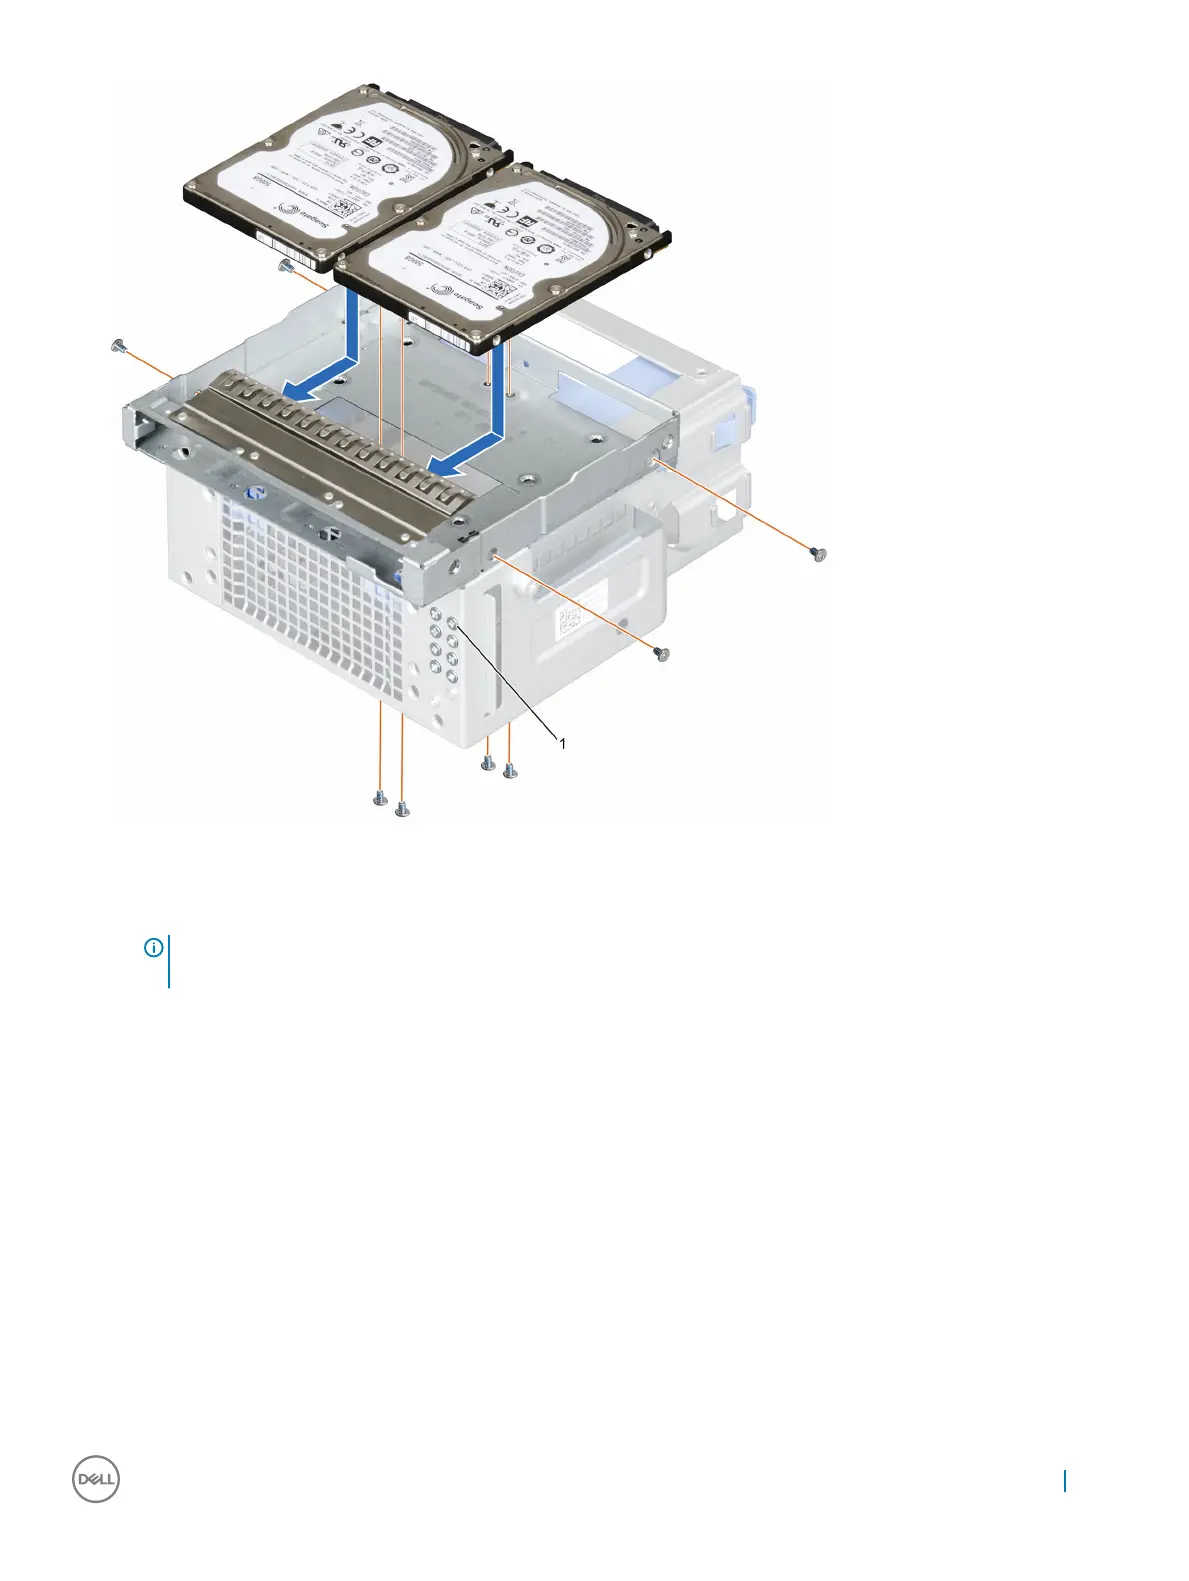
Figure 23. Installing a 2.5-inch hard drive in the optical drive bay
1
2.5-inch hard drive screws (8)
NOTE: Use the SATA cables to connect hard drives in the hard drive cage to avoid damaging the connector pins. This is
applicable for the 2.5-inch hard drives and optical drive.
Next steps
1 Insert the hard drive cage into the system.
2 Connect the power and data cables to the hard drive.
3 Follow the procedure listed in the After working inside your system section.
4 Reboot the system and press F2 to enter the System Setup and ensure that the hard drive controller is enabled.
Related links
Safety instructions
Before working inside your system
Removing the hard drive cage
Installing the hard drive cage
After working inside your system
Installing and removing system components
59
 Loading...