EasyManuals Logo

Dell PowerVault NX3100 User Manual

Dell PowerVault NX3100
164 pages
To Next Page IconTo Next Page
To Previous Page IconTo Previous Page
Page #72 background imageLoading...
Page #72 background image
72 Installing System Components
4 With the lever on the hard drive carrier open, slide the hard drive into
the drive bay until the carrier contacts the backplane. See
Figure 3-6.
5 Close the handle to lock the drive in place.
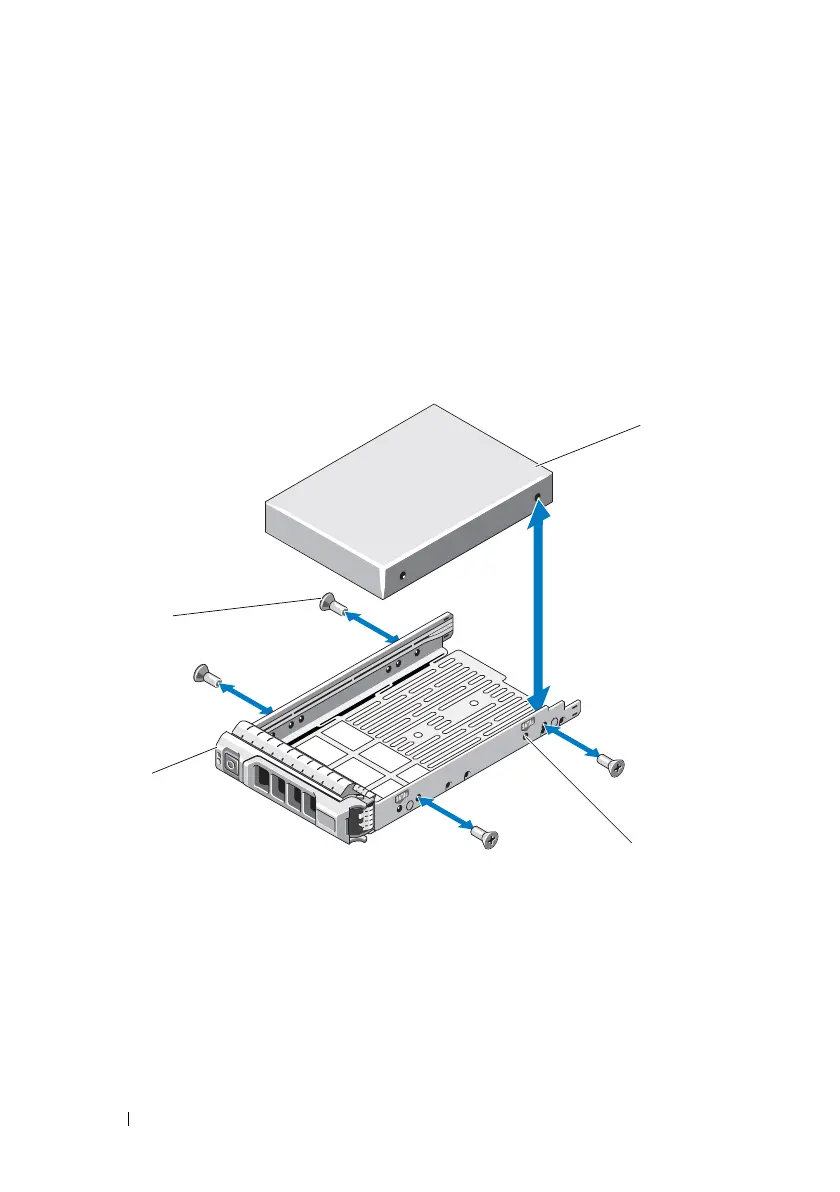
Removing a Hard Drive From a Hard-Drive Carrier
Remove the screws from the slide rails on the hard-drive carrier and separate
the hard drive from the carrier. See Figure 3-7.
Figure 3-7. Installing a Hot-Swap Hard Drive Into a Drive Carrier
1 hard drive 2 SAS/SATA indicator
3 drive carrier 4 screws (4)
2
1
3
4
book.book Page 72 Wednesday, March 3, 2010 10:37 AM

Table of Contents

Other manuals for Dell PowerVault NX3100

Questions and Answers:

Question and Answer IconNeed help?

Do you have a question about the Dell PowerVault NX3100 and is the answer not in the manual?

Dell PowerVault NX3100 Specifications

General IconGeneral
BrandDell
ModelPowerVault NX3100
CategoryServer
LanguageEnglish

Related product manuals