76 Installing System Components
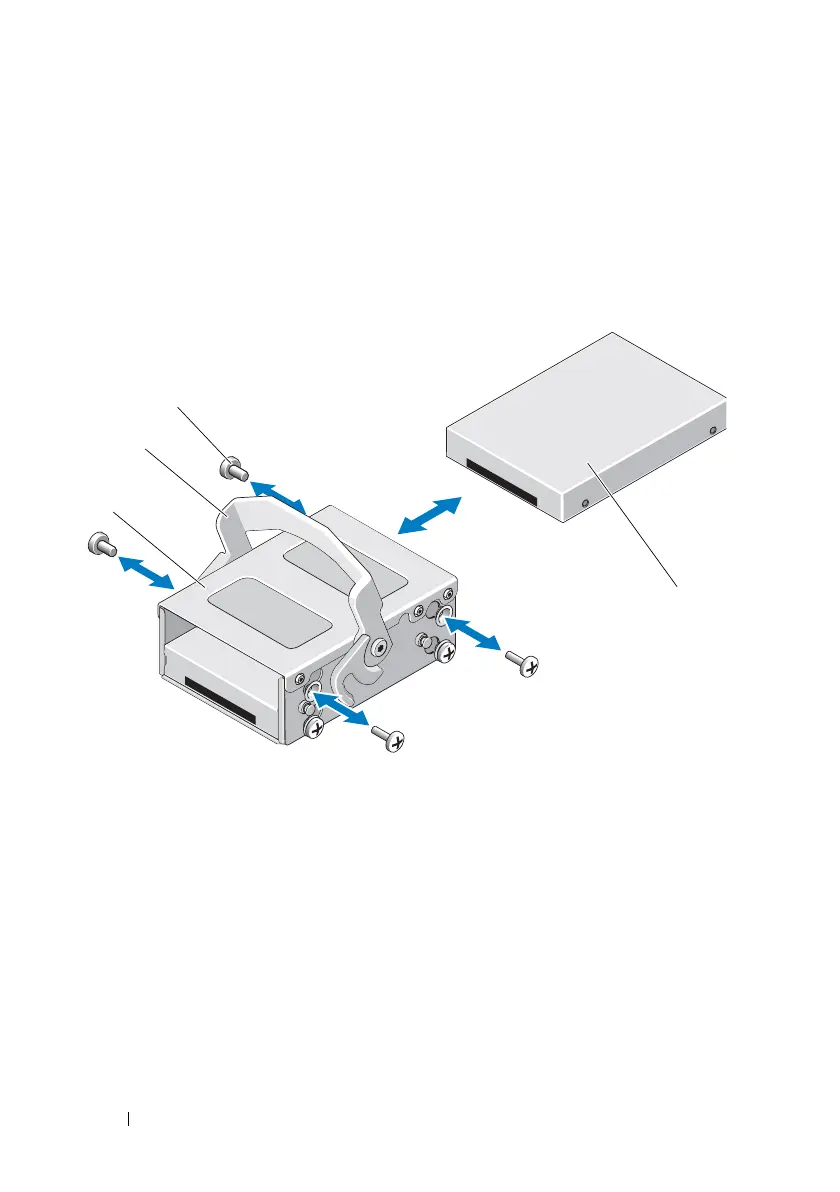
Removing an Internal Hard Drive From the Internal Hard-Drive Bay
Remove the screws on the sides of the internal hard-drive bay and slide out
the hard drive. See Figure 3-9.
Figure 3-9. Installing and Removing an Internal Hard Drive From the Internal
Hard-Drive Bay
*Screws are supplied along with the hard drives ordered from Dell.
Installing a Hard Drive Into a Hard-Drive Bay
1
Insert the hard drive into the internal hard-drive bay with the connector
end of the drive at the back, until it is flush with the back of the hard-drive
bay. See Figure 3-9.
2
Attach the four screws to secure the hard drive to the hard-drive bracket.
1 internal hard drive bay 2 release latch
3 screws (4)
* 4 internal hard drive
book.book Page 76 Wednesday, March 3, 2010 10:37 AM
 Loading...


