Optical Drive: Dell Precision M6400 Service Manual
file:///T|/htdocs/systems/wsm6400/en/sm/optical.htm[11/16/2012 10:26:28 AM]
Back to Contents Page
Optical Drive
Dell Precision™ M6400 Service Manual
Removing the Optical Drive
Replacing the Optical Drive
Removing the Optical Drive
CAUTION: Before working inside your computer, read the safety information that shipped with your
computer. For additional safety best practices information, see the Regulatory Compliance Homepage on
www.dell.com at: www.dell.com/regulatory_compliance.
1. Follow the procedures in Before Working on Your Computer
.
2. Turn your computer upside down.
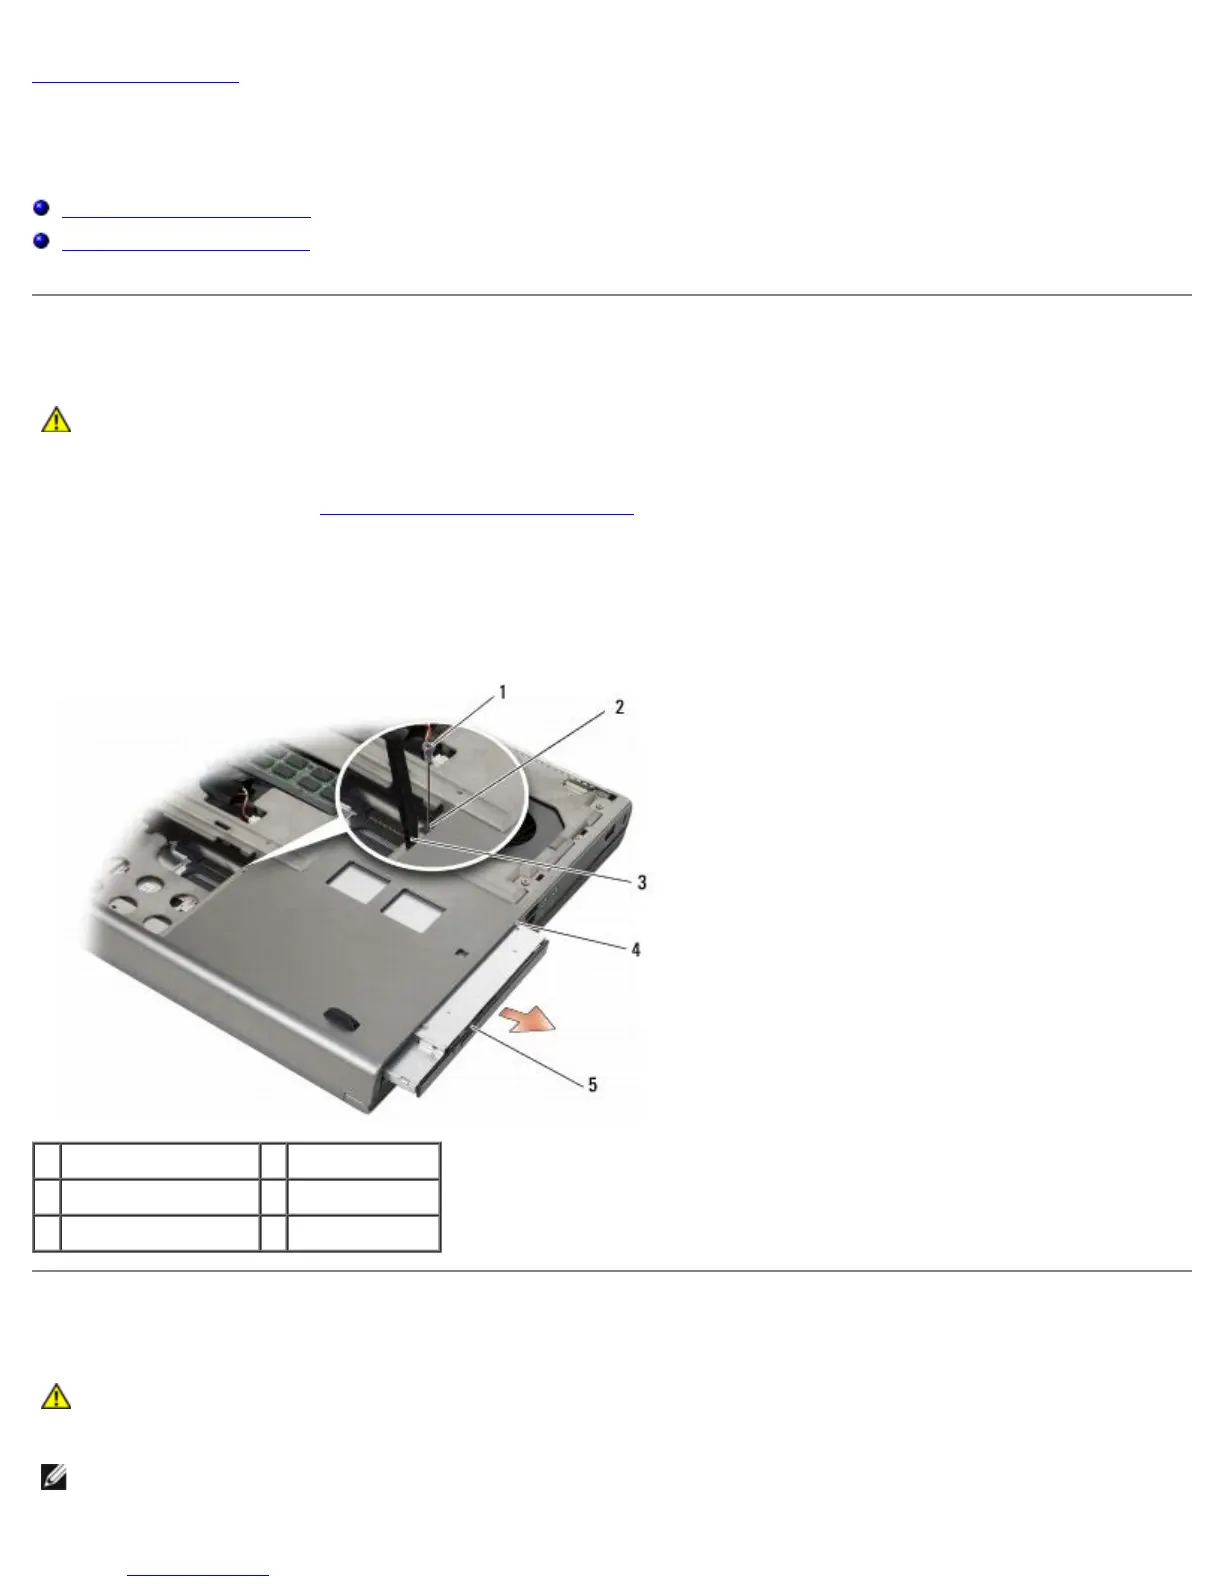
3. Remove the M2.5 x 8-mm screw in the battery bay.
4. Use the notch by the screw to push the optical drive out enough to pull it out from the bay.
1 M2.5 x 8-mm screw 2 notch by screw
3 plastic scribe 4 media bay
5 optical drive
Replacing the Optical Drive
CAUTION: Before working inside your computer, read the safety information that shipped with your
computer. For additional safety best practices information, see the Regulatory Compliance Homepage on
www.dell.com at: www.dell.com/regulatory_compliance.
NOTE: The security screw on the optical drive is optional and may not be installed on your computer.