Back to Contents Page
Optical Drive
Dell™Studio1535/1536ServiceManual
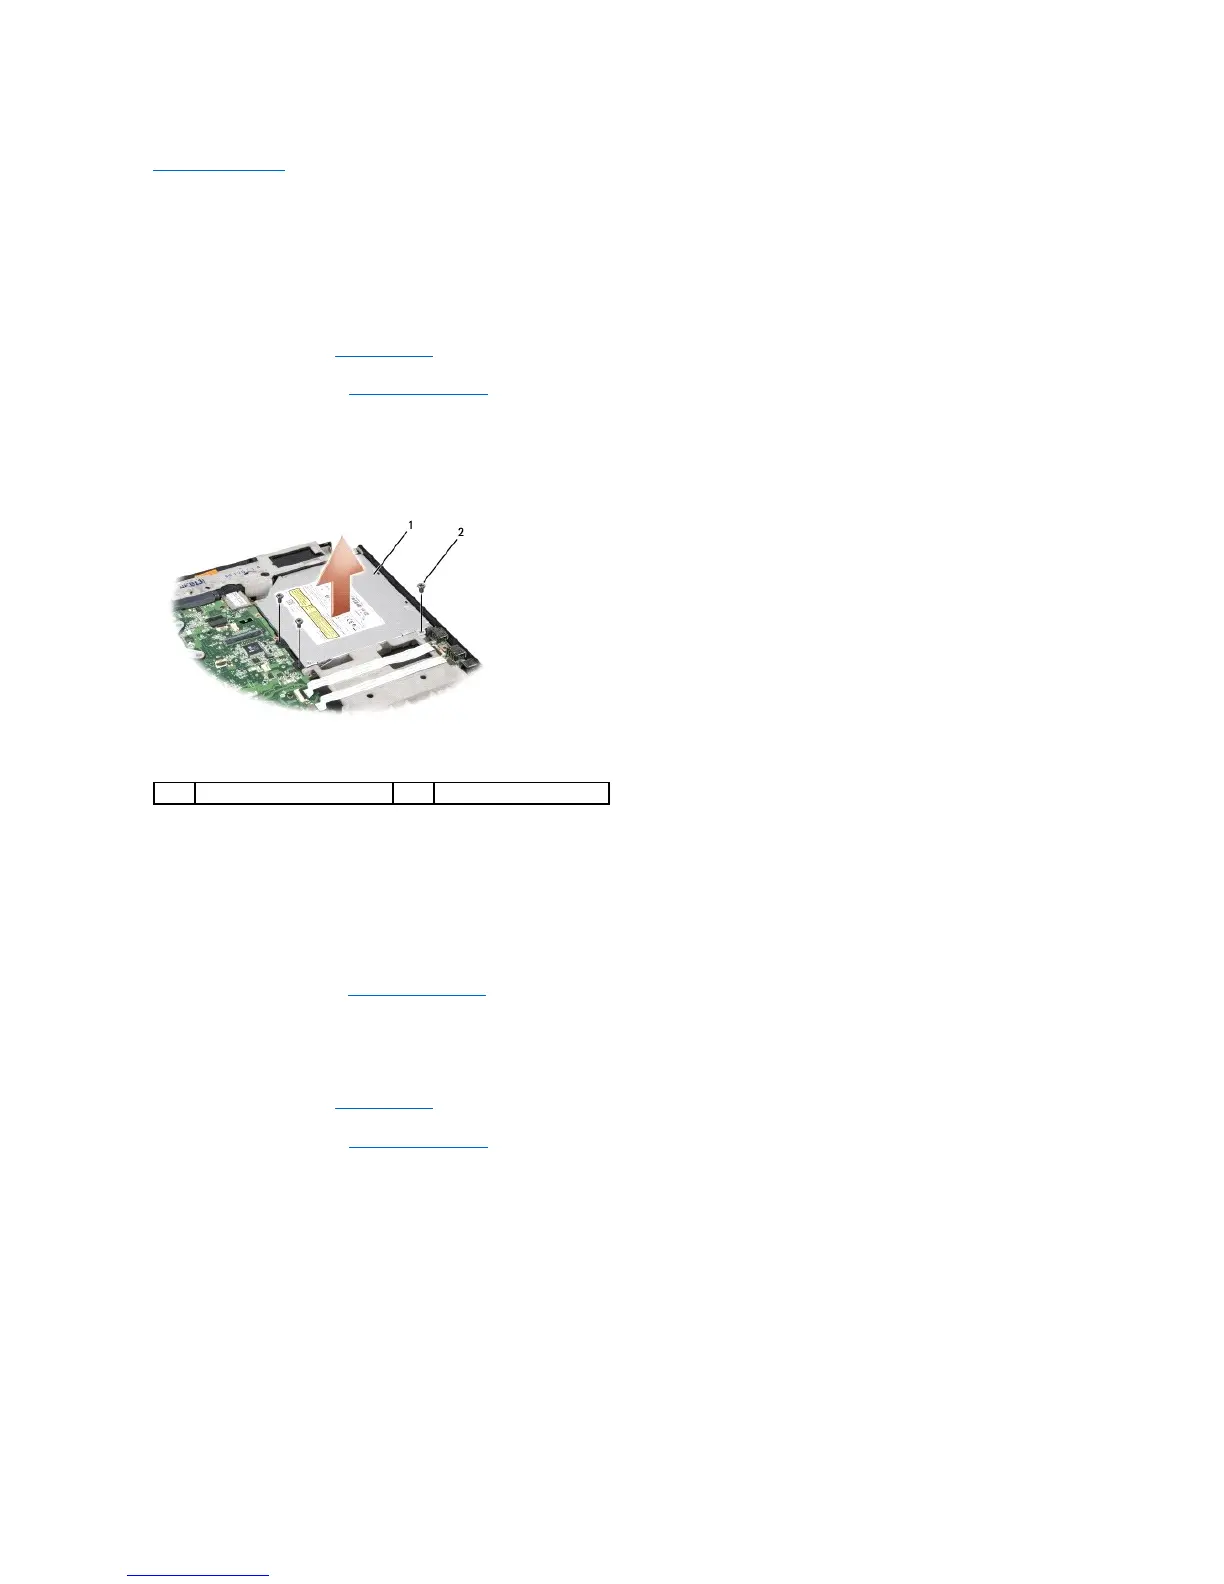
Removing the Optical Drive
1. Follow the procedures in Before You Begin.
2. Remove the palm rest (see Removing the Palm Rest).
3. Remove the three screws on the optical drive and take out the optical drive from the bay.
Replacing the Optical Drive
1. Connect the optical drive connector to the system board.
2. Replace and tighten the three screws on the optical drive.
3. Replace the palm rest (see Replacing the Palm Rest).
Removing the Optical Drive Interposer
1. Follow the procedures in Before You Begin.
2. Remove the palm rest (see Removing the Palm Rest).
3. Remove the three screws on the optical drive and take out the optical drive from the bay.
4. Pull out the optical drive interposer to remove it.