Back to Contents Page
USB/Audio Board
Dell™Studio1535/1536ServiceManual
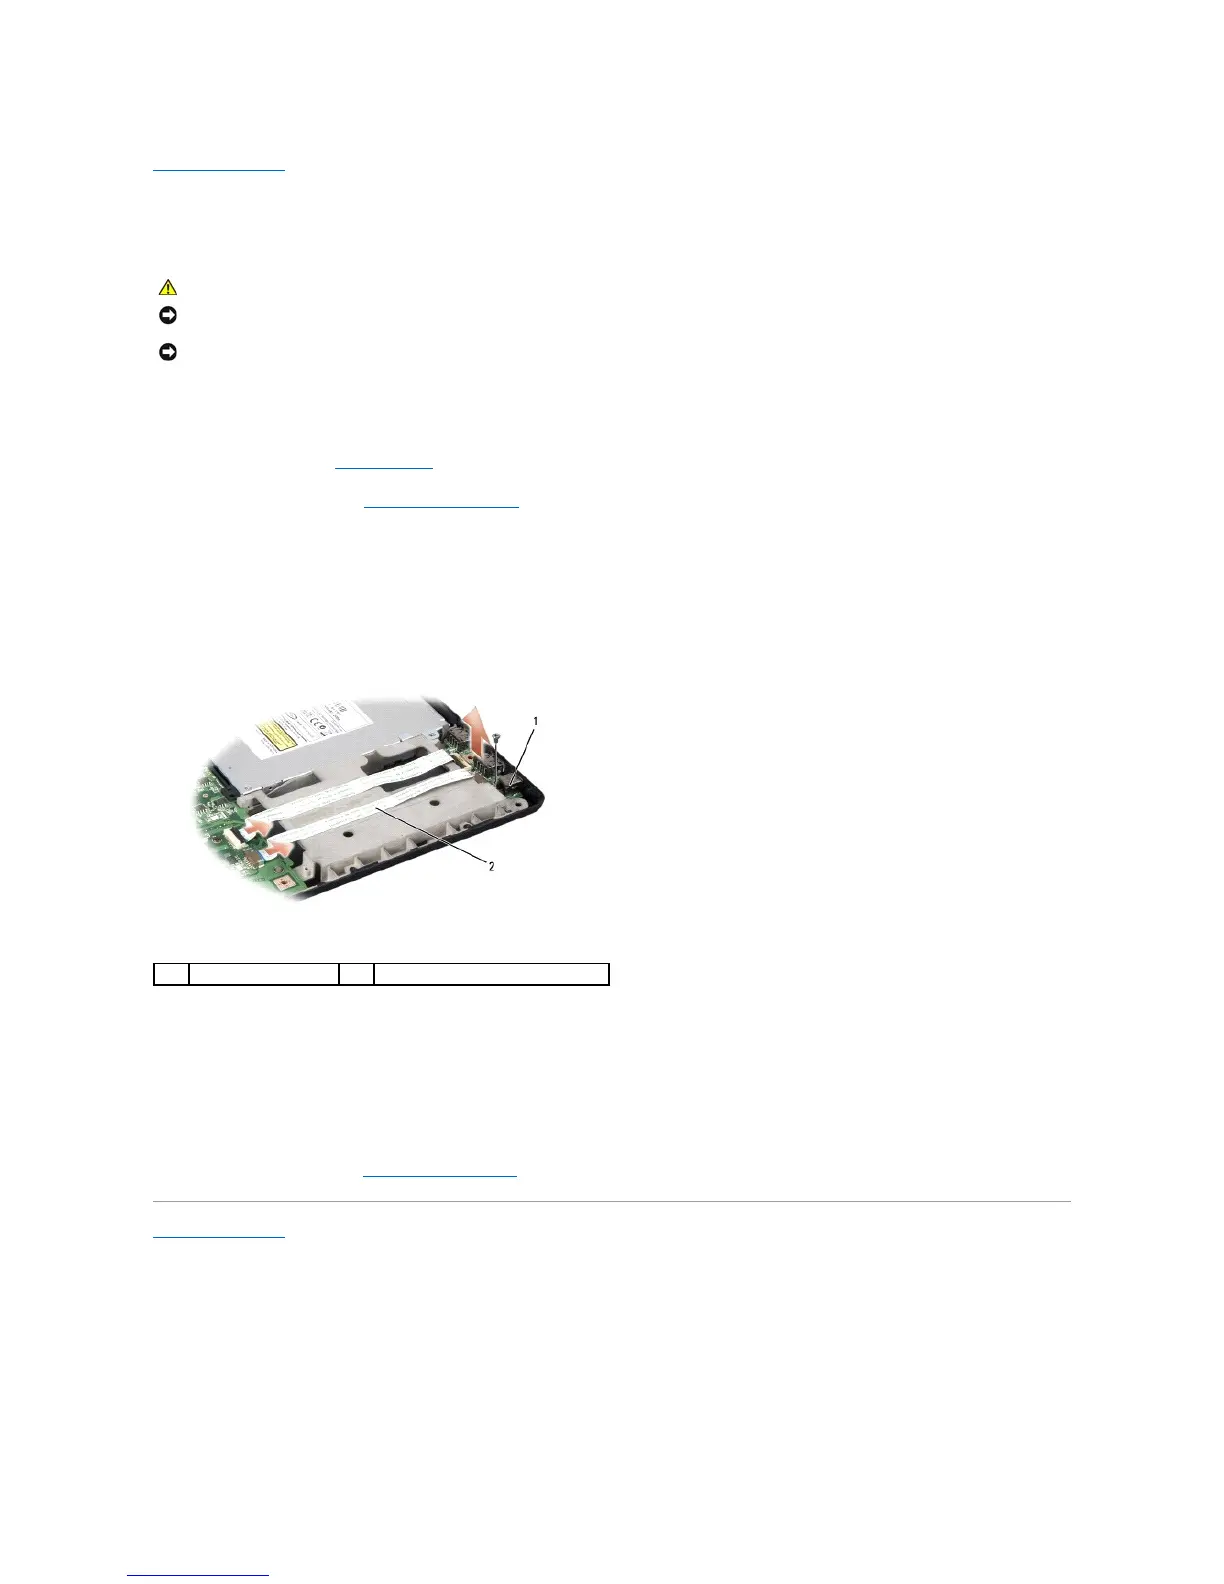
Removing the USB/Audio Board
1. Follow the procedures in Before You Begin.
2. Remove the optical drive (see Removing the Optical Drive).
3. Disconnect the two cables of the USB/Audio board from the connectors on the system board.
4. Remove the adhesive tapes from the cables securing it to the system board.
5. Remove the screw securing the USB/Audio board to the computer base cover and remove the board.
Replacing the USB/Audio Board
1. Connect the USB/Audio board cables to the system board connectors.
2. Place the USB/Audio board in position and replace and tighten the screw to secure the board.
3. Replace the optical drive (see Replacing the Optical Drive).
Back to Contents Page
NOTICE: To avoid electrostatic discharge, ground yourself by using a wrist grounding strap or by periodically touching an unpainted metal surface (such
as a connector on the back of the computer).