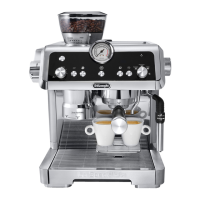
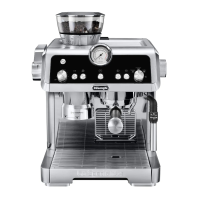
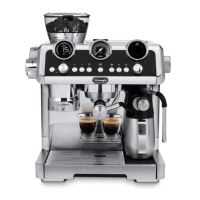
8
This illustration shows how to regulate the dosage, based on the
roast colour: this should be taken as a general guide, given that
in practice, the nal adjustment can vary according to the com-
position of the beans.
1. Set the dosage starting from the minimum position.
2. Looking at the roast colour of your particular beans, turn
the dial slowly to nd the right adjustment.
4.2 Step 2 - Tamping
1. Following the grinding step, bring the tamping lever (A21)
down completely (keeping the portalter in position) (g.
14). For best results, repeat the tamping stroke twice, re-
turning the lever to the at-rest position each time.
2. Keep the tamping lever fully down when removing the
portalter (g 15). When done, return the lever to the at-
rest position.
3. Having checked that the dosage is as required (see “The
“perfect dose””),
attach the portalter to the coee spout
(A19) (g. 16).
Please note:
• If residual traces of coee are left along the edges of the
lter after tamping, this does not aect the quality of the
brew or the resulting drink.
• Draw the portalter away from the tamper with the lever
still down, so that the surface of the compacted coee stays
smooth.
The “perfect dose”
• The coee lters have a mark inside to identify the level for
perfect dose.
“Perfect
dose”
The lter should be lled up to the level of the mark.
• Make sure the coee is at the right level after tamping. It
might be necessary to adjust the level a few times using the
dial (B1) before the ideal dosage is achieved.
• If your coee is over or under extracted and the dose is
within the perfect dose range, adjust the grinder settings
ner or coarser (see “4. Making coee”). Over extracted
coee (pouring too slowly) needs coarser grind. Under ex-
tracted coee (pouring too fast) needs ner grind
Tamping pre-ground coee
For preparation with pre-ground coee:
1. add the pre-ground coee into the lter;
2. attach the portalter to the grinder outlet;
3. with the lter-holder attached, lower the tamping lever
(A21) as far as it will go;
4. detach the protalter;
5. press the button for the desired number of cups (1x or 2x).
4.3 Step 3 - Delivery of hot drinks
1. Select the temperature (g. 17) (see “The temperature for
brewing hot drinks”).
2. Select the desired drink (g. 18). If the drink has been pro-
grammed (see section “6. Programming drink quantities”),
the drink light blinks briey.
3. Press OK (B4) to start brewing (g. 8) (pre-infusion and in-
fusion). Delivery of the coee will stop automatically.
The temperature for brewing hot drinks
The temperature of the water is controlled throughout the
preparation process to ensure its stability during extraction.
The Specialista Prestigio oers 3 infusion temperatures* set in
a range between 92 and 96 °C.
Depending on the variety and roasting degree of the beans, a
dierent temperature is recommended: Robusta beans and dark
roast usually require lower temperatures. Arabica beans and
lighter roast usually require higher brewing tempertaures. Use
the table below as reference and adjust to taste
Temperature level Corresponding
indicator
Roast colour
MIN Dark
MED Medium-dark
MAX Light - medium
* This is the temperature of the water in the thermoblock. It
is therefore not the temperature of the drink in the cup or
the temperature of the drink at the moment of release from
the outlets of the portalter.
4.4 Step 3 - Delivery of Cold Brew
• Select Cold Brew (g. 19): the OK indicator (B6) turns blue
to show that a cold drink has been selected.
4. Place 1 or 2 ice cubes in the glass (g. 20).
5. Press OK to begin delivery. Delivery will stop automatically.
Please note:
• The pressure gauge does not swing around to high values:
there is no pressure involved in this preparation.
• Cold Extraction Technology: to ensure best possible re-
sults when preparing Cold Brew drinks, ll the water tank
with fresh drinking water.