EN - 5A-7314
5B
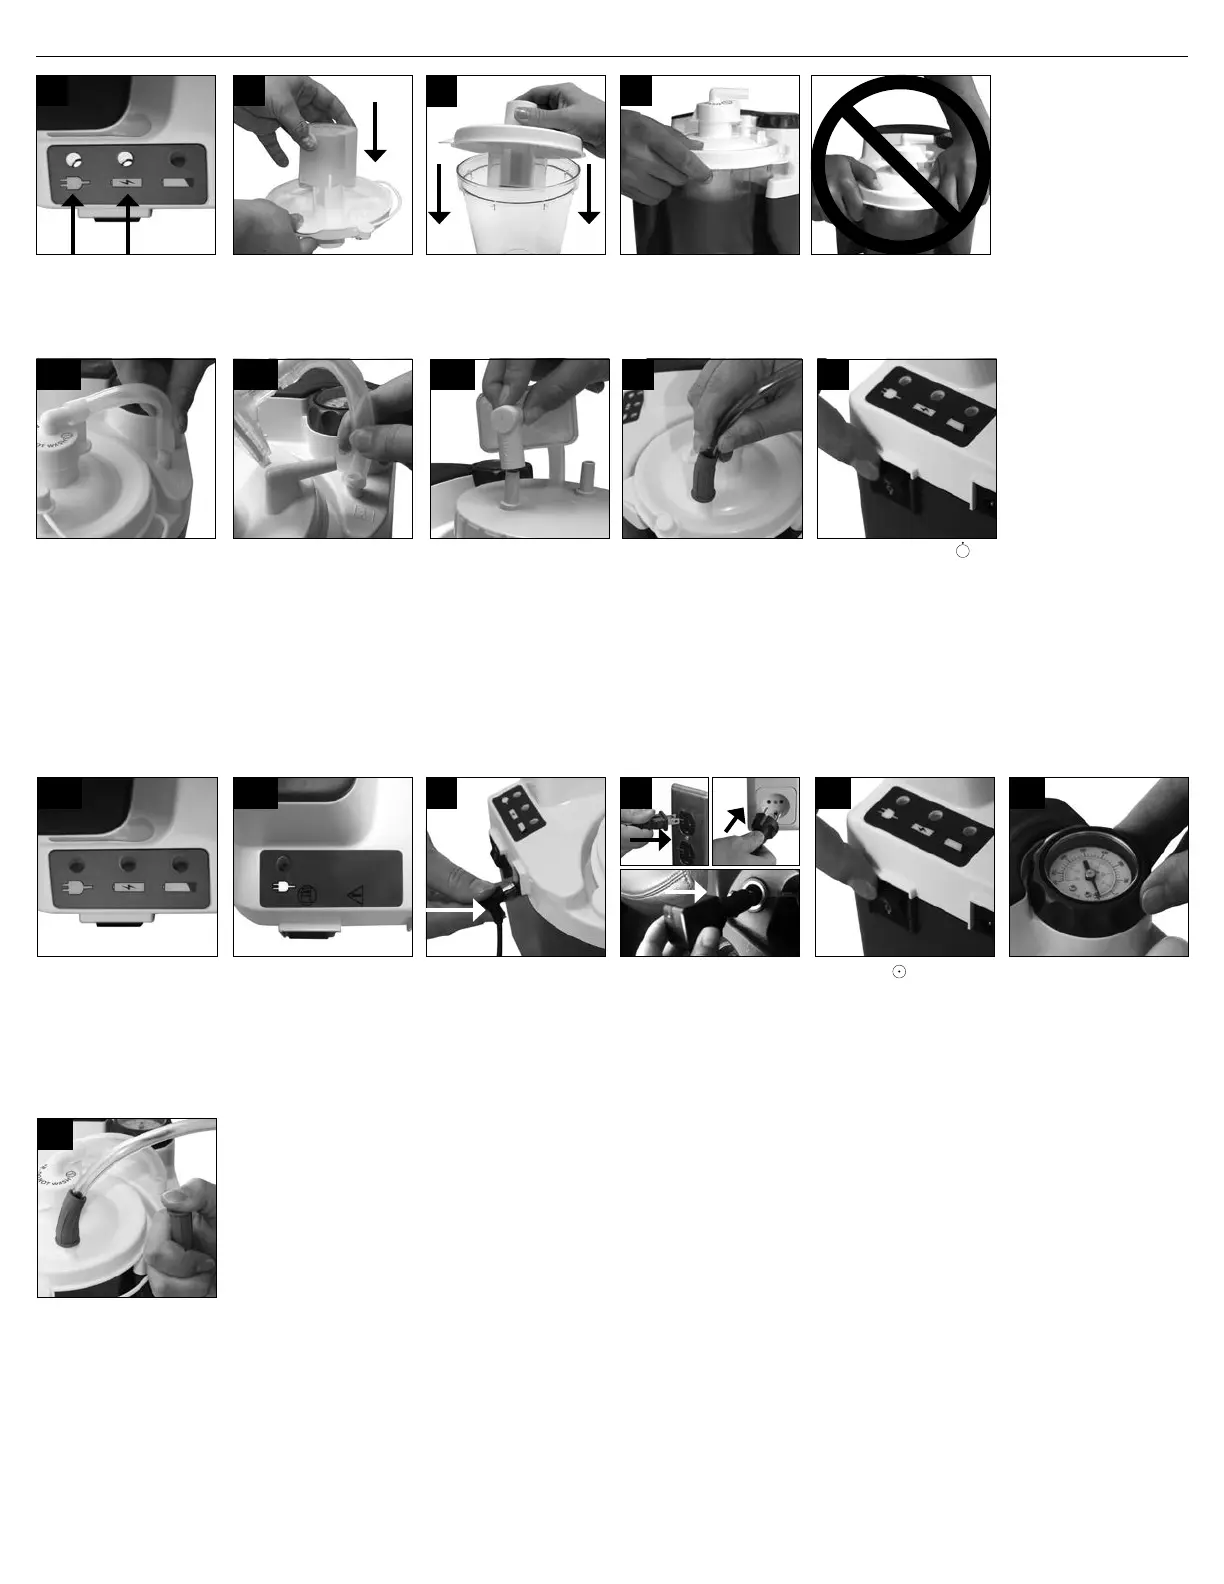
SET-UP & OPERATION
Fully charge battery for 17
HOURS. (7314P series only)
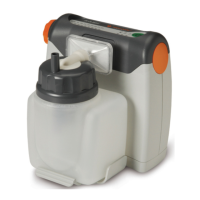
Insert container into holder and gently push into place.
NOTE– Do not use excessive force. Pushing container down
too hard could cause potential leak or loss of suction.
Attach 6’ patient tubing to
container lid at outlet labeled
<Patient>.
Turn the unit “on”.
If using AC or DC power, plug
the small connector into the
DC power input on the side of
unit.
Plug the other end into an AC
wall outlet or DC receptacle.
NOTE– The AC adapter may
become warm to the touch
during charging or running of
the unit. This is normal.
Adjust the suction level.
Verify suction level.
NOTE - Always verify suction
level before beginning by
occluding open end of patient
tubing while observing gauge.
Adjust knob to desired level.
WARNING
If the unit is not receiving power from an external source or the battery was not recharged, the low battery indicator light will remain
on and the performance of the unit will drop off rapidly. Switch to another power source immediately after the low battery light appears
to avoid an interrupted suction procedure.
NOTE– The vacuum (negative) pressure should be set as directed by a physician or other appropriate health care professional. Published expert
consensus suggests the suction vacuum pressure should be set as low as possible to effectively clear secretions.
1
For tracheal and/or
endotracheal suctioning, a vacuum (negative) pressure of less than 100 mmHg in infants, less than 120 mmHg in children and less than 150
mmHg in adults has been recommended.
2
NOTE– Gauge is for reference only. If the unit sustains a severe drop, accuracy of the gauge must be checked.
CAUTION– When automatic oat shut-off is activated, contents of the collection container should be emptied. Further suctioning could cause
damage to the vacuum pump.
CAUTION– Should uid be aspirated back into the unit, equipment provider servicing is necessary as possible vacuum pump damage may
result.
WARNING
This device is rated for intermittent operation use as noted in the specications. Do not operate device with no ow (or suction port
blocked). Continuous operation under this condition may cause the unit to thermal shut off or damage the device.
1
Ensure power switch is “off”.
7
Disposable Container w/
internal lter cartridge
Connection: Attach 4-1/2”
(11.43 cm) tubing from lter
cartridge to tubing connector
on unit.
5A 6
7314P - Select desired power
source.
(Skip step 8 if using
internal battery power.)
7A 8 10 11
12
NOTE–Inspect suction tubing and container for leaks, cracks, etc. and assure that all connections are secure and without leaks before using.
9
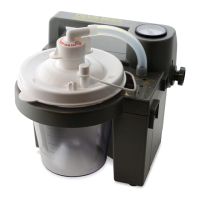
Reusable Container and Disposable Container w/external
Bacteria Filter Connection: Connect either end of the 4-1/2”
(11.43 cm) (reusable) or 3-3/8” (8.57 cm) (disposable) tubing to
the tubing connector then connect the other end to the bacteria
lter. NOTE– If connection tubing in the 22330 Kit is longer than
specied measurements, cut tube to 4-1/2 inches to provide a
good t with the unit. Ensure that the clear side of the bacteria
lter is toward elbow and bottle when installing. Do not reverse
direction of lter. The bacteria lter should then be connected to
the 90˚ elbow connection, and the elbow should be connected
to the top of the container lid where it says <Vacuum>.
5C
7B
NOTE– The 7314D series is not factory equipped with an
internal rechargeable battery. 7314P series is factory equipped
with an internal rechargeable battery and all information
regarding battery operation in this guide is applicable.
7314D series (non-battery
label)
If applicable, ensure splash
guard is securely attached to
inside of lid over lter
cartridge.
4
Securely attach lid to
container.
2
3
1
AARC Clinical Practice Guideline. Endotracheal Suctioning of Mechanically Ventilated Patients With Articial Airways-2020. Respir Care 2010;55(6): 758- 764.
2
AARC Clinical Practice Guideline. Nasotracheal Suctioning-2004 Revision & Update. Respir Care 2004;49(9); 1080-1084