Chapter 5: Working with Pro Tools LE 53
Basic Recording
This section describes how to record audio and
MIDI into Pro Tools LE.
Preparing for Recording
To prepare an audio track for recording:
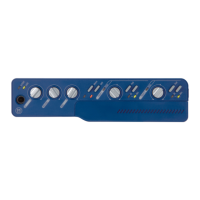
1 Verify the connections to your microphones
or instruments. Refer to Chapter 4, “Mbox 2
Hardware and Connections” for more informa-
tion about connecting microphones or instru-
ments to Mbox 2.
2 Choose Track > New. Specify 1 Mono or Stereo
audio track (depending on your sound source)
and click Create.
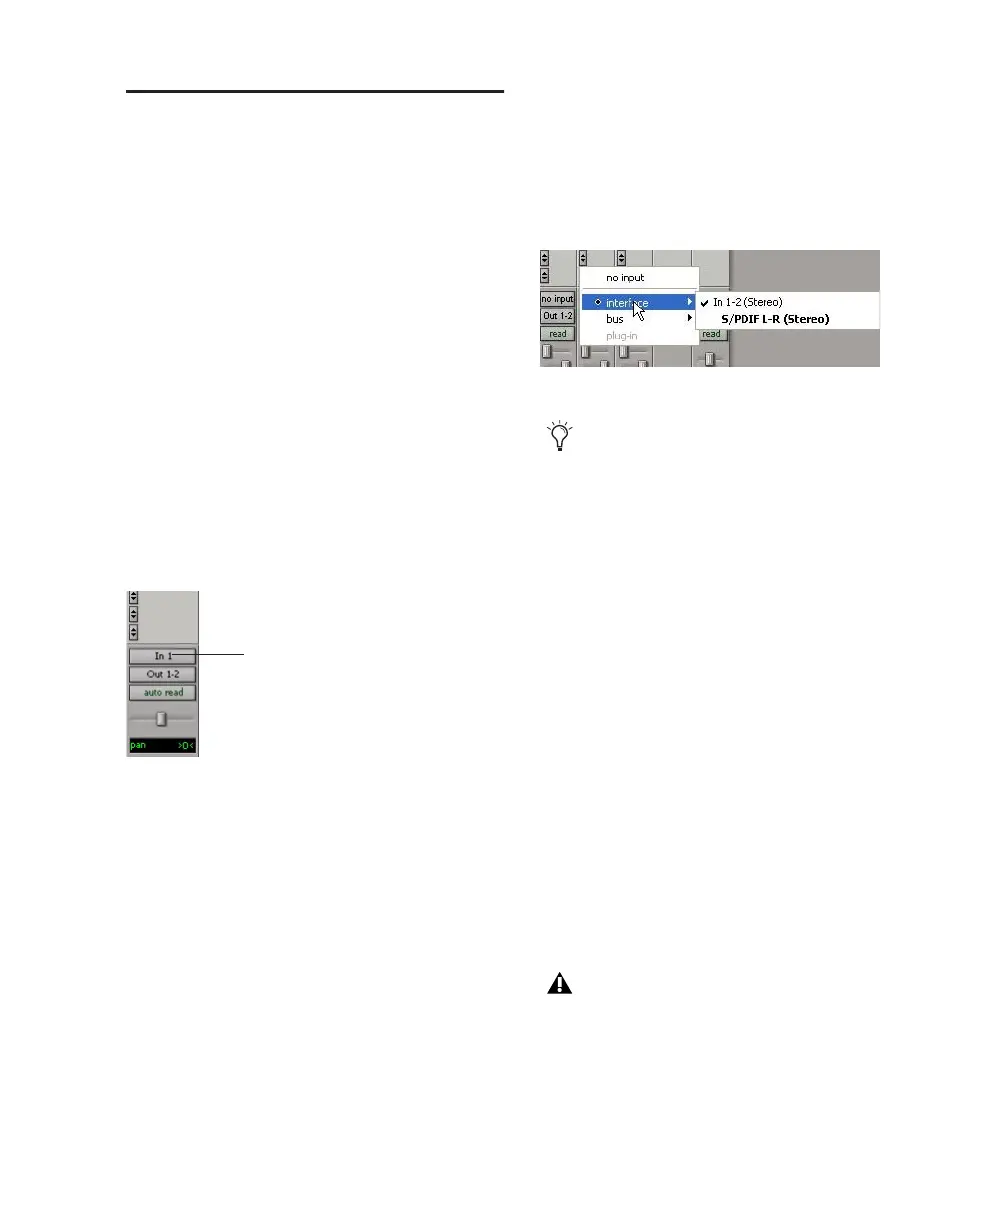
3 In the Mix window, click the Audio Input Path
selector on the new track.
4 From the pop-up menu, select the interface in-
put you want to record. For example, select In 1
if your audio source is plugged into an Input 1
jack on the back of the Mbox 2. Select In 1–2 if
your audio source is stereo and is connected to
Input 1 and Input 2 connectors.
Setting Input Levels
Input levels are adjustable using the gain knobs
on the front of Mbox 2. You can also adjust in-
put signal levels at the source.
When you feed a signal into Pro Tools, make
sure to adjust the input level to optimize the dy-
namic range and signal-to-noise ratio of the re-
corded file. If the input level is too low, you will
not take full advantage of the dynamic range of
your Pro Tools system. If the input level is too
high, the waveform will be clipped, distorting
the recording.
Try to set levels so that they register within the
top 6 dB of the input meter without triggering
the clipping indicator. on your audio interface.
Routing an input to a mono track
Audio Input Path selector
Routing an input to a stereo track
Mbox 2 lets you record as many as four
tracks simultaneously, by creating and as-
signing tracks to analog inputs 1–2 and
S/PDIF digital inputs 3–4 (left and right).
Set input levels to avoid clipping. Clipping
is indicated by the red Peak LEDs on the
front of the Mbox 2, and by the red indica-
tor at the top of each on-screen meter.