Do you have a question about the DigiTech JAMMAN STEREO and is the answer not in the manual?
Essential safety guidelines, electrical hazard warnings, and proper unit care.
Details FCC compliance, interference, and shielded cable requirements for device operation.
Specific safety advice regarding the UK mains plug, fuse replacement, and proper disposal.
Lists product compliance with safety and EMC directives, and manufacturer contact.
Step-by-step instructions for connecting instruments, amplifiers, and the power supply.
Guides users on finding and selecting an unused memory slot for recording.
Explains how to choose the input source (Inst/Mic) for recording.
Details setting input level knobs for optimal signal recording.
Instructions on initiating recording using the REC/PLAY/OVERDUB footswitch.
How to set the loop point and begin playback, adjusting levels.
Steps to stop playback and save the recorded loop to memory.
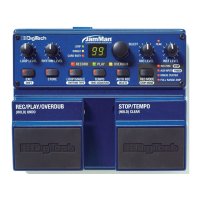
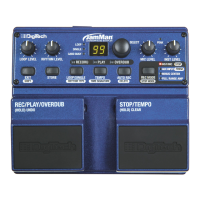
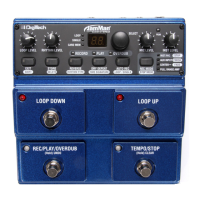
Explanation of input/output level knobs and status indicator LEDs on the unit.
Description of the display screen and the select knob for memory navigation.
Details on setting signal levels for microphone and instrument inputs.
Explanation of LEDs indicating record modes and stop modes.
Functions of the Record Mode and Auto Record buttons, including stop mode selection.
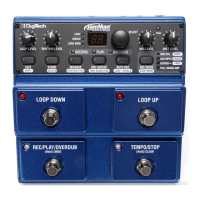
Detailed functions of the main footswitches for loop manipulation and editing.
How to navigate loops downwards and play phrases in reverse.
Operations for saving, deleting, and accessing secondary functions via buttons.
Details on connecting microphones and instruments via XLR and 1/4" jacks.
Information on using the Aux Input for external sources and the Rhythm Output.
Connecting optional footswitches and using SD/SDHC memory cards for storage.
Details on USB connectivity for computer interaction and power adapter connection.
Diagrams illustrating mono and stereo instrument connection configurations.
Examples of connecting for vocal performances and DJ setups.
Illustrations for connecting external music players and backing tracks.
Instructions for reversing the last overdub action or re-applying it.
Procedure to erase current recording or overdubs not yet saved.
Steps to save modifications made to an existing loop memory.
Procedure for duplicating a loop from one memory slot to another.
How to adjust loop tempo while stopped, using tempo tapping.
How to adjust loop tempo during playback, potentially using an external footswitch.
How to switch between continuous looping and one-shot playback modes.
Procedure to format an SD/SDHC card for use with the JamMan Stereo.
Steps to format a card not recognized by the unit, or one with an invalid format.
Details on the functions of the Mode, Down, and Up switches on the FS3X footswitch.
Details on A/D conversion, sampling frequency, file format, and USB connectivity.
Technical details for microphone, instrument, and auxiliary inputs, as well as outputs.
| Type | - |
|---|---|
| Bit rate | 24 bit |
| Proper use | DJ |
| Sample rate | 44.1 kHz |
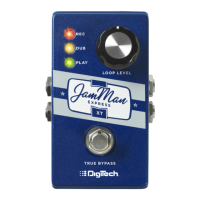
| Product color | Blue |
| Power consumption (typical) | 9 W |
| Depth | 173.73 mm |
|---|---|
| Width | 170.18 mm |
| Height | 73.4 mm |
| Weight | 1006 g |