10
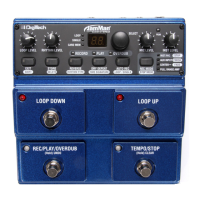
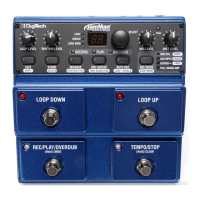
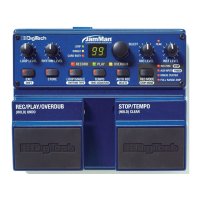
10. Record Mode (Stop Mode) Button
Press this button to select the inputs that are to be recorded: Inst/Mic
or Aux Input with options of Minus Center and/or Full Range Amp
(indicated by the LEDs next to the button).
Press this button while the
button is lit to select one of two Stop
Modes: Stop or Finish (indicated by the LEDs next to the button). For
more information about Stop Modes, see page 25.
11. Auto Record (Delete) Button
Press this button to enable Auto Record. When Auto Record is enabled,
recording begins automatically when you begin your performance.
Press this button while the
button is lit to delete the contents
of the current memory location. For more information about the Delete
function, see page 32.
12. Tempo (Time Signature) Button
Press this button to set or change the loop tempo. If tempo for an existing
loop is changed, the loop plays back at the new tempo without any change
of pitch. See pages 23 and 26 for more information about Tempo.
Press this button while the
button is lit to change the Time
Signature. For more information about Time Signatures, see page 28.
Time Signature can only be changed for a memory location that has
no phrase recorded in it.
13. Stop/Tempo Footswitch
Stops recording, playback and overdubbing of the phrase. It can be used
like the TEMPO button (#12) to set the tempo before recording a loop. Press
and hold this footswitch for two seconds to clear all unstored audio in a
loop.
Guided Tour - Front Panel