`
DN-16032 User’s Guide
P
P
a
a
n
n
/
/
T
T
i
i
l
l
t
t
I
I
P
P
S
S
u
u
r
r
v
v
e
e
i
i
l
l
l
l
a
a
n
n
c
c
e
e
C
C
a
a
m
m
e
e
r
r
a
a
DN-16032 USER’S GUIDE PAGE 11/61 Rev. PV1.0
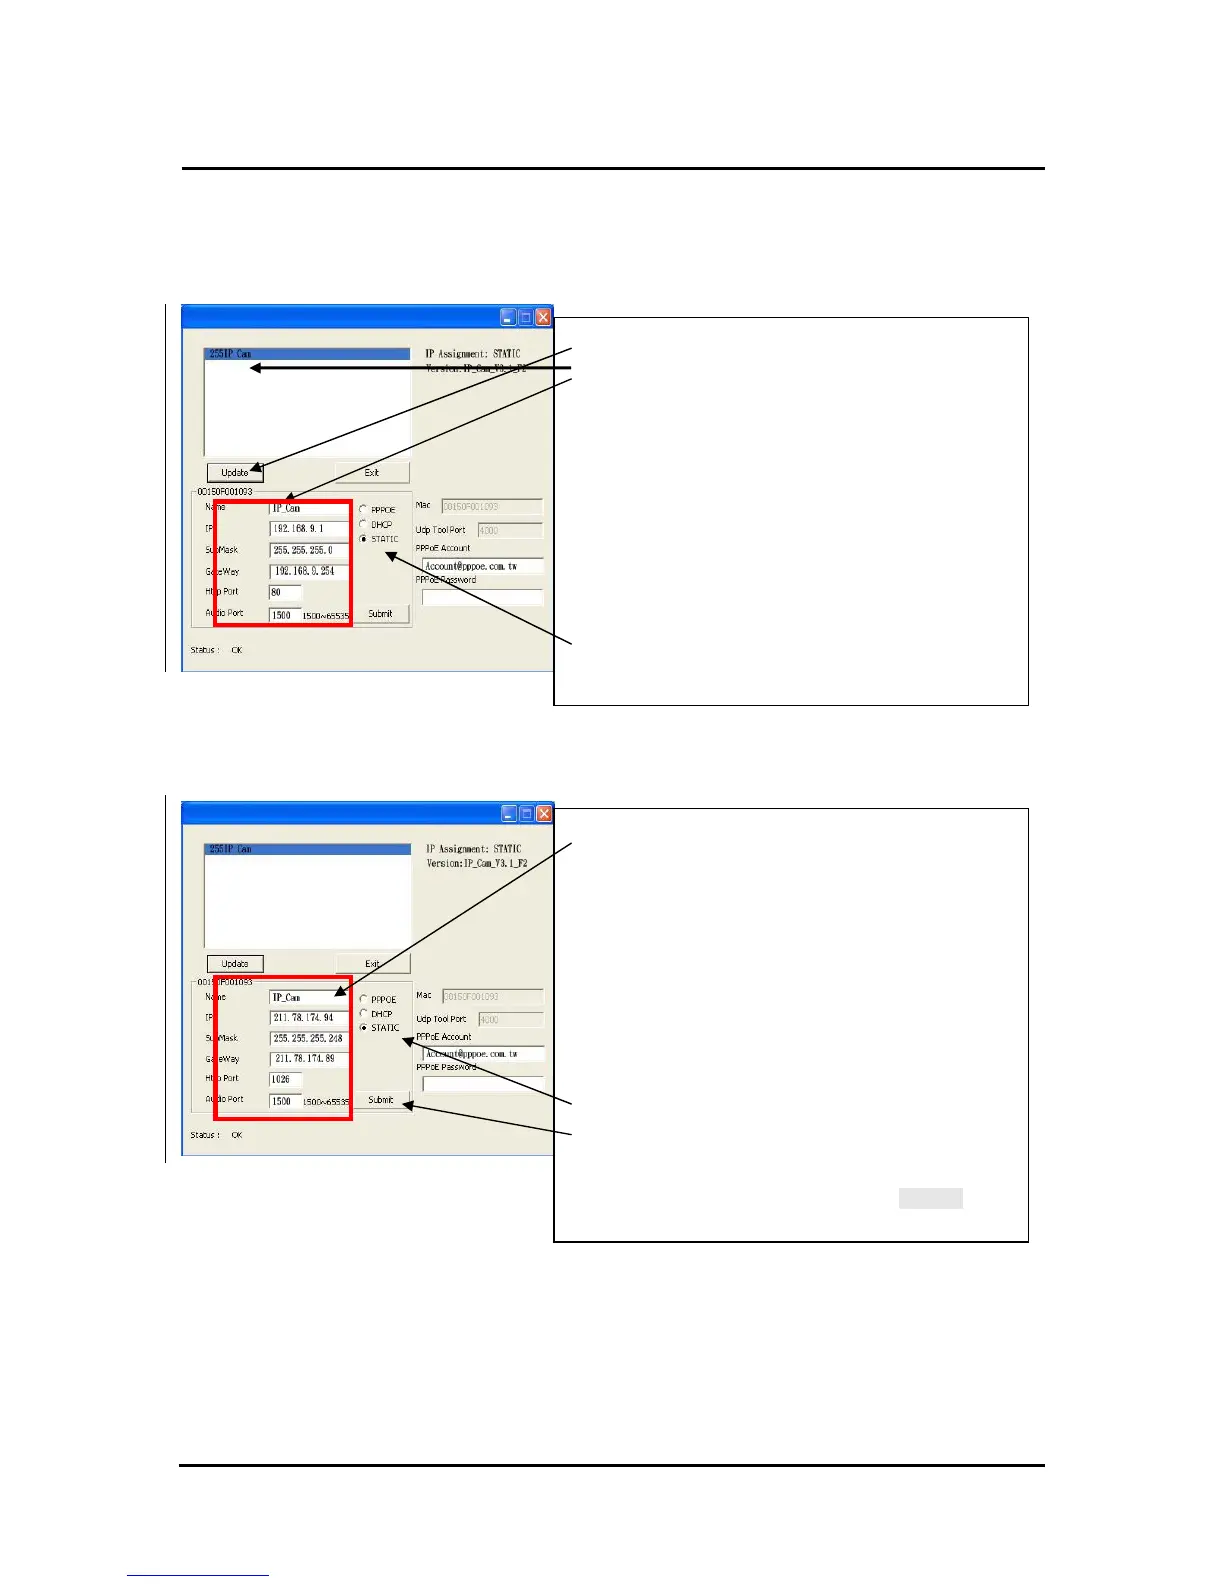
Open and execute CAM_EZ Search (as shown in Figure 3). The system will
scan the IP-CAM that you just installed automatically. Then, you will find
255DN-16032 in the column of Camera Lists. Click 255DN-16032 with left
mouse button. You can see the default settings for IP-CAM.
Figure 3
Fill in Fixed IP Address as below. (If you do not know your fixed IP address,
please contact with your ISP. Below is an example of Fixed IP Address
modification.)
Step 4. Type Fixed IP.
Name : DN-16032
IP : 211.78.174.94
SubMask :255.255.255.248
GateWay :211.78.174.89
HTTP Port:Http communication port. The
default setting is 80.
(If you have multiple IP-CAMs installed in the
same network, you have to divide them
with different Port numbers, e.g, 1025、
1026、1039…..)
UDP Port : UDP Port,Pre-setting is 1500
Step 5. Choose STATIC.
Step 6. After finishing the settings, click Submit. The
network settin
s for DN-16032 IP-CAM will
Step 1. Click Update. You can see 255DN-16032.
Step 2. Click 255DN-16032. You can see
Name : DN-16032
IP : 192.168.9.1
SubMask :255.255.255.0
GateWay :192.168.9.254
HTTP Port:Http communication port. The
default setting is 80.
(If you have multiple IP-CAMs installed in
the same network, you have to divide them with
different Port numbers, e.g, 1025、1026、1039….)
UDP Port : UDP port,Pre-setting is 1500
Step 3. Make sure the IP setting is STATIC.