6
GENERAL TIPS
Only use ltered/decalcied water in this appliance.
Always ensure that the appliance is sitting on a level surface.
If you intend not using the appliance for longer than 2 weeks, remove and empty the sump and water tank.
Once installed, never move this appliance or lay on its back, without draining the water from sump.
CLEANING
Warning – Always press Switch ‘A’ to the ‘OFF’ (0) position (Fig 26) and disconnect from the power supply before
cleaning the re.
We recommend cleaning the following components once every 2 weeks, particularly in hard water areas:
Sump, Nozzle, Tank cap and seal, Air lter
For general cleaning use a soft clean duster – never use abrasive cleaners.
To remove any accumulation of dust or uff, the soft brush attachment of a vacuum cleaner should occasionally be used.
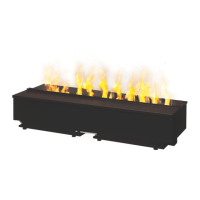
Sump
1. Press Switch ‘A’ to the ‘OFF’ (0) position (Fig 26)
2. Gently lift off the fuel bed and place it aside.
3. Remove the water tank from its position on top of the sump.
Maintenance
3. Press the button on the Button Panel, the LED’s will start to slowly blink on and off.
4. Press the button on the remote control; the product LEDs will ash quickly three times and the product will then
automatically switch off. The remote control is now paired to the product and can be used to switch it back on.
The operation of the remote control is the same as described in ‘Receiver Controls’. You can pair multiple products to the
one remote control by repeating the pairing operation as above on your subsequent products. Please note a maximum
of six CAS500R/CAS1000R products can be paired to the one remote control.
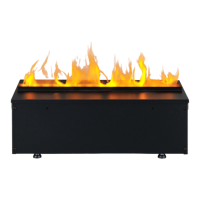
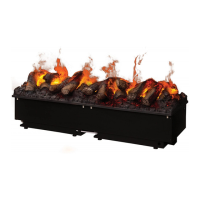
GETTING THE DESIRED FLAME EFFECT
1. Switch the appliance on by pressing the main switch to the on position and pressing the button. The ames will
start after 45seconds.
2. Press the and buttons to adjust the ame to your desired level. Please give the ame generator time to react
to the changes you make.
Once you have made your adjustments to both the ame height and crackling sound, the appliance will keep these
settings even if you power off the appliance by either the on/standby button or by the main switch. The next time you
switch on the appliance, it will start up as normal, wait 45 seconds for the ames to start and then revert to the adjusted
settings.
Nozzle Inserts
Nozzle inserts have been supplied and tted to the nozzle opening. These inserts are used to alter the prole of the
ame effect. These inserts can be removed if a different ame prole is preferred. In addition to these inserts, inserts for
blocking the ame in certain areas have also been supplied. To t these inserts, remove the exisitng inserts that have
been supplied and tted to the product. Break the blocking inserts into the required length. Snap the inserts into the
nozzle opening in the desired location. See Fig 27 for further deatils.
LOW WATER / REFILLING THE WATER TANKS
When the water tanks have emptied and the water level in the product is getting low, the product will ash its LEDs twice
and beep twice. The product will operate for a further 15 minutes before beeping once and switching into low water
mode. For products being operated with the LED log fuel bed, only the fuel bed will remain illuminated while in low water
mode. At this point, the product can either be switched into stand-by mode using the remote control or Bluetooth receiver
or the product can be relled with water. Relling the product with water will cause the product to restart automatically.
To rell the tank, remove the fuel bed and remove the water tank from its position on top of the sump. Rell the water tank
using ltered/decalcied water only. The tank can then be replaced on top of the sump. If the product was not switched
into stand-by mode after experiencing low later, the product will restart automatically after about 20 seconds of relling.
Please note that for a CAS1000R product, the side of the product that is experiencing low water will ash twice and beep
twice. The water tanks on both sides of the CAS1000R product can be relled at this point as it is likely that they should
both be empty or near empty.