9
Installation
units in the same vicinity they will
need to be wired in parallel.
!
NOTE: The Optimyst
®
cassette
is designed to allow for installa-
tion of a wall switch to control the
incoming power to the unit.
4. Connect the black wire (live)
from the unit to the live from the
power supply.
5. Connect the white wire (neutral)
from the unit to the neutral wire
from the power supply.
6. Connect the green wire (ground)
from the unit to the ground wire
from the power supply.
7. Place all connectors inside the
unit and secure the cable clamp
to unit, making sure that the
cable clamp grips only the jacket
of service cable.
WARNING: Ensure the power
wiring is not installed so that it is
pinched or against a sharp edge
and ensure that the power wir-
ing is stored or secured to avoid
tripping or snagging to reduce
the risk of re, electric shock or
injury to persons.
8. Install the unit into the roughed
in framing ensuring that the unit
is resting on two framing sills,
one at the front and one at the
back or a level surface.
9. Level the housing - right to left
and front to back, using the 6
adjustable feet on the bottom of
the unit.
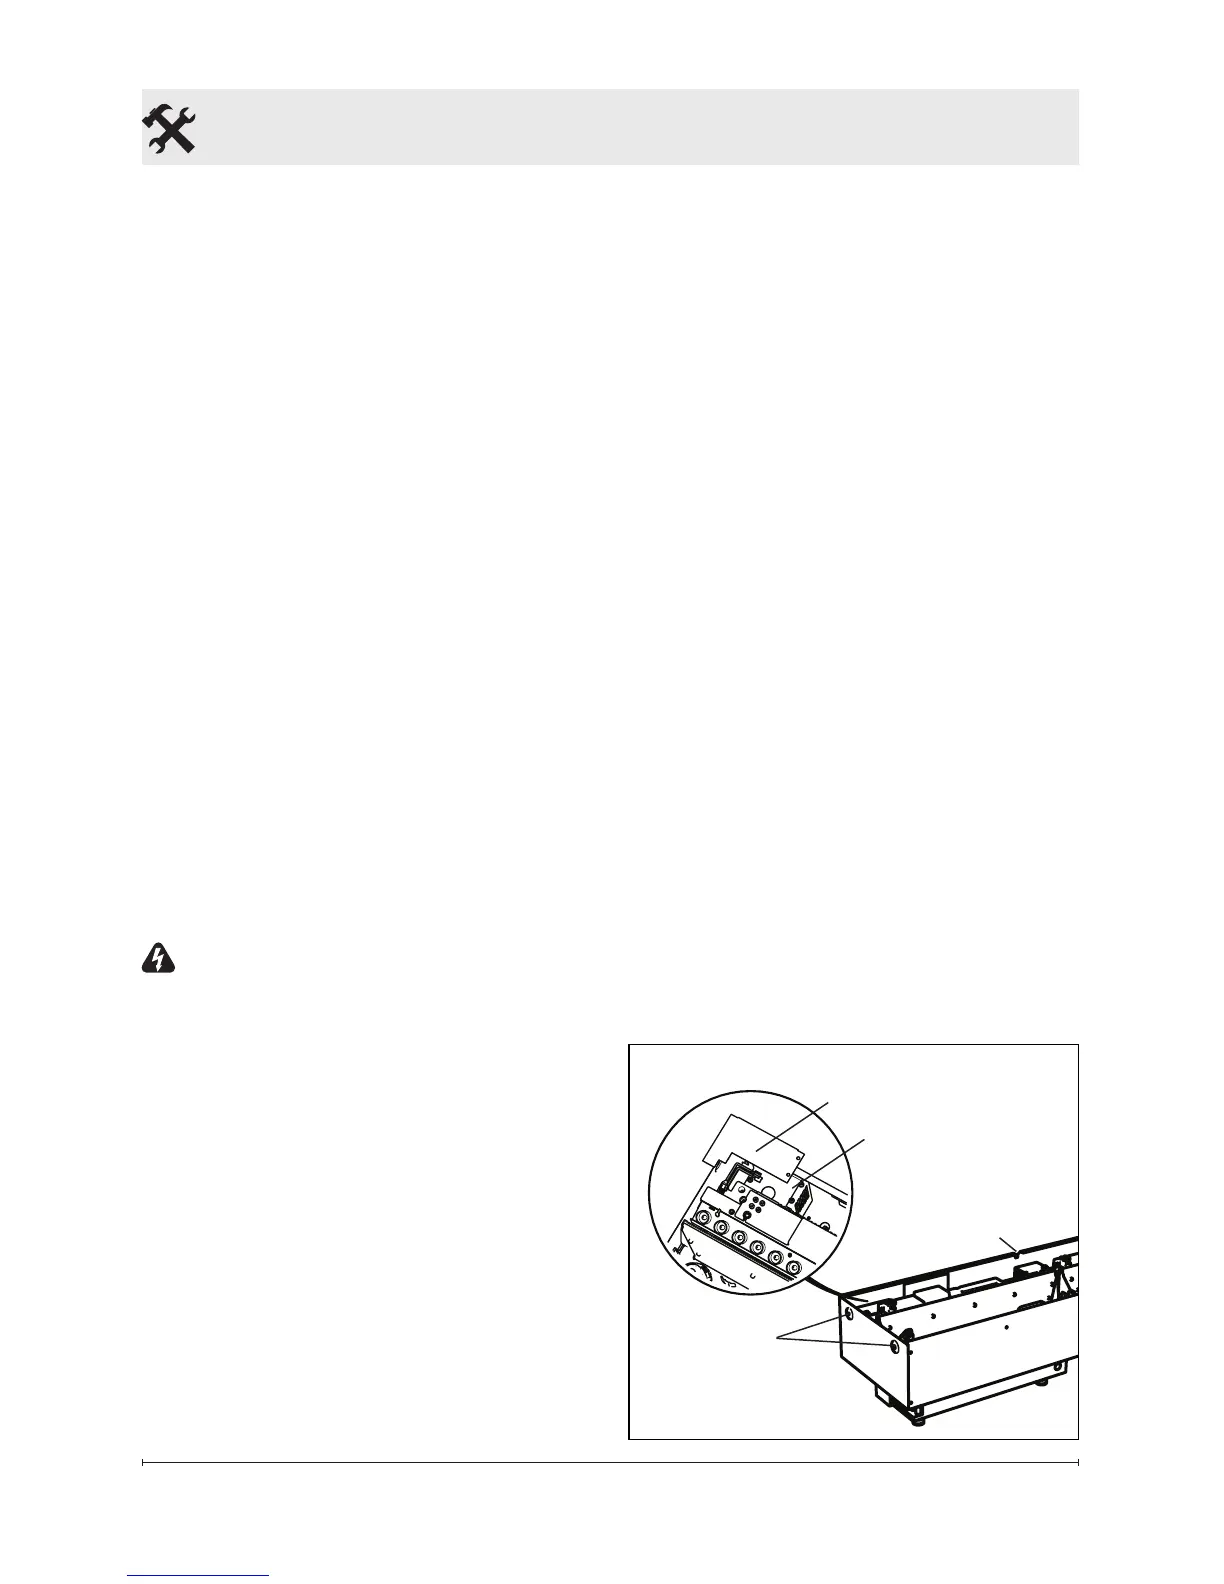
10. Secure the unit to the perma-
nent framing on either end
through a minimum of two holes
(Figure 2).
!
NOTE: An air inlet that is a min-
imum of 72 in
2
(460 cm
2
) is required
for optimum mist production (Figure
3).
Operation Preparation
1. After the surrounding area has
been dry walled and nished,
remove the media plate from the
unit.
2. Install the tethered controller
into the jack on the right hand
side of the unit and run the cord
around the internal components
and out through the small open-
ing in the back panel. (Figure 2)
Figure 2
Cable Plate
Electrical Cover Plate
Holes for
securing to
framing
Cord Outlet
for Tethered
Controller