EasyManua.ls Logo

Dimplex XHD28L - User Manual

Dimplex XHD28L
18 pages
Print Icon
To Next Page IconTo Next Page
Loading...
Owners Manual
IMPORTANT SAFETY INFORMATION:
Read this manual first before attempting to install or use this electric heater. Always comply with
the warnings and safety instructions contained in this manual to prevent personal injury or property
damage.
To view the full line of Dimplex products, visit www.dimplex.com
7216430100R02
Share the warmth and leave a review.
dimplex.com/sharethewarmth
Your input helps to create even better
products and experiences.
We value your feedback!
Models
XHD28L - 6913840259
XHD28G - 6913840559
XHD26L - 6913830259
XHD26G - 6913830559
XHD23L - 6913820259
XHD23G - 6913820559
XHD33L - 6910090259
XHD33G - 6910090559

Other manuals for Dimplex XHD28L

Questions and Answers

  • R
    Randy HowardSep 9, 2025
    Why is the display flashing on my Dimplex Indoor Fireplace?
    • J
      Jacqueline EdwardsSep 9, 2025
      If the display on your Dimplex Indoor Fireplace is flashing, it could be due to a few reasons: * **Loose Wiring:** Check the wiring connections to ensure they are secure. * **Defective Power Supply:** The power supply may be defective and need replacing. * **Defective Main Control Board:** The main control board could be defective and need replacing.
  • L
    Larry SheaSep 7, 2025
    How to fix flame not visible on Dimplex XHD28L?
    • W
      williamkellerSep 7, 2025
      If the flame is not visible on your Dimplex Indoor Fireplace, consider the following possibilities: * **Flame is Turned Off:** Ensure the color theme is not set to t0 (log models only). * **Defective LED Strip:** The flame LED strip may be defective and need replacing. * **Main Control Board:** The main control board could be defective and need replacing.
  • P
    Pamela McbrideAug 22, 2025
    Why does my Dimplex Indoor Fireplace trip the circuit breaker?
    • K
      Kelly BergerAug 22, 2025
      Your Dimplex Indoor Fireplace might be tripping the circuit breaker because additional appliances are exceeding the current rating of the circuit breaker or fuse. Try plugging the unit into another outlet or installing it on a dedicated 15 amp circuit. Another possible cause is a short in the unit wiring, in which case you should trace the wiring in the unit.
  • K
    Kevin SimmonsSep 5, 2025
    Why does the circuit breaker trip when I turn on my Dimplex XHD28L Indoor Fireplace?
    • T
      Tara GonzalezSep 5, 2025
      If the circuit breaker trips or a fuse blows when you turn on your Dimplex Indoor Fireplace, it could be due to two main reasons. First, the current rating of the circuit breaker or fuse might be exceeded by the combined power draw of the fireplace and other appliances on the same circuit. Try plugging the unit into another outlet or installing it on a dedicated 15 amp circuit. Second, there might be a short in the unit's wiring, in which case you should trace the wiring in the unit.
  • A
    Amy ClineSep 4, 2025
    Why is light leaking out around the log set of my Dimplex XHD28L Indoor Fireplace?
    • J
      Jill ZhangSep 4, 2025
      If light is leaking out around the log set of your Dimplex Indoor Fireplace, it's likely that the log set is not positioned properly in the unit. See instructions for replacing the log set and ensure the log set is connected to the base panel.
  • A
    Anna MoyerSep 2, 2025
    Why is the left half of the flame not visible on my Dimplex Indoor Fireplace?
    • D
      Dakota JohnsonSep 2, 2025
      If the left half of the flame is not visible on your Dimplex Indoor Fireplace, it could be due to a broken flicker rod, which would need to be replaced.
  • S
    Sophia CoxSep 1, 2025
    Why is the log set dim on my Dimplex XHD28L?
    • J
      jhughesSep 1, 2025
      If the log set in your Dimplex Indoor Fireplace is dim or not glowing, it could be due to a loose connection, so check wiring connections. It may also indicate a defective log set, which would need to be replaced.
  • J
    Justin BowersAug 31, 2025
    Why does the power cord get warm on my Dimplex XHD28L Indoor Fireplace?
    • S
      Stephanie NelsonAug 31, 2025
      The power cord of your Dimplex Indoor Fireplace might get slightly warm to the touch during normal operation when the heater is on. However, if it seems excessively warm, it could indicate a defective power cord, which would need to be replaced.
  • E
    Elizabeth GatesAug 30, 2025
    Why is my Dimplex XHD28L flame frozen?
    • W
      william18Aug 30, 2025
      If the flame in your Dimplex Indoor Fireplace is frozen, it might be due to a defective flicker motor or a defective main control board. Consider replacing the flicker motor or the main control board.
  • H
    Hannah MaloneAug 28, 2025
    Why is my Dimplex XHD28L display flashing?
    • E
      Emily LiuAug 28, 2025
      A flashing display on your Dimplex Indoor Fireplace could be due to loose wiring, in which case you should check wiring connections. It might also indicate a defective power supply or main control board, requiring their replacement.

Summary

Welcome

Important Instructions

Basic Precautions

General safety guidelines to reduce risks of fire, electric shock, and injury when using the electric fireplace.

Special Precautions

Specific warnings and cautions related to unit operation, battery handling, and high temperatures.

FCC Compliance

Information on FCC rules for digital devices and potential interference with radio or television reception.

Specifications

Electrical Specifications

Details on voltage, amperage, wattage, wiring, and bulb type for the electric fireplace.

Unit Dimensions

Physical measurements (width, height, depth) for different Dimplex fireplace models.

Unit Weight

Weight specifications for various Dimplex fireplace models.

Operating Temperature Range

The recommended ambient temperature range for operating the electric fireplace.

Installation

Placement

Guidelines for positioning the fireplace, ensuring adequate air circulation and avoiding specific locations.

Mounting

Instructions for securing the fireplace unit, especially when installing into mantels or openings.

Grounding Instructions

Essential information on proper grounding to prevent electric shock and ensure safe operation.

Operation

Touch Panel and Remote Controls

Overview of the fireplace's touch controls and the multi-function infrared remote.

Power Control

How to turn the fireplace unit on and off using the controls.

Heat Control

Instructions for activating and deactivating the heating function.

Temperature Control

How to select desired temperature settings and display temperature units (°C/°F).

Flame Speed Control

Adjusting the speed of the flame effect through multiple levels.

Color Themes Control

Changing the media and flame base colors or selecting different themes.

Brightness Control

Adjusting the brightness level of the flame and logs.

Flame Effect Control

Turning the flame effect on and off.

Timer Control

Setting the sleep timer for automatic shut-off.

Temperature Cutout Switch Reset

Procedure to reset the heater if it overheats and shuts off automatically.

Maintenance

General Maintenance

Recommendations for regular inspection, dust removal, and cleaning of the firebox.

Battery Replacement

Step-by-step guide for replacing the battery in the remote control.

Electrical Diagram

Warranty

Two-Year Limited Warranty

Details the duration and scope of the limited warranty for the electric fireplace.

Products Covered by Warranty

Specifies the regions and conditions under which the warranty applies.

Excluded Products

Lists items like light bulbs and products purchased in specific territories that are not covered.

Warranty Coverage Details

Explains what is covered regarding material and workmanship defects for fireplace units and surrounds.

What is Not Covered

Outlines conditions such as misuse, accidents, or unauthorized repairs that void the warranty.

Obtaining Warranty Service

Instructions on how to contact technical service and what information is needed for warranty claims.

Manufacturers Defect Resolution

Describes the manufacturer's options for repair, replacement, or refund in case of defects.

Limitations of Responsibility

Defines what the manufacturer and its agents are not responsible for, including indirect damages.

Applicable Law

Information on how state and provincial laws apply to the limited warranty.

Overview

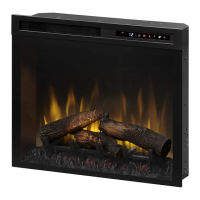
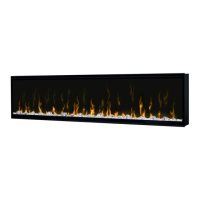
This document is an owner's manual for the Dimplex Electric Fireplace, covering models XHD28L, XHD28G, XHD26L, XHD26G, XHD23L, XHD23G, XHD33L, and XHD33G. It provides essential information for installation, operation, and maintenance of the electric fireplace.

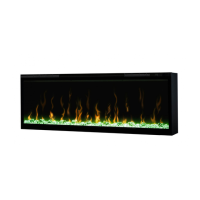
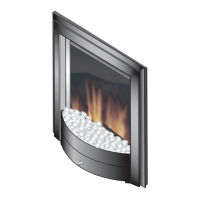
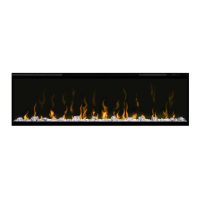
The Dimplex Electric Fireplace offers an alternative to a traditional wood or gas fireplace, designed to give an existing fireplace new life or transform a cabinet or media center into a focal point. It does not require special venting, but proper air circulation is necessary, with at least 1/2 inch clearance behind the unit. It should not be installed directly on carpet or similar surfaces that may restrict airflow. When installing into an existing fireplace opening, all drafts and vents should be sealed with a non-fibrous insulation material to prevent chimney debris from falling onto the unit. It is important not to install the unit into an existing fireplace opening that is prone to dampness.

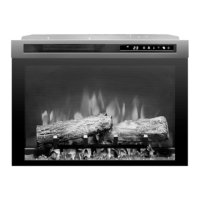
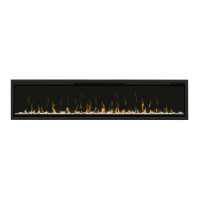
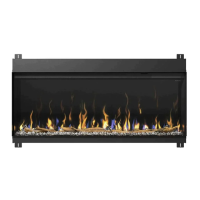
Installation involves placing the unit into an opening with specific minimum dimensions depending on the model (XHD33, XHD28, XHD26, XHD23). For media models, small acrylic crystals are supplied to be dispersed in the media tray, with larger crystals arranged near the flame panel. If using an optional media accessory kit (XHDDW-KIT for XHD26G & XHD28G, or XHDDW-KIT33 for XHD33G), the supplied crystals are omitted, and river rocks are dispersed in the media tray with driftwood arranged on top.

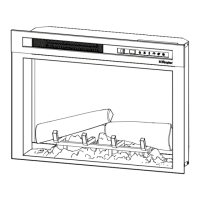
For mounting into a Dimplex mantel, check for holes in the side panels near the top. Align the front of the firebox (without the front glass installed) with the mantel's front face and install provided screws into the front holes on the inside faces of the firebox, aligning with the mantel holes to secure it. If there are no holes, remove the screw on the back bottom flange and use the provided L-bracket to secure the firebox to the mantel. For custom mantels or existing openings, secure the firebox by inserting an appropriate screw through either the front or back hole on the inside face of the firebox, depending on the most suitable location.

The product must be grounded to reduce the risk of electric shock in case of malfunction. It is equipped with an equipment-grounding conductor and a grounding plug. The plug must be connected to a properly installed and grounded 120V outlet in accordance with all local codes. No adapter should be used. Improper connection of the grounding conductor can result in electric shock. If there is doubt about proper grounding, consult a qualified electrician or serviceman. The plug should not be modified; if it does not fit the outlet, a proper outlet should be installed by a qualified electrician.

The fireplace is operated via a hidden touch panel on the front and a multi-function IR (infrared) remote control. To activate the touch panel, touch the hidden control to the right side of the white line; an icon will be selected, and the digital display will highlight the selection. The touch panel returns to a hidden state after 5 seconds. The remote control has a range of approximately 30 ft (9 m) and must be pointed towards the front of the fireplace.

The controls include:

  • Power (Icon A): Press to turn the unit off or on. When off, pressing it turns everything off. When on, pressing it turns the unit on with previous settings. If the flame effect was on, it will turn on, and the previous heat setting will be activated. The display will show the current heater temperature setting and then the room temperature after 2 seconds. If the flame effect was off, the previous heat setting will be activated (on or off).
  • Heat (Icon B): Press to turn heat on (indicated by a short beep). The display will show the current heater temperature setting and then the room temperature after 2 seconds. The Temperature icon is used to change the heater temperature setting. Press again to turn heat off (indicated by a short beep). After the heater is switched off, the fan will continue for 60 seconds before turning off.
  • Temperature (Icon C): Press multiple times to cycle through 12 temperature settings from 62°F to 84°F, and "On" for continuous operation (17°C to 28°C, and "On"). Press once to display the set temperature, which flashes for 3 seconds before displaying the room temperature.
  • Disable Heat: On the touch panel, press the Heat and Temp buttons simultaneously and hold for 2 seconds to disable the heater. Repeat to enable. When disabled, "--" will display when the Temp button is pressed, but other controls operate normally.
  • °C / °F Temp: To change the temperature display between Celsius and Fahrenheit, press and hold the Temp and Flame Speeds buttons simultaneously on the touch panel.
  • Flame Speed (Icon D): Press multiple times to toggle through flame speeds (minimum, medium, maximum), indicated by F1, F2, F3 respectively.
  • Color Themes (Icon E): Press multiple times to change the media and flame base colors. This feature is active only when the flame effect is on. The display will show the theme (t0, t1, t2, etc.). Log unit themes include: t0 (no flame), t1 (Natural, flame base off), t2 (Red highlights), t3 (Orange highlights). Media unit themes include: t0 (Midnight mode), t1 (Media white), t2 (Media red/orange), t3 (Media blue), t4 (Media purple), t5 (Media green), and t0 (Prism mode, which is a color cycle). To choose a custom color, press the Brightness icon, then press again to return to Prism Mode.
  • Brightness (Icon F): Press to change the flame and logs brightness. The display will show b1 (low), b2 (medium), b3 (high).
  • Flame (Icon G): Press to turn the flame effect on. Press again to turn it off. Note that if the flame effect is off while the heat is on, the heat indicator light remains illuminated to show the heat function is active.
  • Timer (Icon H): Press multiple times to change the sleep timer from 0.5 hours to 8 hours before turning off. Press again to display the remaining time. When the timer is active, the timer indicator light illuminates.

Maintenance involves regular inspection of the electric firebox, at least yearly, and cleaning with a damp cloth to remove dust. Except for installation and cleaning, all other servicing should be performed by an authorized service representative. Before any maintenance or cleaning, disconnect power by unplugging the unit and allow the heater to cool to reduce the risk of fire, electric shock, or injury.

The remote control battery (3V Lithium) needs replacement. To do this, push the release tab towards the center and slide the battery cover open. Install the new battery with the positive (+) side facing up, then close the cover. Batteries must be recycled or disposed of properly according to local authority or retailer advice.

Should the heater overheat, an automatic cutout will turn it off. To reset, unplug the unit and wait 5 minutes before plugging it back in. If the heater needs continuous resetting, unplug the unit and contact Technical Support.

The product comes with a two-year limited warranty for products other than fireplace surrounds (mantels) and trims, and a one-year limited warranty for surrounds (mantels) and trims. This warranty applies to the original purchaser and covers defects in material and workmanship. It does not cover light bulbs, products purchased in certain regions (Yukon Territory, Nunavut, Northwest Territories, Hawaii, or Alaska), or defects resulting from misuse, abuse, accident, neglect, incorrect installation, improper maintenance or handling, or operation with an incorrect power source. For service, contact Technical Service with proof of purchase, model, and serial numbers. Glen Dimplex Americas will, at its discretion, repair or replace defective products or parts. For products other than surrounds and trims, on-site or in-home warranty services are provided, with some limitations on travel costs and access. For surrounds and trims, the purchaser is responsible for removal and transportation to and from the service location. The warranty does not cover installation or removal expenses. Glen Dimplex Americas is not liable for indirect, special, punitive, exemplary, consequential, or incidental loss, cost, or damage exceeding the product's purchase price. Some jurisdictions may not allow limitations on incidental or consequential damages. This warranty provides specific legal rights, which may vary by jurisdiction.

Dimplex XHD28L Specifications

General IconGeneral
ModelXHD28L
TypeElectric Fireplace
StyleTraditional
Power SourceElectric
FinishBlack
Remote ControlYes
Volts120V
Watts1500W
HeaterYes
Flame Brightness AdjustmentYes
ThermostatYes
TimerYes
Log SetYes
Heat SettingsHigh/Low

Related product manuals