ECB Series BACnet
®
Controllers
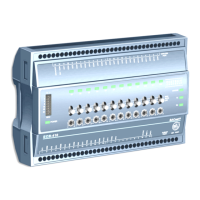
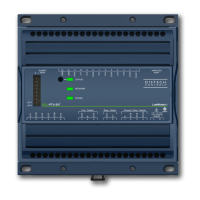
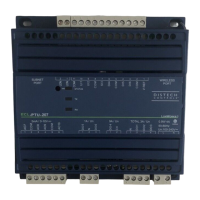
Figure1: From left to right: ECB-650 with operator interface, ECB-410 with HOA, ECB-203
Product Description
This document describes the hardware installation procedures for the ECB Series BACnet controllers.
The Distech Controls ECB Series controllers are designed to control and monitor various HVAC equipment such as roof top units, air handling units as
well as chillers, boilers, and central plant applications. Moreover, these controllers are suitable for any lighting control and power measurement applica-
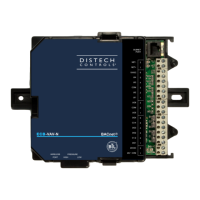
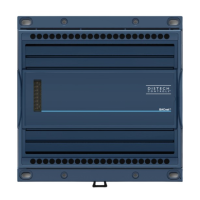
tions. This product line includes the following controllers: ECB‑203, ECB‑300, ECB‑400 Series, ECB‑600 Series.
For controllers equipped with an operator interface (ECB-x50 models), refer to the ECL‑x50 and ECB‑x50 Series Controller User Guide for how to use
the this interface.
The ECB‑600 Series are compatible with the IO Extension Module product line, which includes the following modules: ECx‑400, ECx‑410, and ECx-420
(refer to the ECx‑400 series IO Extension Module Hardware Installation Guide).
Each controller uses the BACnet
®
MS/TP LAN communication protocol.
This document describes the hardware installation procedures for the following controllers: ECB‑203, ECB‑300, ECB‑400 Series, and ECB‑600 Series
controllers only.
£ These controllers are all built on a similar platform, but have different numbers of inputs and outputs. Moreover,
each individual model has different amounts of digital and/or universal outputs. For more information on the
specific layout and functionality of each controller, please refer to their individual datasheets.
£ The following controllers are housed in small enclosures: ECB‑203 Series and ECB‑300 Series.
£ The following controllers are housed in large enclosures: ECB‑400 Series and ECB‑600 Series.
General Installation Requirements
For proper installation and subsequent operation of the device, pay special attention to the following recommendations:
£ It is recommended that the controller(s) be kept at room temperature for at least 24 hours before installation to allow any condensation that may
have accumulated due to low temperature during shipping/storage to evaporate.
£ Upon unpacking, inspect the contents of the carton for shipping damages.
Do not install a damaged device.
£ The device is designed to operate under environmental conditions that are specified in its datasheet.
£ Ensure proper ventilation of the device and avoid areas where corroding, deteriorating or explosive vapors, fumes or gases may be present.
£ Allow for proper clearance around the device’s enclosure and wiring terminals to provide easy access for hardware configuration and maintenance.
£ When installing in an enclosure, select one that provides sufficient surface area to dissipate any heat generated by the device and by any other de-
vices installed in the enclosure. A metal enclosure is preferred. If necessary, provide active cooling for the enclosure.
£ Orient the controller with the ventilation slots and power supply/output terminal block connectors towards the top to permit proper heat dissipation.
£ The device’s plastic enclosure has a back plate that is separable from the front plate allowing the back plates (with the connectors) to be shipped di-
rectly to the installation site while all the engineering is done in the office.
£ The device’s datasheet specifies the power consumption (amount of heat generated), the operating temperature range, and other environmental
conditions the device is designed to operate under.
£ Ensure that all equipment is installed according to local, regional, and national regulations.
£ Do not drop the device or subject it to physical shock.
£ If the device is used and/or installed in a manner not specified by Distech Controls, the functionality and the protection provided by the device may
be impaired.
H a r d w a r e I n s t a l l a t i o n G u i d e