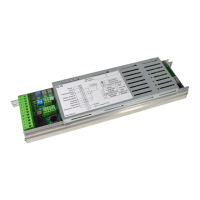
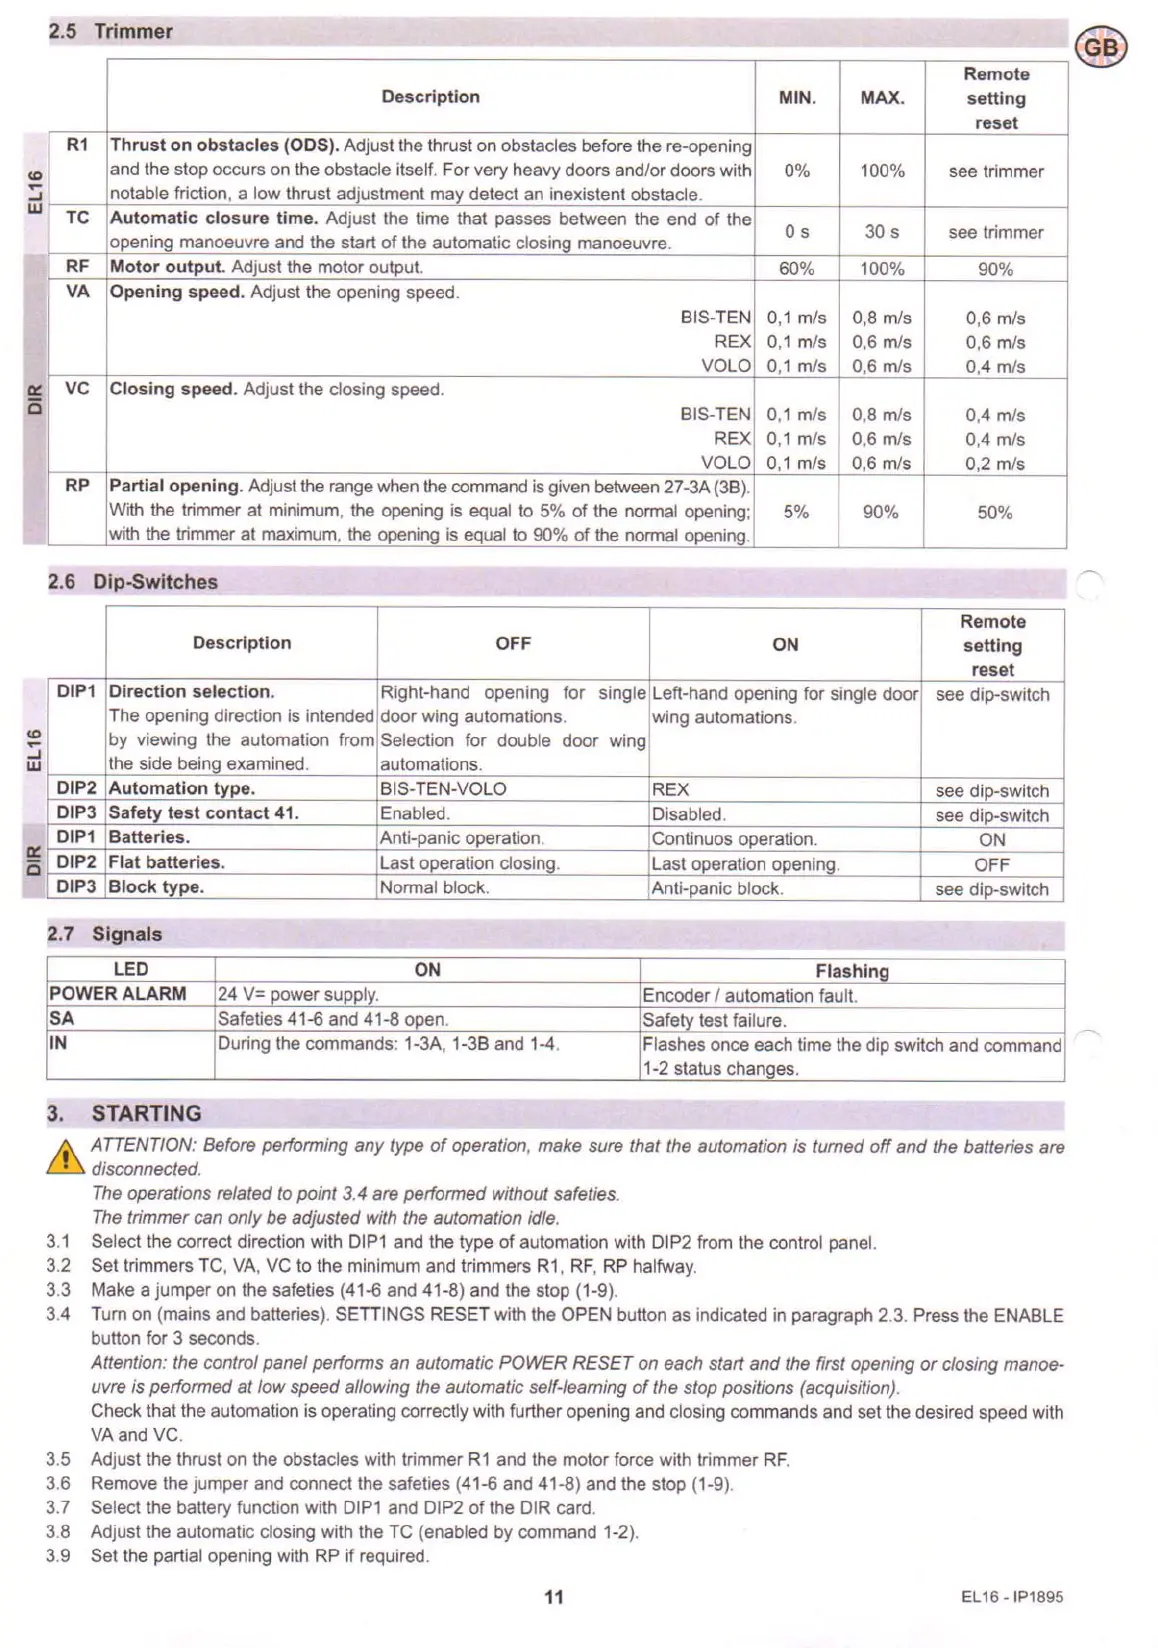
2.5 Trimmer
Remote
Description
MIN. MAX.
selting
reset
R1
Thrust on obstacles (ODS). Adjust the thrust on obstacles before the re-opening
'"
and the stop occurs on the obstacle itself. For very heavy doors andlor doors with
0%
100%
see trimmer
-
notable friction, a low thrust adjustment may detecl an inexistenl obstacle .
...J
w
TC
Automatic closure lime. Adjust the time that passes between the end of the
opening manoeuvre and the start of the automatic closina manoeuvre.
as 30 s see trimmer
RF
Molar oulput. Adjust the motor output.
60% 100%
90%
VA Opening speed. Adjust Ihe opening speed.
BIS-TEN 0,1 mls 0,8 mls
0,6 mls
REX 0,1 mls 0,6 mls
0,6 mls
VOLO
0.1 mls 0,6 mls 0,4 mls
er:
VC
Closing speed. Adjust the closing speed.
0
BIS-TEN
0,1 mls 0,8 mls
0,4 mls
REX
0,1 mls 0,6 mls 0,4 mls
VOLO 0,1 mls 0,6 mls
0,2 mls
RP
Partial opening. Adjust the range when the oommand is given between 27-3A (3B).
With the trimmer at minimum, the opening is equal to 5% of the normal opening;
5%
90%
50%
with the trimmer at maximum, the opening is equal to 90% of the normal opening.
2,6 Dip-Switches
Remole
Description
OFF
ON
selting
reset
DIP1
Direction selection.
Right-hand opening
for single
Left-hand opening for single door
see dip-switch
The opening direction is intended
door wing automations.
wing automations.
'"
by viewing the automation from
Selection for double door
wing
::;
w
Ihe side being examined.
automations.
DIP2
Automation Iype. BIS- TEN-VOLO
REX
see dip-switch
DIP3 Safety lest contact 41.
Enabled.
Disabled.
see dip-switch
DIP1 Balteries.
Anti-panic operation.
Continuos operation.
ON
er:
DIP2 Flat balteries.
Last operation closino.
Last operation opening.
OFF
c
DIP3 Block type.
Normal block.
Anli-panic block.
see dip-switch
2.7 Signals
LED
ON
Flashing
POWER ALARM 24 V- power supplv.
Encoder I automation fault.
SA
Safeties 41-6 and 41-8 open.
Safetv test failure.
IN During the commands: 1-3A, 1-3B and 1-4.
Flashes once each time the dip swilch and oommand
1-2 status changes.
3. STARTING
IZ\,
ATTENTION: Before performing any type of operation. make sure that the automation
is
turned off and the batleries are
~ disconnected.
The operations related to point
3.4
are performed withoul safeties.
The trimmer can only be adjusted with the automation idle.
3.1 Selecl the oorrect direction with DIPl and the type of automation with DIP2 from the oontrol panel.
3.2 Set trimmers TC, VA, VC to the minimum and trimmers Rl, RF, RP halfway.
3.3 Make a jumper on the safeties (41-6 and 41-8) and the stop (1-9).
3.4 Turn on (mains and batteries). SEITINGS RESET with the OPEN button as indicated in paragraph 2.3. Press the ENABLE
button for 3 seoonds.
Atlention: the control panel performs an automatic POWER RESET on each start and the first opening or closing manoe-
uvre is performed at low speed allowing the automatic self-learning of the stop positions (acquisition).
Check that the automation is operating oorrectly wilh further opening and closing commands and set the desired speed with
VA and VC.
3.5 Adjust the thrust on the obstacles with trimmer R 1 and the motor force with trimmer RF.
3.6 Remove the jumper and oonnect the safeties (41-6 and 41-8) and the stop (1-9).
3.7 Select the battery function with DIPl and DIP2 of the DIR card.
3.8 Adjust the automatic closing with the TC (enabled by oommand 1-2).
3.9 Set the partial opening with RP if required.
11
EL16 -IP189S
 Loading...