6
slightly bending sides of the label toward the front of
the vender being careful not to crease the label. Once
inserted, push the label firmly against the front of the
knuckle. This will insure the label is locked in place
and will not fall out during normal operation of the
vend mechanism.
INSTALLING FLAVOR CARDS
For problem free vending, it is necessary to load the
vender consistently with same product every time the
vender is filled. To ensure consistent loading, flavor
cards are included with every vender and should be
installed into the product pusher to designate to the
route driver which product the column is set for.
To install the flavor card, simply detach it from the
sheet at the perforation and slide it into the slots in the
product pusher .
COIN CHANGERS & OTHER
ACCESSORIES
The vender must have an MDB coin changer installed
and can have an MDB bill acceptor installed as well.
If the MDB coin changer and other MDB accessories
are not factory installed, refer to the instructions
received form the manufacturer of the MDB coin
changer and other MDB accessories for proper set-up
and installation.
The vender will support the following Domestic MDB
coin changers:
Coinco 9302GX, USG-701 Quantum
Mars TRC-6510, TRC-6512, TRC-4010
Conlux CCM-5G
The vender will support the following domestic MDB
Bill validators:
Coinco BA-30 B ,BA-50B
Coinco Mag 50
Mars VN 2512
Conlux NBM-3000 Series
The vender will support the following MDB card
readers:
Debitek Danyl Smartcard
Danyl Schlumberger
Diebold Systems
AT&T Campus Wide
VMC LTD
Fage
Jofemar
Evend.net
The above listed peripherals indicate units that have
been tested by Dixie-Narco at the time of printing of
this manual and are not all-inclusive. For information
regarding other types not listed here, please contact
Dixie-Narco Technical Service Department.
SETTING THE TEMPERATURE
CONTROL
This vender is equipped with a manual thermostat. It
is located on the power distribution box inside the
service area. This thermostat is factory pre-set to
maintain a cabinet temperature of 33 to 38 degrees
Fahrenheit (1 to 3 degrees centigrade), however,
occasional adjustment may become necessary. It is
also a good practice to ensure the proper operating
temperature prior to installing the vender on location.
To set the temperature, apply power to the vender
and allow it to run for several hours with the glass
door closed or until the minimum cabinet temperature
is achieved. Then, using one of the methods below,
verify the temperature inside the cabinet:
1. If your vender is equipped with an electronic
temperature sensor, use the keypad on the
service door to show cabinet temperature in
Fahrenheit by pressing the F key followed by
the asterisk (*) key or in Centigrade by
pressing the C key followed by the asterisk
key. The temperature will be shown on the
digital display located on the front of the
service door.
2. If your vender is not equipped with a
temperature sensor, place a thermometer in
the center of the C shelf when vender is first
powered up. Make sure the thermometer is
placed in a location that permits reading the
temperature with the glass door closed. This
will prevent the introduction of warm, ambient
air.
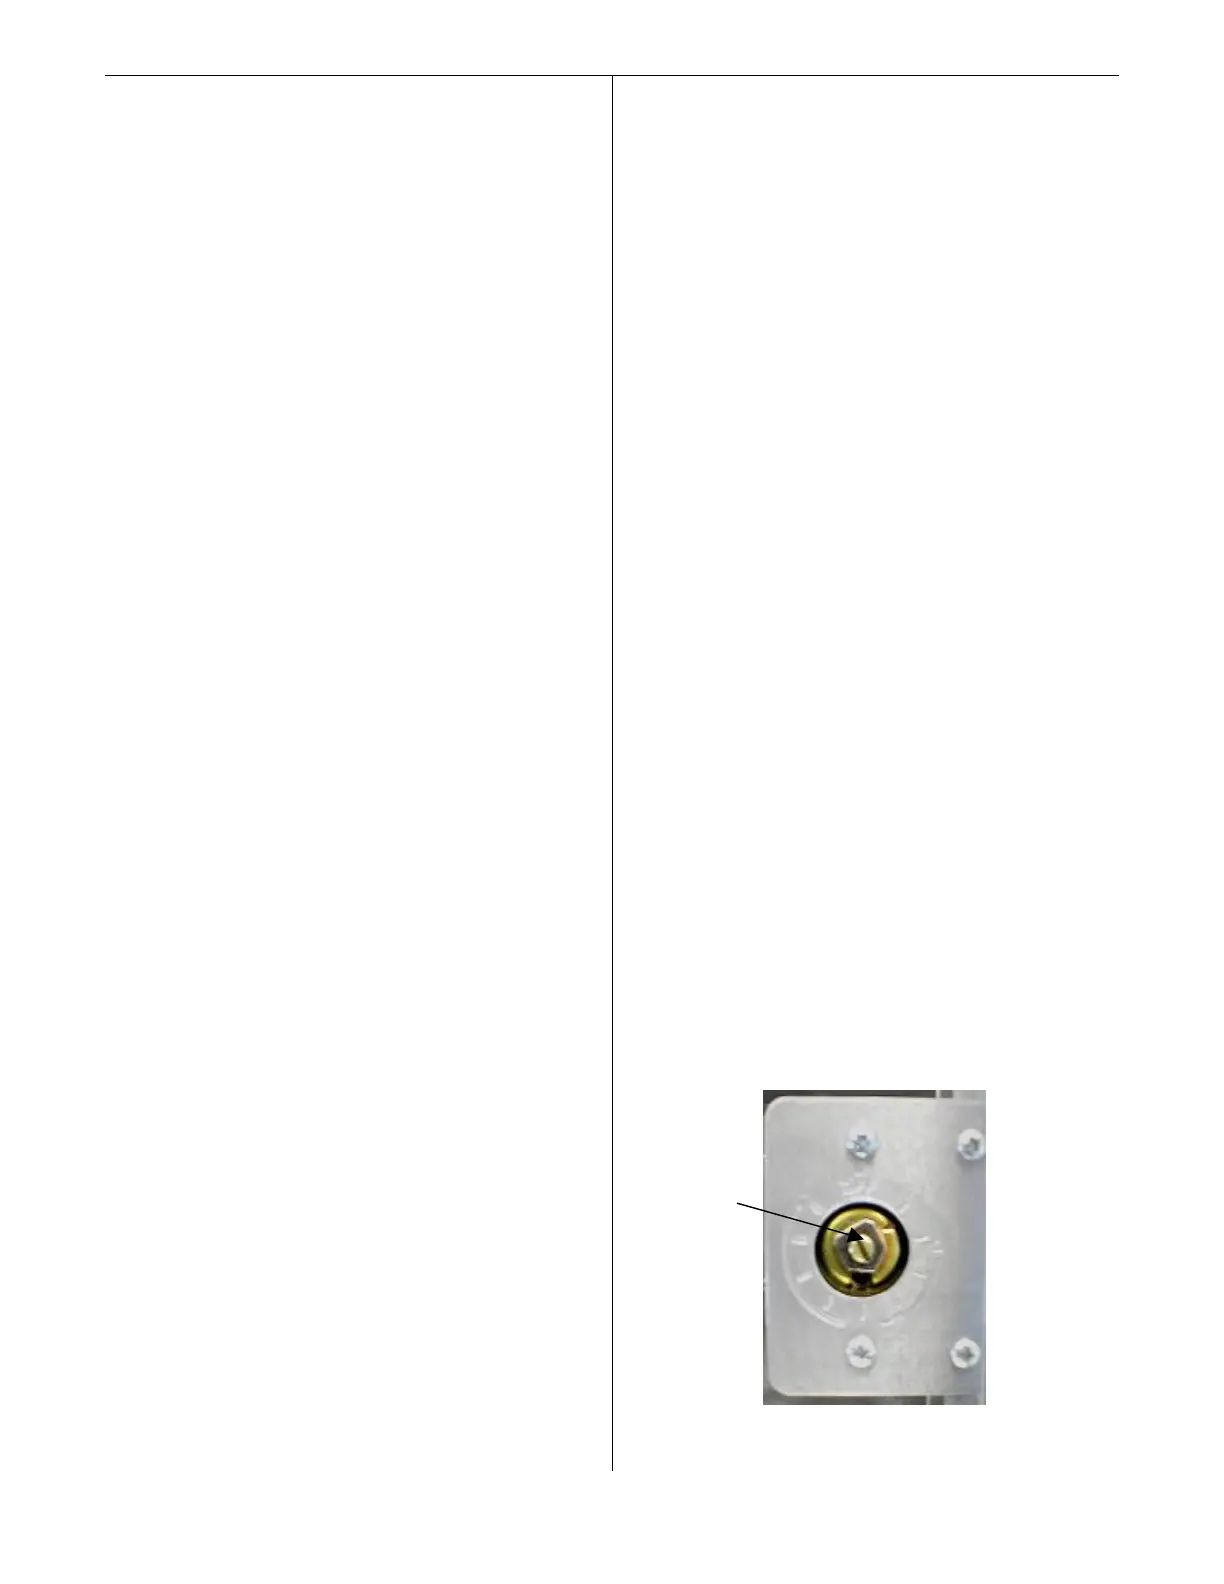
Adjustments are made by turning the screw in the
center of the control (Shown in fig. 1) clockwise for
colder product or counterclockwise for warmer
product. It is recommended that the control screw be
adjusted in very small increments allowing the
refrigeration unit to cycle off and then verifying the
temperature again using one of the methods listed
above prior to further adjustment.
fig. 1
Temperature control adjustment
(Arrow shows location of adjustment screw)