MAVIC 2 ENTERPRISE Advanced
User Manual
©
2021 DJI All Rights Reserved.
39
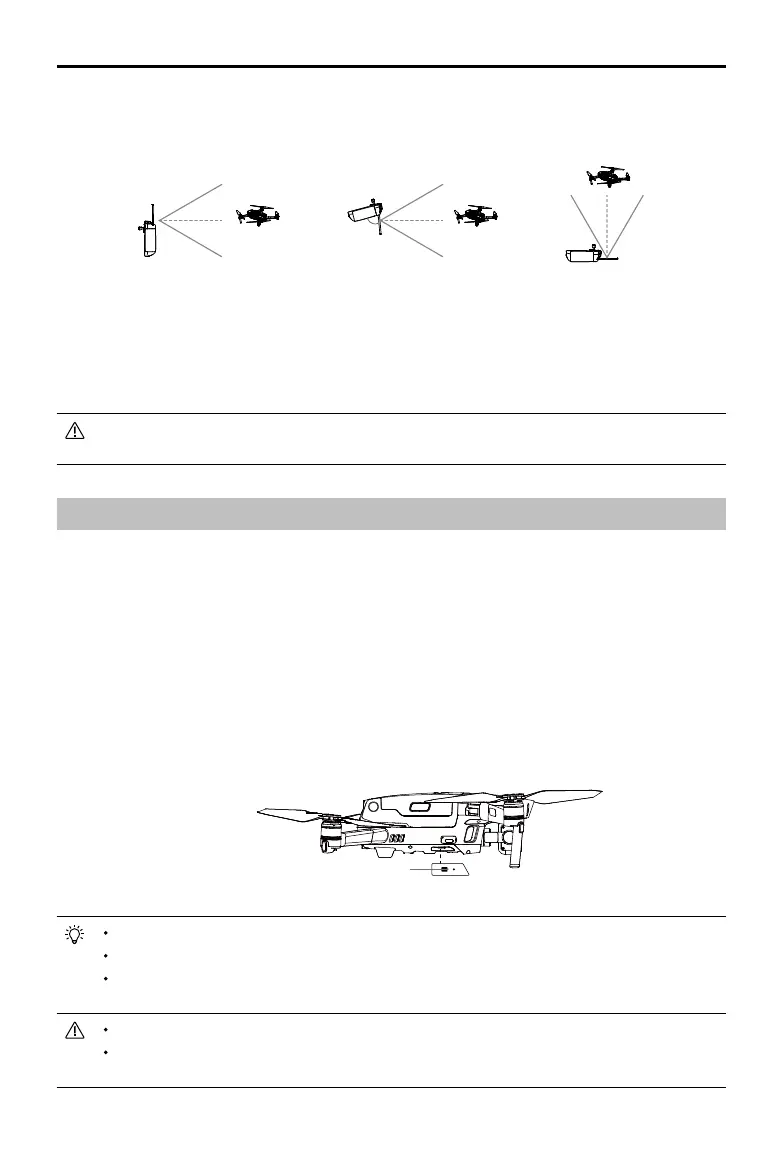
Optimal Transmission Zone
The optimal transmission range of the Smart Controller is shown below:
Link Button
Make sure the remote controller is within 1.6 ft (0.5 m) of the aircraft during linking.
Make sure the remote controller is connected to the internet when logging in using a DJI account.
For more linking methods, visit https://www.dji.com/smart-controller/downloads and download the
DJI Smart Controller User Manual.
Fully charge the remote controller before each ight.
If the remote controller is powered on and is not in use for 5 minutes, an alert will sound. After
10 minutes, it will automatically power o. Move the control sticks to cancel the alert.
80°
Make sure the antennas are facing towards the aircraft. The signal between the remote controller and
the aircraft can reach its optimal performance when the angle between the antennas and the back of
the Smart Controller is 80° or 180°.
Note that the illustrations above do not reect the actual distances between the user and aircraft and
are for reference only.
A warning prompt appears in DJI Pilot if the transmission signal is weak. Adjust the antennas to make
sure that the aircraft is within the optimal transmission range.
Linking the Smart Controller
When the Smart Controller is purchased together with an aircraft, the remote controller has already
been linked to the aircraft, and they can be directly used after activating the remote controller and
aircraft. If the Smart Controller and the aircraft were purchased separately, follow the steps below to
link the remote controller to the aircraft.
1. Power on the aircraft and the remote controller.
2. Press the customizable button C1, C2, and Record button simultaneously. The status LED blinks
blue and the controller beeps twice to indicate the linking has started.
3. Press the linking button on the aircraft. The remote controller’s status LED will be solid green if the
linking is successful.
 Loading...