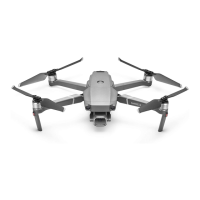
Mavic 2 Pro/Zoom User Manual
24
©
2018 DJI All Rights Reserved.
Free
The aircraft automatically takes photos and generates a timelapse video. Free mode can be used while
the aircraft is on the ground. After takeo, control the aircraft’s altitude, ight speed, and gimbal angle
using the remote controller. Hold the control sticks and accelerate at a steady speed for two seconds
and then press the C1 button. The speed is xed and the aircraft continues to travel at that speed while
taking photos. The orientation of the aircraft can still be controlled during this time. Follow the steps
below to use Free:
1. Set the interval time and video duration. The screen displays the number of photos that will be taken
and how long the shooting time will be.
2. Tap the shutter button to begin.
Circle
The aircraft automatically takes photos while ying around the selected subject to generate a timelapse
video. Circle can be selected to travel in either a clockwise or counter-clockwise direction. Please note that
the aircraft exits from Circle if any command from the remote controller is received. Follow the steps below
to use Circle:
1. Set the interval time and video duration. The screen displays the number of photos that will be taken
and how long the shooting time will be.
2. Select a subject on the screen.
3. Tap the shutter button to begin.
CourseLock
With the Mavic 2 Pro/Zoom, Course Lock can be used in two ways. In the rst way, the orientation of
the aircraft is xed, but a subject cannot be selected. In the second way, the orientation of the aircraft is
xed and the aircraft ies around a selected object. Follow the steps below to use Course Lock:
1. Set the interval time and video duration. The screen displays the number of photos that will be taken
and how long the shooting time will be.
2. Set a ight direction.
3. Select a subject (if applicable).
4. Tap the shutter button to begin.
Waypoint
The aircraft automatically takes photos on a flight path of two to five waypoints and generates a
timelapse video. The aircraft can y in order from waypoint No. 1 to No. 5 or No. 5 to No. 1. Please note
that the aircraft exits from Waypoints if any command from the remote controller is received. Follow the
steps below to use Waypoint.
1. Set the desired waypoints and the lens direction.
2. Set the interval time and video duration. The screen displays the number of photos that will be taken
and how long the shooting time will be.
3. Tap the shutter button to begin.
The aircraft will generate a timelapse video with resolution of 1080p25 automatically, which is viewable
in the Playback menu. You can select to save the JPEG or RAW format footage and to store the footage
in built-in storage or SD card in the camera settings.

 Loading...