18
©
2018 DJI All Rights Reserved.
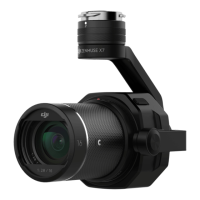
ZENMUSE X7
User Manual
Attach the lens to the Zenmuse X7 after lens dedusting to avoid the performance of the
sensor unit being negatively aected due to air exposure.
If you do not need to use the Zenmuse X7 after lens dedusting, please attach the
camera body cap to the body and power o the aircraft to prolong product service life.
An air blower can also be used to clean the sensor unit. Be extremely careful when using
an air blower. Please contact DJI or a DJI authorized dealer whenever you encounter a
problem when cleaning the sensor unit.
Update Firmware
The firmware of the Zenmuse X7 should be updated together with the Inspire 2. Please make
sure the lens is attached to the Zenmuse X7 before updating.
Method 1: Using DJI ASSISTANT™ 2
1. Power on the Intelligent Flight Battery, and toggle the USB Mode Switch down.
2. Connect the Inspire 2 and the PC via the USB cable (with Double A ports).
3. Launch DJI Assistant 2 and login with a DJI account.
4. Click Inspire 2 and the firmware update button.
5. Select the firmware version required.
6. DJI Assistant 2 will download and upgrade the firmware automatically.
7. Restart the aircraft after the firmware upgrade is complete.
Method 2: Using the DJI GO 4 app
1. Power on the Intelligent Flight Battery, and toggle the USB Mode Switch up.
2. Connect the aircraft and your mobile device via an appropriate USB cable.
3. Follow the on-screen instructions in the DJI GO 4 app to upgrade. Ensure to connect to the
Internet when downloading the rmware.
4. Restart the aircraft after the rmware update is complete.
under any circumstances.
Please follow these instructions to clean the dust:
1. Attach the Zenmuse X7 (lens included) to the aircraft.
2. Power on the remote controller and the aircraft, and then launch the DJI GO 4 app. After
entering the camera page, tap > > Lens Dedusting.
3. A window will appear in the DJI GO 4 app. Tap Start to start. Follow the instructions to detach
the lens. After the system detects that the lens has been successfully removed, tap Start to
continue. The gimbal will start vibrating to remove the dust.
4. After the dust removal process has been completed, please attach the lens back and tap Exit.
5. Finally, check if the sensor unit has been properly cleaned either by visual inspection or by
making a test capture. If further cleaning is needed, repeat the cleaning procedure.
6. If there are still dark or colored spots or lines after carrying out the Lens Dedusting procedure
several times, please contact DJI or an authorized DJI dealer.
 Loading...