ORIENTATION 1
AIR 2
HARDWARE 3
SOFTWARE 4
MAINTENANCE 5
aDV. maINTENaNCE 6
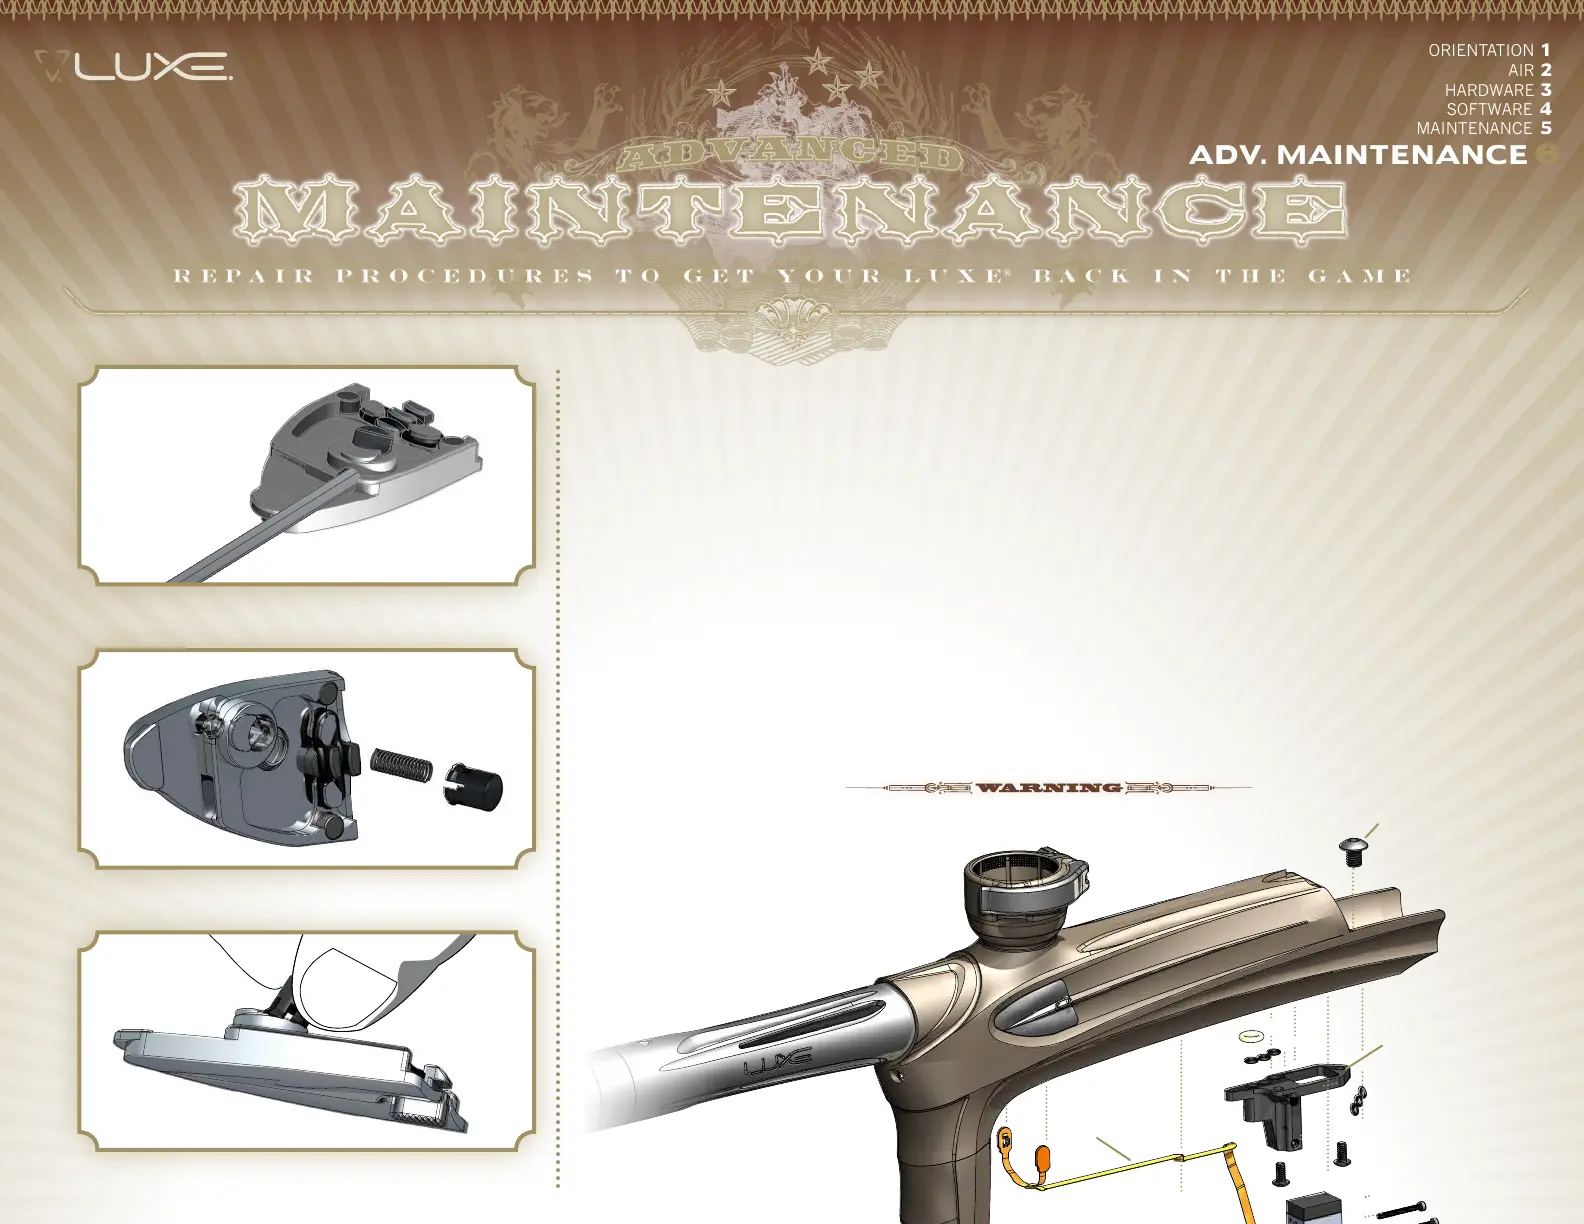
aDVaNCED maINTENaNCE 6.3 BaLL DETENT aSSEmBLIES
IF THE BALL DETENT PLUNGER OR ITS SPRING are worn and need replacing, this is a relatively simple
task. Remove the ball detent assemblies from the Luxe®, and press their plungers in and out. You should
see one of the plunger's fingers moving back and forth across the detent release hole.
Take your 1/16-inch allen wrench, and reach it into the release hole [FIG. 1.] Use the allen wrench to pry
outward on the backside of the ball detent plunger. Once the plunger is popped loose, you may pull it out
of the ball detent cover with your fingers or a pair of needle-nosed pliers. You will probably damage the ball
detent spring in the process, and for this reason it is normal to replace both the plunger and spring at the
same time. If you are careful to not put the wrench in any further than is needed to pry against the closest
edge of the plunger, you can avoid damage to the ball detent spring. Also check the Detent Assembly
tension spring to make sure it is properly seated. Replace if bent or damaged. If, necessary the Quick-Strip
latch may be removed for cleaning by first removing its tension garter spring. Replace the spring if worn.
Carefully clean the ball detent cover with rubbing alcohol and a cotton swab. Install the new ball detent
plunger, with its spring beneath it, into the ball detent cover [FIG 2.] You will need to pinch the plunger’s
fingers inward and wiggle it until it presses inside the cover and latches into place [FIG. 3.] Be careful, and
make sure you are doing this in a clean work area—if you slip, the spring can jump away from you, and it is
much easier to find on a clean work table.
FIG. 3
FIG. 2
FIG. 1
1
3
2
THE BALL DETENT PLUNGERS ARE
MADE OF SELF-LUBRICATING MATE-
RIAL. DO NOT USE GREASE,
OIL OR OTHER LUBRICANTS ON
THEM.