3
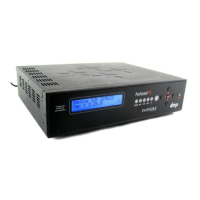
Connecting your ProFusion iS to your amplication equipment:
Always connect audio and video cables prior to powering on your ProFusion iS
• Turnvolumeonyouramplicationequipmentcompletelydownandthenturnpowerobeforeinstallingyour
ProFusion iS.
• OnlyplugyourProFusioniSpowersupplyintoaproperlywiredoutletwhichisingoodworkingorder.Useof
switched outlets, power strips and extension cords should be avoided.
• Toavoidbeinginadvertentlypoweredo,neverplugyourProFusioniSintoaswitchedoutlet.
Connecting ProFusion iS to Your Amplication Equipment:
STEP 1 Connect the white RCA plug of the audio cable into the RCA jack labeled Zone1/L on the rear panel
of your ProFusion iS. Connect the other white end of the RCA cable into the corresponding input of
your amplication equipment.
Note: If your ProFusion iS is congured for a single mono zone, use only the RCA jack labeled Zone
1/L to feed your amplication equipment. The RCA jack labeled Zone 2/R is active only when the
ProFusion iS is congured to provide a single stereo zone or two mono zones.
STEP 2 If your ProFusion iS has been congured with one stereo zone or two mono zones, connect the red
RCA plug of the audio cable to the RCA jack labeled Zone 2/R on the rear panel of your ProFusion iS.
Connect the other red end of the RCA cable to the appropriate input of your amplication equip-
ment.
Connecting ProFusion iS to Your Network
Connecting your ProFusion iS to your company’s network:
STEP 1 Connect one end of a CAT5 Ethernet cable to the Ethernet port located on the rear panel of your Pro-
Fusion iS.
STEP 2 Connect the other end of the CAT5 Ethernet cable to your network equipment (router, hub, or
switch).
It is highly recommended that a connectivity test is performed after changing any network
settings. See Testing the Network Settings for instructions.

 Loading...