10 DR
®
PREMIER 26" ALL-TERRAIN MOWER
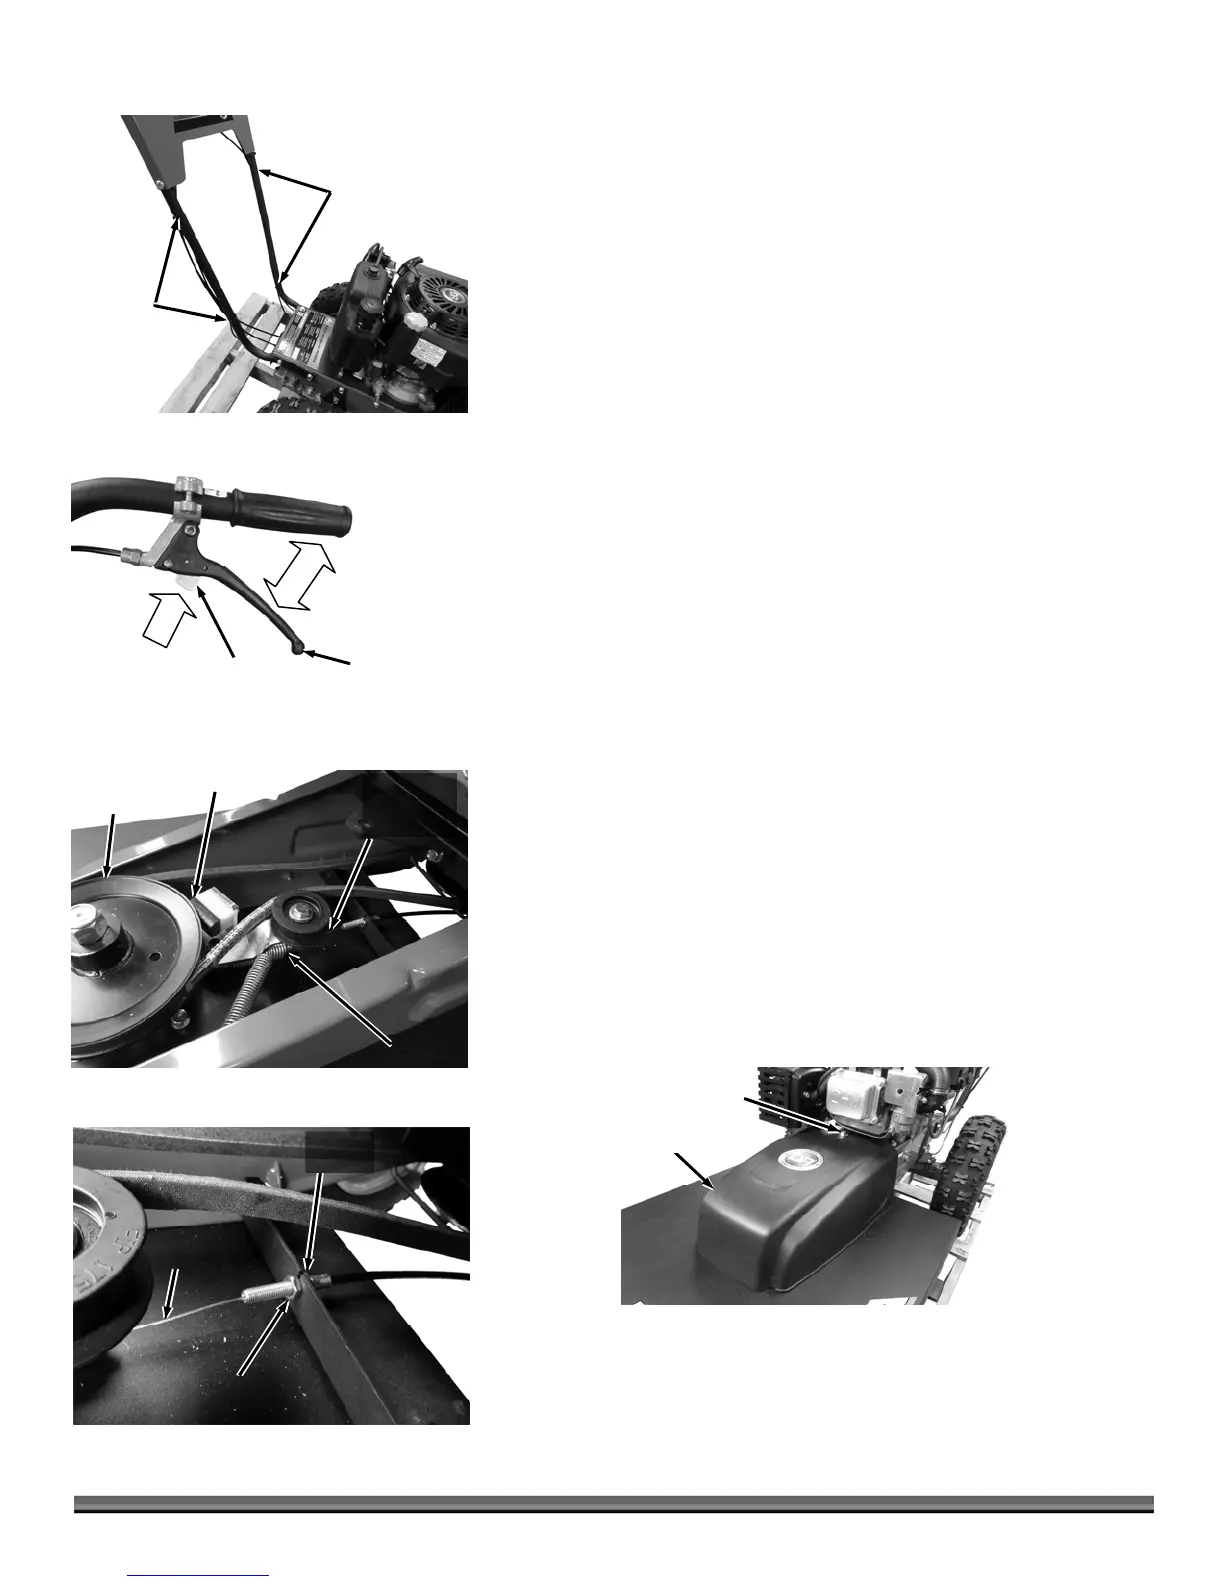
4. Secure the Cables to the Handlebars with the Cable Ties (Figure 5). Cut off
the excess from the Cable Ties using the Wire Cutters.
Note: Because the Handlebars came uninstalled from the factory, the Blade Engage
Cable should be checked/adjusted before you use your Brush mower. Please perform
the following steps before using your machine.
5. Press the Lever Lock (1), pull and release the Blade Engage Lever a few times
(2), then fully release the Blade Engage Lever
(Figure 6).
6. With the Blade Engage Lever released, ensure that the Brake Pad is resting
against the Blade Pulley and that the Cable/Spring end of the Blade
Engagement Cable is sagging slightly
(Figure 7).
7. Pull the Blade Engagement Lever as far as it will go towards the Handlebar.
The Brake Pad should not be touching the Pulley and the Belt should be
tightened around the Pulleys.
8. If the Cable was not adjusted as described in steps 6 and 7, perform the
adjustment described in step 9. If the Cable performs as described and is
adjusted correctly, Continue to step 10.
9. Adjusting the Blade Engage Cable: To Loosen the Cable – loosen the rear
Jam Nut slightly and tighten the front Jam Nut using a 1/2" Wrench
(Figure
8
). To Tighten the Cable – loosen the front Jam Nut slightly and tighten the
rear Jam Nut using a 1/2" Wrench
(Figure 8).
10. If the Blade Engage Cable is adjusted properly, position the Belt Guard and
secure with the 3/8-16 X 1.5" Flange Bolt using a 9/16" Wrench
(Figure 9).
Continue to the next page for more important information on how to set up the
machine.
Figure 6
Blade
Engagement
Leve
Lever Lock
1
2
Belt
Guar
Figure 9
Bolt
Rear Jam
Nut
Figure 8
Front Jam Nut
Blade Engage
Cable
Blade Pulley
Figure 7
Brake Pa
Blade
Engagement
Cable
S
rin
En
Cable Ties
Figure 5
Cable Ties