CONTACT US AT www.DRpower.com 21
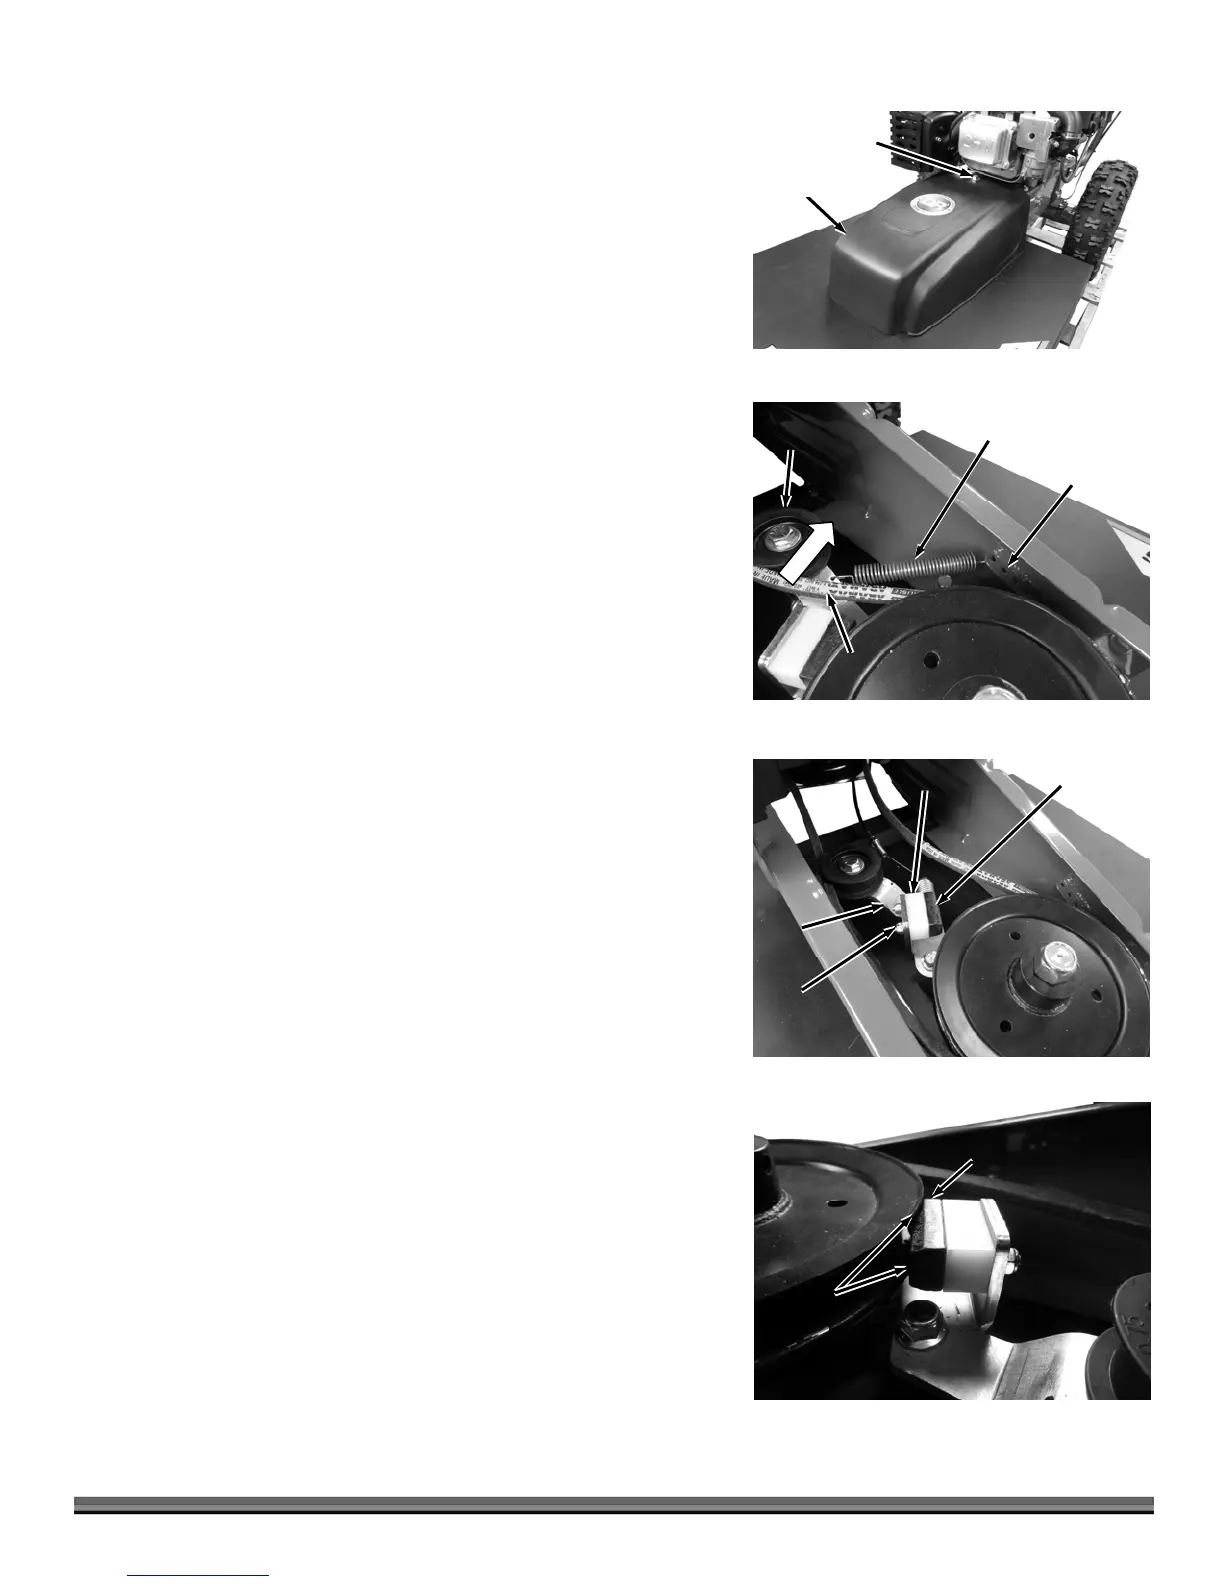
Changing the Blade Pulley Brake Pad
Tools needed:
9/16" Wrench
3/8" Wrench
1/8" Allen Wrench
1. Remove the Belt Guard by unscrewing the Bolt using a 9/16" Wrench
(Figure 27).
2. Unhook the end of the Brake Spring where it attaches to the Spring Bracket
(Figure 28).
3. Move the Belt to the outside of the Idler Pulley.
4. Remove the Brake Pad and Spacer using a 3/8" Wrench for the Nuts and
1/8" Allen Wrench for the Bolts (Figure 29).
5. Install a new Brake Pad with the Spacer and tighten the hardware tight
enough that it stays in place but can be forced up or down as needed for
adjustment.
6. Rotate the Idler Arm so the Brake Pad contacts the Blade Pulley. Adjust the
Pad up or down to fit into the groove of the Pulley so there is equal contact
on top and bottom of the Pad (Figure 30).
7. Rotate the Idle Arm out and fully tighten the Bake Pad hardware.
8. Move the Belt to the inside of the Idler Pulley and Hook the Bake Spring to
the second hole in the Spring Bracket.
Note: Do not use the first hole in the Spring Bracket. We recommend you install
the Brake Spring into the second hole for the proper tension. The other
(further) holes can be used to create even better Blade Braking but will
increase the force needed to operate the Blade Engage Lever.
9. Reinstall the Belt Guard when Brake adjustment is complete.
Belt
Guar
Figure 27
Bolt
Brake
Spring
Figure 28
Idler
Pulley
Belt
Spring
Bracket
Brake Pad
Figure 29
Spacer
Hardware
Idler
rm
Blade
Pulley
Brake
Pad
Figure 30
Blade
Pulley
Contact