CONTACT US AT www.DRpower.com 19
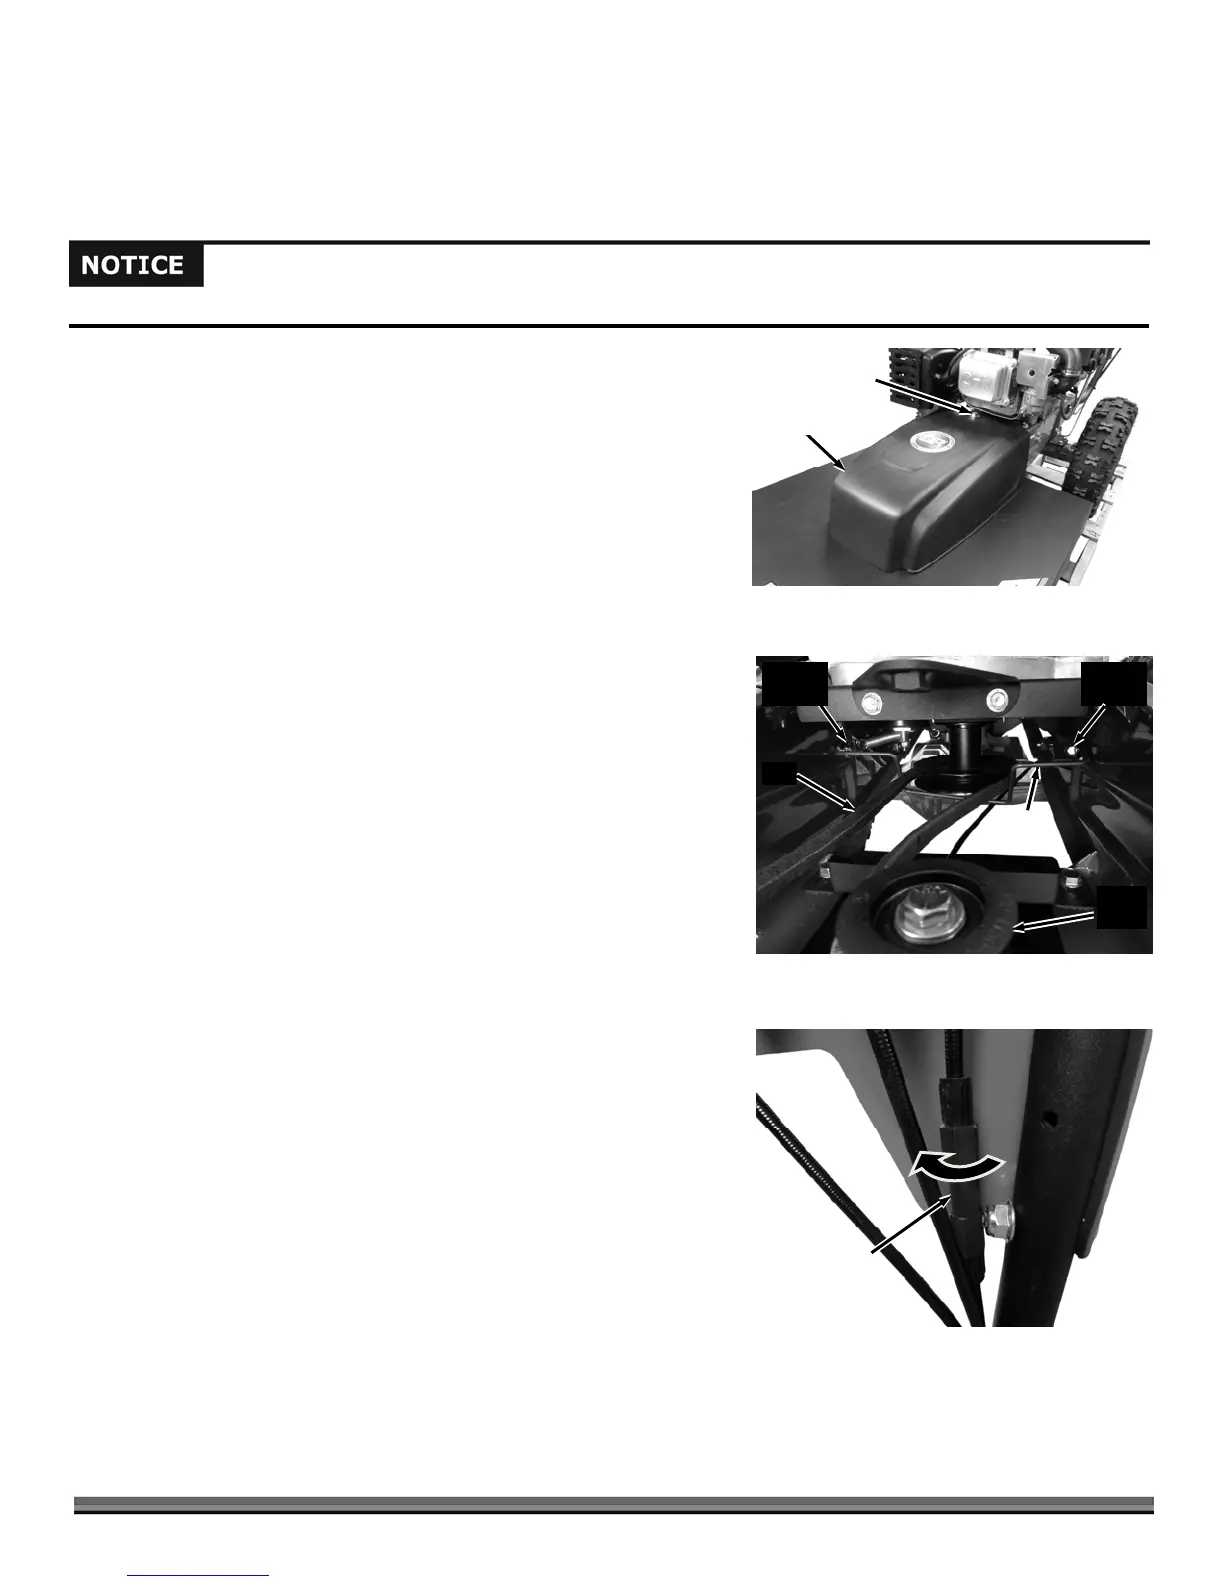
Replacing the Blade Belt
Tools and Supplies Needed:
Two 9/16" Wrenches
Gloves
1. Remove the Belt Guard by unscrewing the Bolt using a 9/16" Wrench
(Figure 21).
2. Remove the Bolt and Locknut at one side of the Belt Guide using two 9/16"
Wrenches (Figure 22).
3. Loosen the Bolt and Locknut at the other side of the Belt Guide using two
9/16" Wrenches until the Guide lowers enough to get the Belt off the Pulley.
4. Remove the Belt from the Deck and Engine Pulleys.
5. To install the new Belt, follow the above procedures in the reverse order.
Note: Make sure to route the new Belt on the inside of the Idler Pulley as shown in
Figure 22.
Adjusting the Traction Drive Cable
The Drive Belt will stretch a little when new, then more over time. If the Wheels
don’t turn with the Traction Drive Lever engaged, adjust the Traction Drive
Cable to put more tension on it. The Adjuster is located on the Cable itself.
1. Locate the Traction Drive Cable along the right Handlebar (behind the
Operator Panel. There is an In-Line Adjuster to change the tension on the
Cable (Figure 23).
2. You can take the slack out of the cable by rotating the body of the In-Line
Adjuster in the clockwise direction as you look down on the cable. If the
Cable is too tight, you can loosen the Cable by twisting the adjuster in the
opposite direction.
Belt
Guide
Figure 22
Bolt and
Locknut
Bolt and
Locknut
Belt
Idler
Pulley
In-Line
Adjuster
Clockwise
to tighten
Figure 23
Belt
Guar
Figure 21
Bolt
Use only DR belts on your machine. They have been thoroughly tested and proven for many hours of use