DR
®
TRIMMER/MOWER
™
Assembly & Operating Instructions 4
Note: Priming is usually unnecessary when restarting a warm engine. In cool weather
priming may need to be repeated
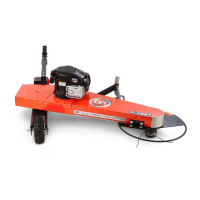
3. Grasp the recoil starter handle (Figure 3), and slowly pull until resistance is felt. Let the cord
retract a little bit, then pull the cord rapidly to start the engine. One or two pulls usually starts
the DR
®
TRIMMER/MOWER
™
, but it may be necessary to repeat the priming.
Stopping the Engine
Move the throttle control lever (Figure 3) back to the STOP position.
Note that on Electric-Starting models the key does not stop the engine. You must throttle down.
The key has a pressure lock that prevents it from vibrating loose during operation. If you wish to
remove the key, push it in and then quickly and firmly pull it out. If the key becomes difficult to
remove, spray FLUID FILM
®
or a comparable lubricant into the keyhole.
Engaging the Trimmer Head
Bring the bail bar (Figure 3) toward you and grip it together with the handlebar. Keep holding
the bail bar to the handlebar. The cutting cords will now be rotating and will continue to rotate
until you release the bail bar.
Stopping the Cords Spinning
Release the bail bar from the handlebar. The trimmer head will stop spinning while the engine
continues to run.
If the trimmer head keeps spinning after the bail bar is released you may need to adjust the
trimmer control cable. See page 20.
Using the Parallel Trimming
Action (PTA
™
) Feature
The DR
®
TRIMMER/MOWER'S PTA
™
Feature
allows the machine to move in a straight line while
the trimmer head is both pivoted and tilted to the left
for better access to fence lines and other obstacles
(Figure 6). This feature allows you to trim in
difficult areas without having to pull the machine
back and forth.
The cutting cords extend beyond the wheel base
when in the PTA
™
mode, which allows you to easily
cut under obstacles. The trimmer head and the
cutting cords also tilt slightly when in the PTA
™
mode so you can edge and trim along gardens, paths
and driveways.
IMPORTANT! When using PTA
™
mode, you should
install the cutting cords in one of the bottom four line
plates only. Using the upper line plates may cause
the cords to hit the wheel.
Figure 6

 Loading...